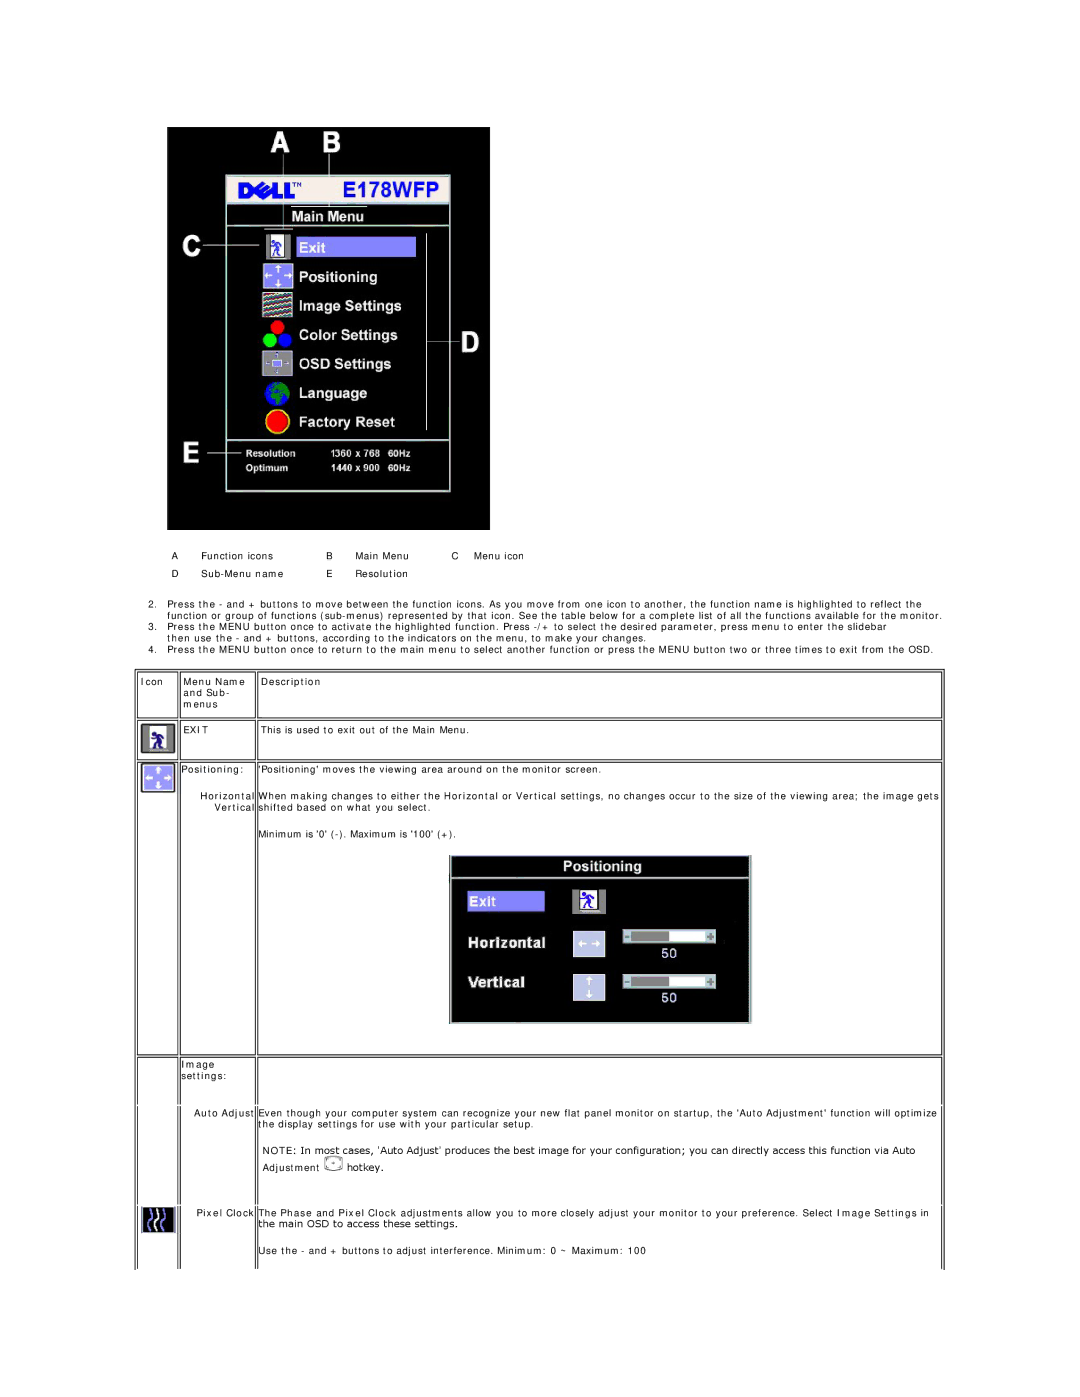
A | Function icons | B | Main Menu | C Menu icon |
D | E | Resolution |
|
2.Press the - and + buttons to move between the function icons. As you move from one icon to another, the function name is highlighted to reflect the function or group of functions
3.Press the MENU button once to activate the highlighted function. Press
4.Press the MENU button once to return to the main menu to select another function or press the MENU button two or three times to exit from the OSD.
Icon Menu Name and Sub- menus
Description
| EXIT | This is used to exit out of the Main Menu. |
|
|
|
|
|
|
| Positioning: | 'Positioning' moves the viewing area around on the monitor screen. |
Horizontal When making changes to either the Horizontal or Vertical settings, no changes occur to the size of the viewing area; the image gets Vertical shifted based on what you select.
Minimum is '0'
Image settings:
Auto Adjust Even though your computer system can recognize your new flat panel monitor on startup, the 'Auto Adjustment' function will optimize the display settings for use with your particular setup.
NOTE: In most cases, 'Auto Adjust' produces the best image for your configuration; you can directly access this function via Auto
Adjustment ![]() hotkey.
hotkey.
Pixel Clock The Phase and Pixel Clock adjustments allow you to more closely adjust your monitor to your preference. Select Image Settings in the main OSD to access these settings.
Use the - and + buttons to adjust interference. Minimum: 0 ~ Maximum: 100
