Back to Contents Page
Operating the Monitor
Dell™ S2409W Flat Panel Monitor User's Guide
Using the Front Panel Controls
Using the
Setting the Optimal Resolution
Using the Dell Soundbar (Optional)
Using the Tilt
Using the Front Panel
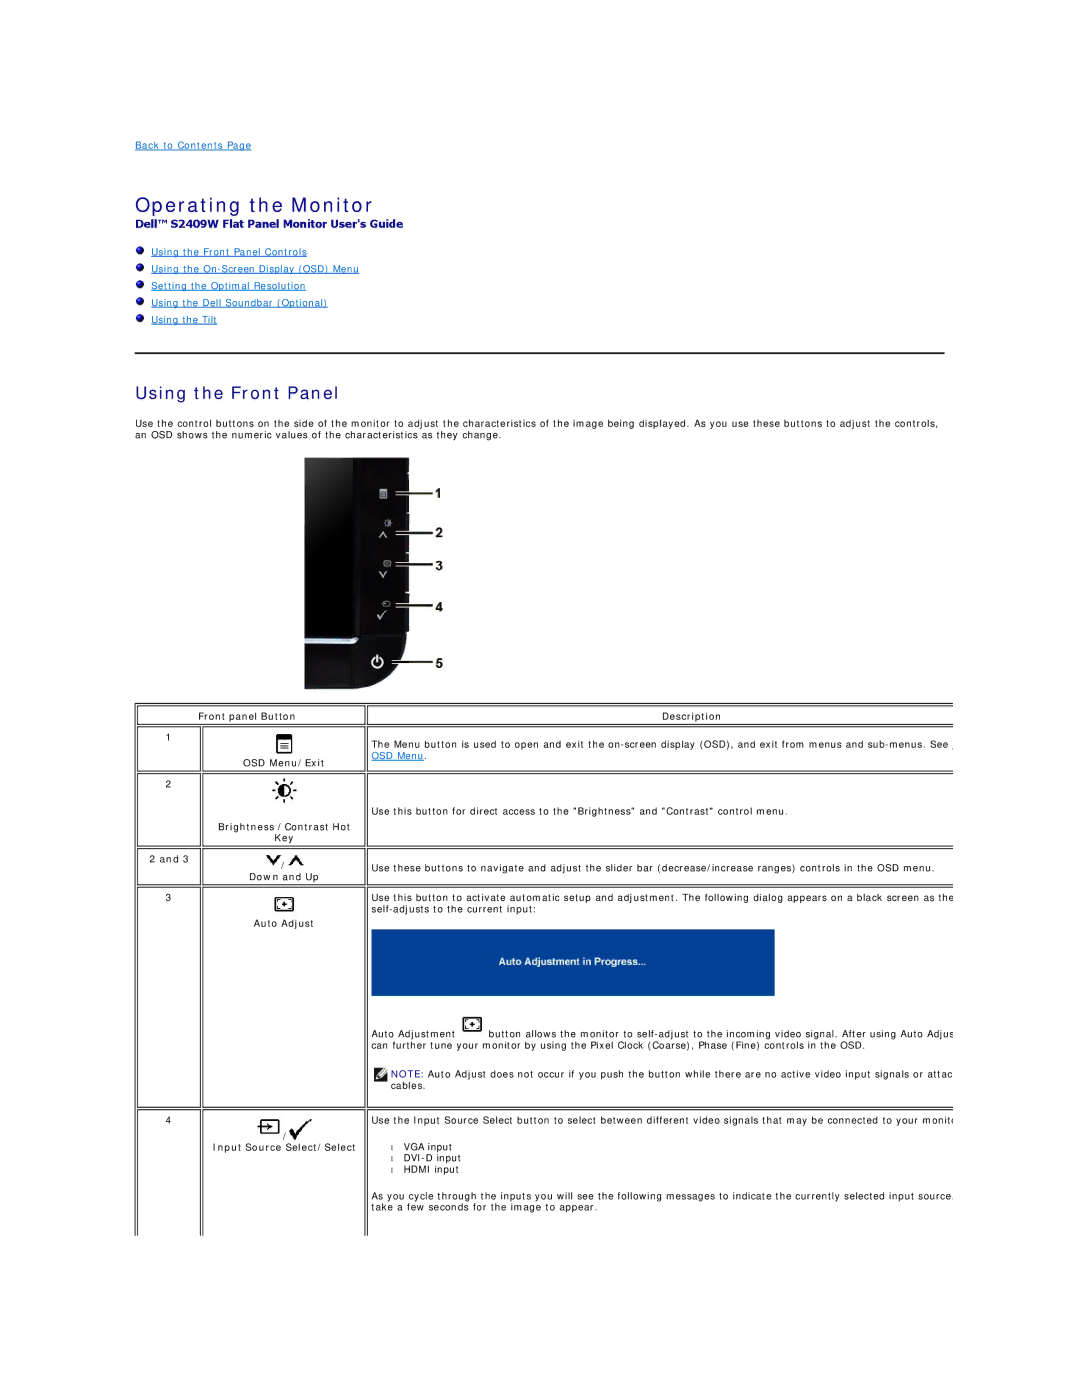
Use the control buttons on the side of the monitor to adjust the characteristics of the image being displayed. As you use these buttons to adjust the controls, an OSD shows the numeric values of the characteristics as they change.
Front panel Button
1 |
|
| OSD Menu/Exit |
|
|
|
|
2 |
|
| Brightness /Contrast Hot |
| Key |
|
|
2 and 3 | / |
| |
| Down and Up |
|
|
|
|
3 |
|
| Auto Adjust |
|
|
4
![]() /
/![]()
Input Source Select/Select
Description
The Menu button is used to open and exit the
Use this button for direct access to the "Brightness" and "Contrast" control menu.
Use these buttons to navigate and adjust the slider bar (decrease/increase ranges) controls in the OSD menu.
Use this button to activate automatic setup and adjustment. The following dialog appears on a black screen as the
Auto Adjustment ![]() button allows the monitor to
button allows the monitor to
![]() NOTE: Auto Adjust does not occur if you push the button while there are no active video input signals or attac cables.
NOTE: Auto Adjust does not occur if you push the button while there are no active video input signals or attac cables.
Use the Input Source Select button to select between different video signals that may be connected to your monito
•VGA input
•
•HDMI input
As you cycle through the inputs you will see the following messages to indicate the currently selected input source. take a few seconds for the image to appear.