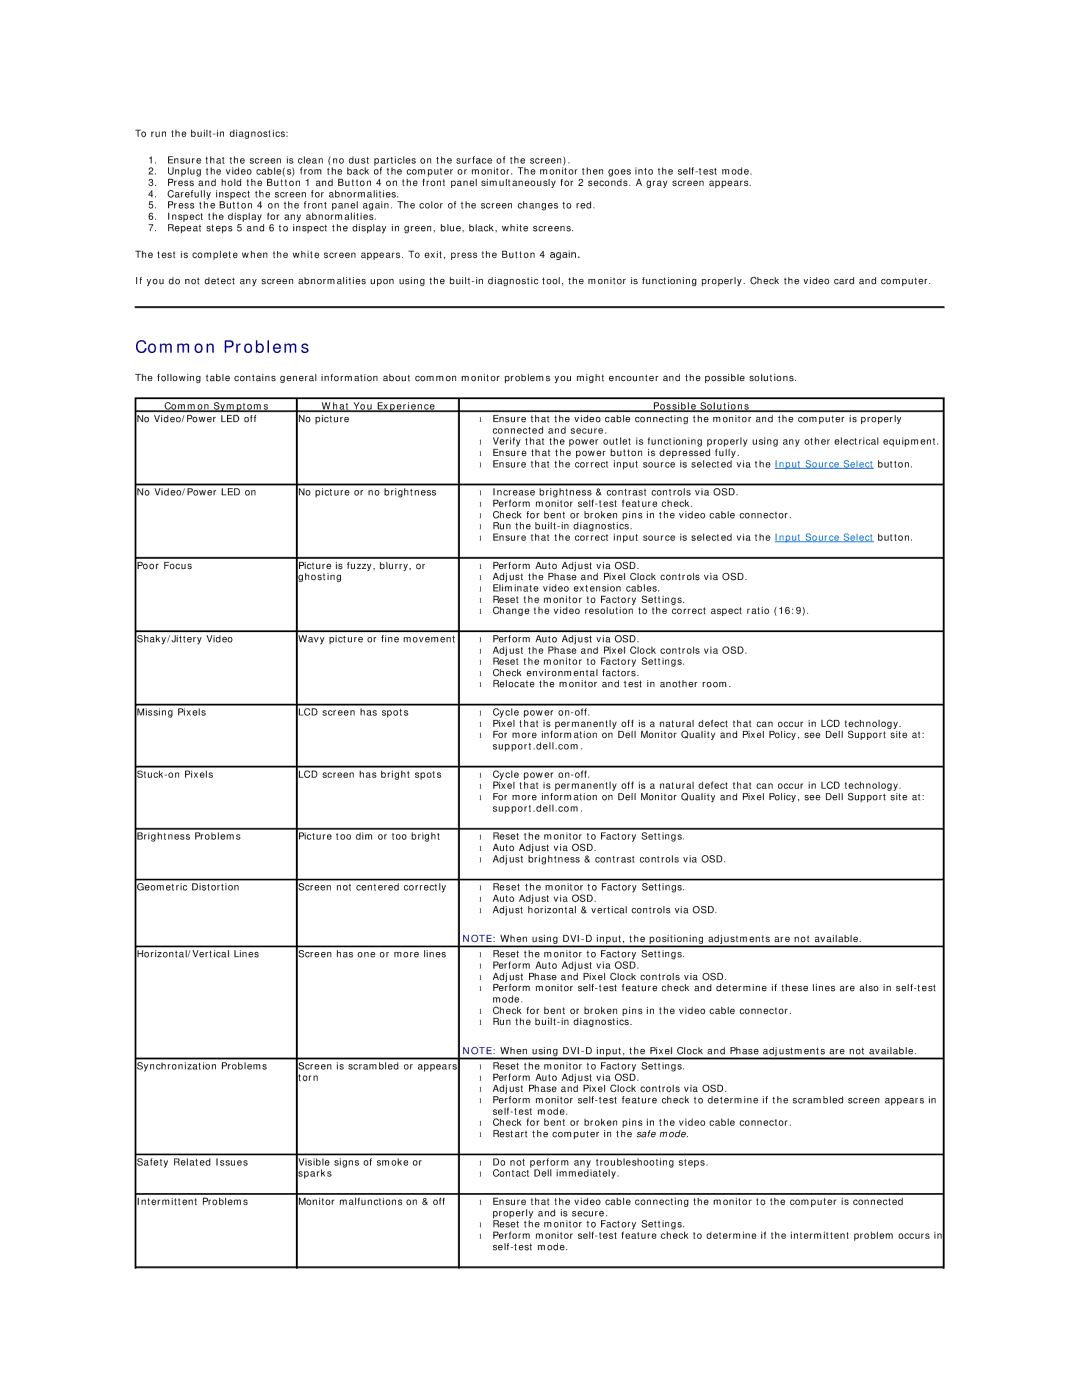
To run the built-in diagnostics:

1.Ensure that the screen is clean (no dust particles on the surface of the screen).

2.Unplug the video cable(s) from the back of the computer or monitor. The monitor then goes into the self-test mode.

3.Press and hold the Button 1 and Button 4 on the front panel simultaneously for 2 seconds. A gray screen appears.

4.Carefully inspect the screen for abnormalities.

5.Press the Button 4 on the front panel again. The color of the screen changes to red.

6.Inspect the display for any abnormalities.

7.Repeat steps 5 and 6 to inspect the display in green, blue, black, white screens.

The test is complete when the white screen appears. To exit, press the Button 4 again.

If you do not detect any screen abnormalities upon using the built-in diagnostic tool, the monitor is functioning properly. Check the video card and computer.

Common Problems

The following table contains general information about common monitor problems you might encounter and the possible solutions.

Common Symptoms

What You Experience


Possible Solutions

No Video/Power LED off

No picture

Ensure that the video cable connecting the monitor and the computer is properly


connected and secure.


Verify that the power outlet is functioning properly using any other electrical equipment.


Ensure that the power button is depressed fully.


Ensure that the correct input source is selected via the Input Source Select button.


No Video/Power LED on

No picture or no brightness

Increase brightness & contrast controls via OSD.


Perform monitor self-test feature check.


Check for bent or broken pins in the video cable connector.


Run the built-in diagnostics.


Ensure that the correct input source is selected via the Input Source Select button.


Poor Focus

Picture is fuzzy, blurry, or

Perform Auto Adjust via OSD.


ghosting

Adjust the Phase and Pixel Clock controls via OSD.


Eliminate video extension cables.


Reset the monitor to Factory Settings.


Change the video resolution to the correct aspect ratio (16:9).


Shaky/Jittery Video

Wavy picture or fine movement

Perform Auto Adjust via OSD.


Adjust the Phase and Pixel Clock controls via OSD.


Reset the monitor to Factory Settings.


Check environmental factors.


Relocate the monitor and test in another room.


Missing Pixels

LCD screen has spots

Cycle power on-off.


Pixel that is permanently off is a natural defect that can occur in LCD technology.


For more information on Dell Monitor Quality and Pixel Policy, see Dell Support site at:


support.dell.com.


Stuck-on Pixels

LCD screen has bright spots

Cycle power on-off.


Pixel that is permanently off is a natural defect that can occur in LCD technology.


For more information on Dell Monitor Quality and Pixel Policy, see Dell Support site at:


support.dell.com.


Brightness Problems

Picture too dim or too bright

Reset the monitor to Factory Settings.


Auto Adjust via OSD.


Adjust brightness & contrast controls via OSD.


Geometric Distortion

Screen not centered correctly

Reset the monitor to Factory Settings.


Auto Adjust via OSD.


Adjust horizontal & vertical controls via OSD.


NOTE: When using DVI-D input, the positioning adjustments are not available.

Horizontal/Vertical Lines

Screen has one or more lines

Reset the monitor to Factory Settings.


Perform Auto Adjust via OSD.


Adjust Phase and Pixel Clock controls via OSD.


Perform monitor self-test feature check and determine if these lines are also in self-test


mode.


Check for bent or broken pins in the video cable connector.


Run the built-in diagnostics.


NOTE: When using DVI-D input, the Pixel Clock and Phase adjustments are not available.

Synchronization Problems

Screen is scrambled or appears

Reset the monitor to Factory Settings.


torn

Perform Auto Adjust via OSD.


Adjust Phase and Pixel Clock controls via OSD.


Perform monitor self-test feature check to determine if the scrambled screen appears in


self-test mode.


Check for bent or broken pins in the video cable connector.


Restart the computer in the safe mode.


Safety Related Issues

Visible signs of smoke or

Do not perform any troubleshooting steps.


sparks

Contact Dell immediately.


Intermittent Problems

Monitor malfunctions on & off

Ensure that the video cable connecting the monitor to the computer is connected


properly and is secure.


Reset the monitor to Factory Settings.


Perform monitor self-test feature check to determine if the intermittent problem occurs in


self-test mode.


Page 36
Image 36
Dell U2211H appendix Common Problems, Common Symptoms What You Experience Possible Solutions, Support.dell.com

U2211H specifications

The Dell U2311H and U2211H are two monitors that have garnered attention for their exceptional performance and robust features, making them appealing to both professional users and casual consumers alike. With their innovative technologies and sleek designs, these monitors stand out in today's competitive market.

The Dell U2311H is a 23-inch IPS panel display that offers a resolution of 1920 x 1080 pixels, providing sharp and vivid picture quality. Its wide viewing angles of 178 degrees both vertically and horizontally ensure that images remain consistent and accurate regardless of the viewer's position. This feature is particularly advantageous for collaborative work environments where multiple people may need to view the screen simultaneously. Additionally, the U2311H boasts a 1000:1 static contrast ratio and a brightness level of 250 cd/m², contributing to its ability to render detailed images in various lighting conditions.

On the other hand, the Dell U2211H is a slightly smaller option at 21.5 inches but shares many of the same technological advantages. It also features an IPS panel with a 1920 x 1080 resolution, ensuring excellent color reproduction and viewing angles. Both monitors are equipped with Dell's Eco-Comfort technology, which not only reduces power consumption but also provides a more comfortable viewing experience by minimizing harmful blue light emissions.

One notable feature of both models is their ergonomic design. They come with adjustable stands that allow users to heighten, tilt, swivel, and pivot the display according to their comfort preference. This level of customization reduces strain during prolonged use and promotes better posture. Additionally, the monitors' bezels are slim, maximizing the display area while maintaining a stylish aesthetic.

The connectivity options on both monitors are comprehensive, offering VGA, DVI, and DisplayPort inputs. This versatility makes it easy to connect to several devices, including laptops, desktops, and other peripherals. Furthermore, both monitors feature USB 2.0 hubs, allowing users to plug in their devices conveniently.

In summary, the Dell U2311H and U2211H are excellent displays that combine superior image quality, ergonomic features, and versatile connectivity options. Their IPS technology ensures impressive color accuracy and wide viewing angles, making them suitable for a variety of professional and personal applications. Whether one is engaged in graphic design, office work, or multimedia consumption, these monitors deliver performance and comfort that are hard to beat.