18T Series Installation
1 Jetted Shower™ Jet Module Trim Installation
A.
1
1
2
B.
1
2
3
4
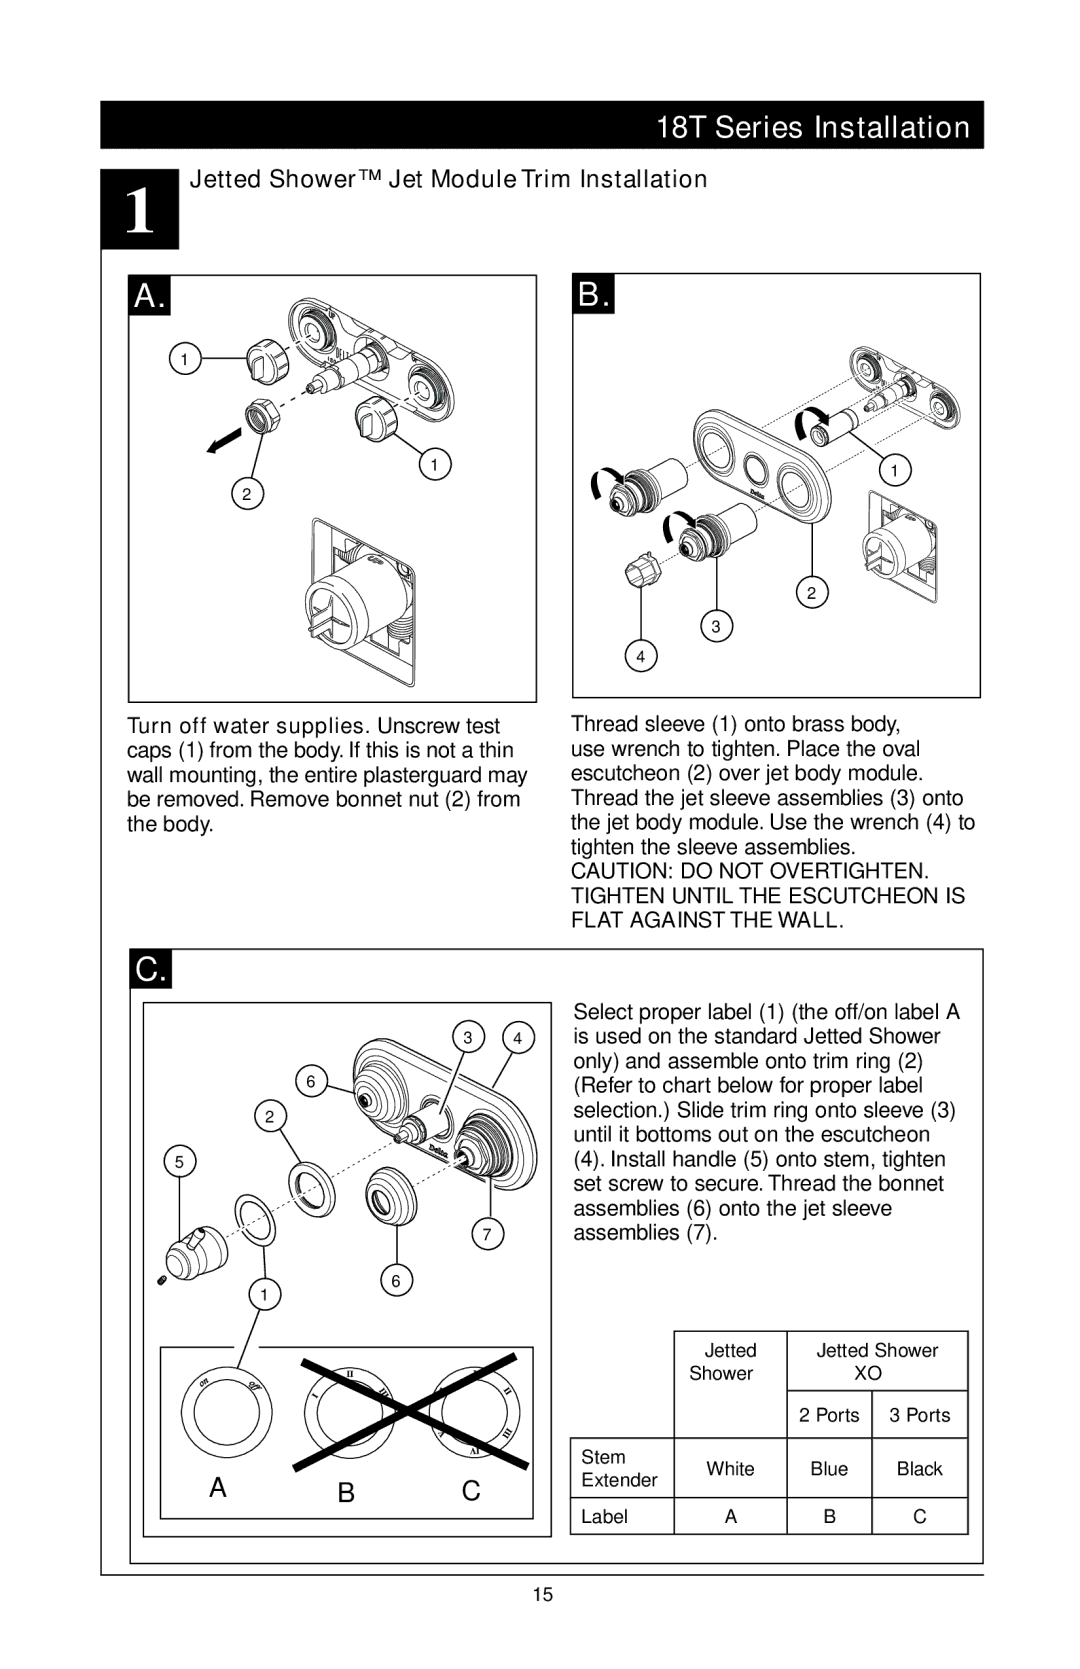
Turn off water supplies. Unscrew test caps (1) from the body. If this is not a thin wall mounting, the entire plasterguard may be removed. Remove bonnet nut (2) from the body.
Thread sleeve (1) onto brass body, use wrench to tighten. Place the oval escutcheon (2) over jet body module. Thread the jet sleeve assemblies (3) onto the jet body module. Use the wrench (4) to tighten the sleeve assemblies. caution: Do not overtighten. Tighten until the escutcheon IS flat against the wall.
C.
3 4
6
2
Select proper label (1) (the off/on label A is used on the standard Jetted Shower™ only) and assemble onto trim ring (2)
(Refer to chart below for proper label selection.) Slide trim ring onto sleeve (3) until it bottoms out on the escutcheon
5
1
7
6
(4). Install handle (5) onto stem, tighten set screw to secure. Thread the bonnet assemblies (6) onto the jet sleeve assemblies (7).
A B C
| Jetted | Jetted Shower | ||
| Shower™ | XO™ | ||
|
|
|
| |
|
| 2 Ports | 3 Ports | |
|
|
|
| |
Stem | White | Blue | Black | |
Extender | ||||
|
|
| ||
|
|
|
| |
Label | A | B | C | |
|
|
|
| |
15