ASSEMBLY
![]() For your own safety, do not connect the machine to the power source until the machine is completely assembled and you read and understand the entire instruction manual.
For your own safety, do not connect the machine to the power source until the machine is completely assembled and you read and understand the entire instruction manual.
ASSEMBLY TOOLS REQUIRED
Wrench (supplied)
ASSEMBLY TIME ESTIMATE
Assembly for this machine takes approximately 30 minutes.
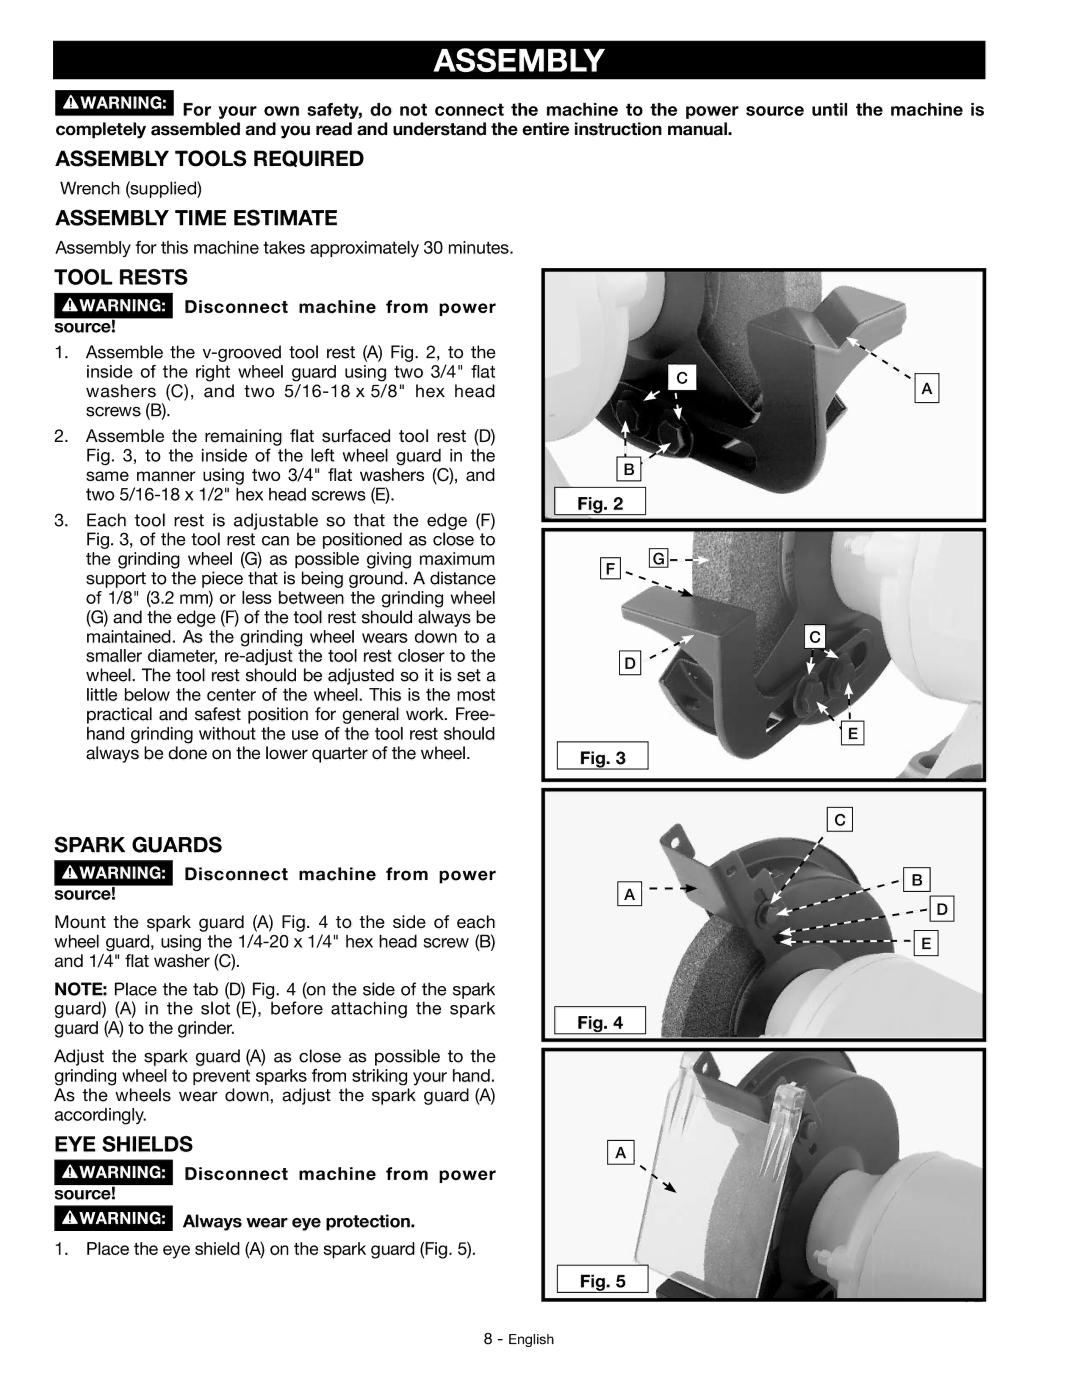
TOOL RESTS
 Disconnect machine from power source!
1. | Assemble the |
| inside of the right wheel guard using two 3/4" flat |
| washers (C), and two |
| screws (B). |
2. | Assemble the remaining flat surfaced tool rest (D) |
| Fig. 3, to the inside of the left wheel guard in the |
| same manner using two 3/4" flat washers (C), and |
| two |
3. | Each tool rest is adjustable so that the edge (F) |
| Fig. 3, of the tool rest can be positioned as close to |
C
B
Fig. 2
A
the grinding wheel (G) as possible giving maximum |
support to the piece that is being ground. A distance |
of 1/8" (3.2 mm) or less between the grinding wheel |
(G) and the edge (F) of the tool rest should always be |
maintained. As the grinding wheel wears down to a |
smaller diameter, |
F
G
C
wheel. The tool rest should be adjusted so it is set a |
little below the center of the wheel. This is the most |
practical and safest position for general work. Free- |
hand grinding without the use of the tool rest should |
always be done on the lower quarter of the wheel. |
SPARK GUARDS
![]() Disconnect machine from power source!
Disconnect machine from power source!
Mount the spark guard (A) Fig. 4 to the side of each wheel guard, using the
NOTE: Place the tab (D) Fig. 4 (on the side of the spark guard) (A) in the slot (E), before attaching the spark guard (A) to the grinder.
Adjust the spark guard (A) as close as possible to the grinding wheel to prevent sparks from striking your hand. As the wheels wear down, adjust the spark guard (A) accordingly.
EYE SHIELDS
![]() Disconnect machine from power source!
Disconnect machine from power source!
Always wear eye protection.
1. Place the eye shield (A) on the spark guard (Fig. 5).
D
E
Fig. 3
C
B
A
![]() D
D ![]() E
E
Fig. 4
A
Fig. 5
8 - English