INSTALLATION
Continued
6.Reconnect heater and equipment shutoff valve to gas supply. Check reconnected fit- tings for leaks.
Test Pressures Equal To or Less Than 1/2 PSIG (3.5 kPa)
1.Close equipment shutoff valve (see Figure 8).
2.Pressurize supply piping system by either opening propane/LP supply tank valve for propane/LP gas or opening main gas valve located on or near gas meter for natural gas or using compressed air.
3.Check all joints from gas meter to equipment shutoff valve for natural gas or propane/LPsupply to equipment shutoff valve for propane/LP (see Figure 9 or 10).Apply noncorrosive leak detection fluid to all joints. Bubbles forming show a leak.
Pressure Testing Appliance Gas Connections
1.Open equipment shutoff valve (see Figure 8).
2.Open main gas valve located on or near gas meter for natural gas or open propane/LP supply tank valve.
3.Make sure control knob of appliance is in the OFF position.
4.Check all joints from equipment shutoff valve to gas control (see Figure 9 or 10). Apply noncorrosive leak detection fluid to all joints. Bubbles forming show a leak.
5.Correct all leaks at once.
6.Light appliance (see Operating Appliance, page 10) Check all other internal joints for leaks.
7.Turn off appliance.
PLACEMENT OF LOOSE EMBERS
4. | Correct all leaks at once. |
| CAUTION: Do not place | |
| Equipment | Open |
| |
|
| any loose embers around pilot | ||
| Shutoff |
| ||
|
| assembly. | ||
| Valve |
| ||
|
| Closed | Two bags of loose embers are provided with this | |
|
|
| ||
| Figure 8 - Equipment Shutoff Valve | unit. For this installation use the embers that are | ||
|
| Equipment | approximately 1" square in size. If needed, larger | |
Propane/LP | embers can be broken to size. These embers aid | |||
Supply Tank | Shutoff Valve | in concealing the burner pan, directing flames | ||
|
|
| through the ember bed, quiet operation of the unit | |
|
|
| and gives a natural random flame pattern. | |
|
|
| Place embers as follows: | |
|
|
| 1. | Place embers around the center ember bed or |
|
|
|
| ember pod. |
|
|
| 2. | Place individual embers on their edge (not flat) |
|
|
|
| along the top of the burner pan. This aids in |
|
| Control Valve |
| directing flames from the burner through the |
|
| Location |
| ember bed. |
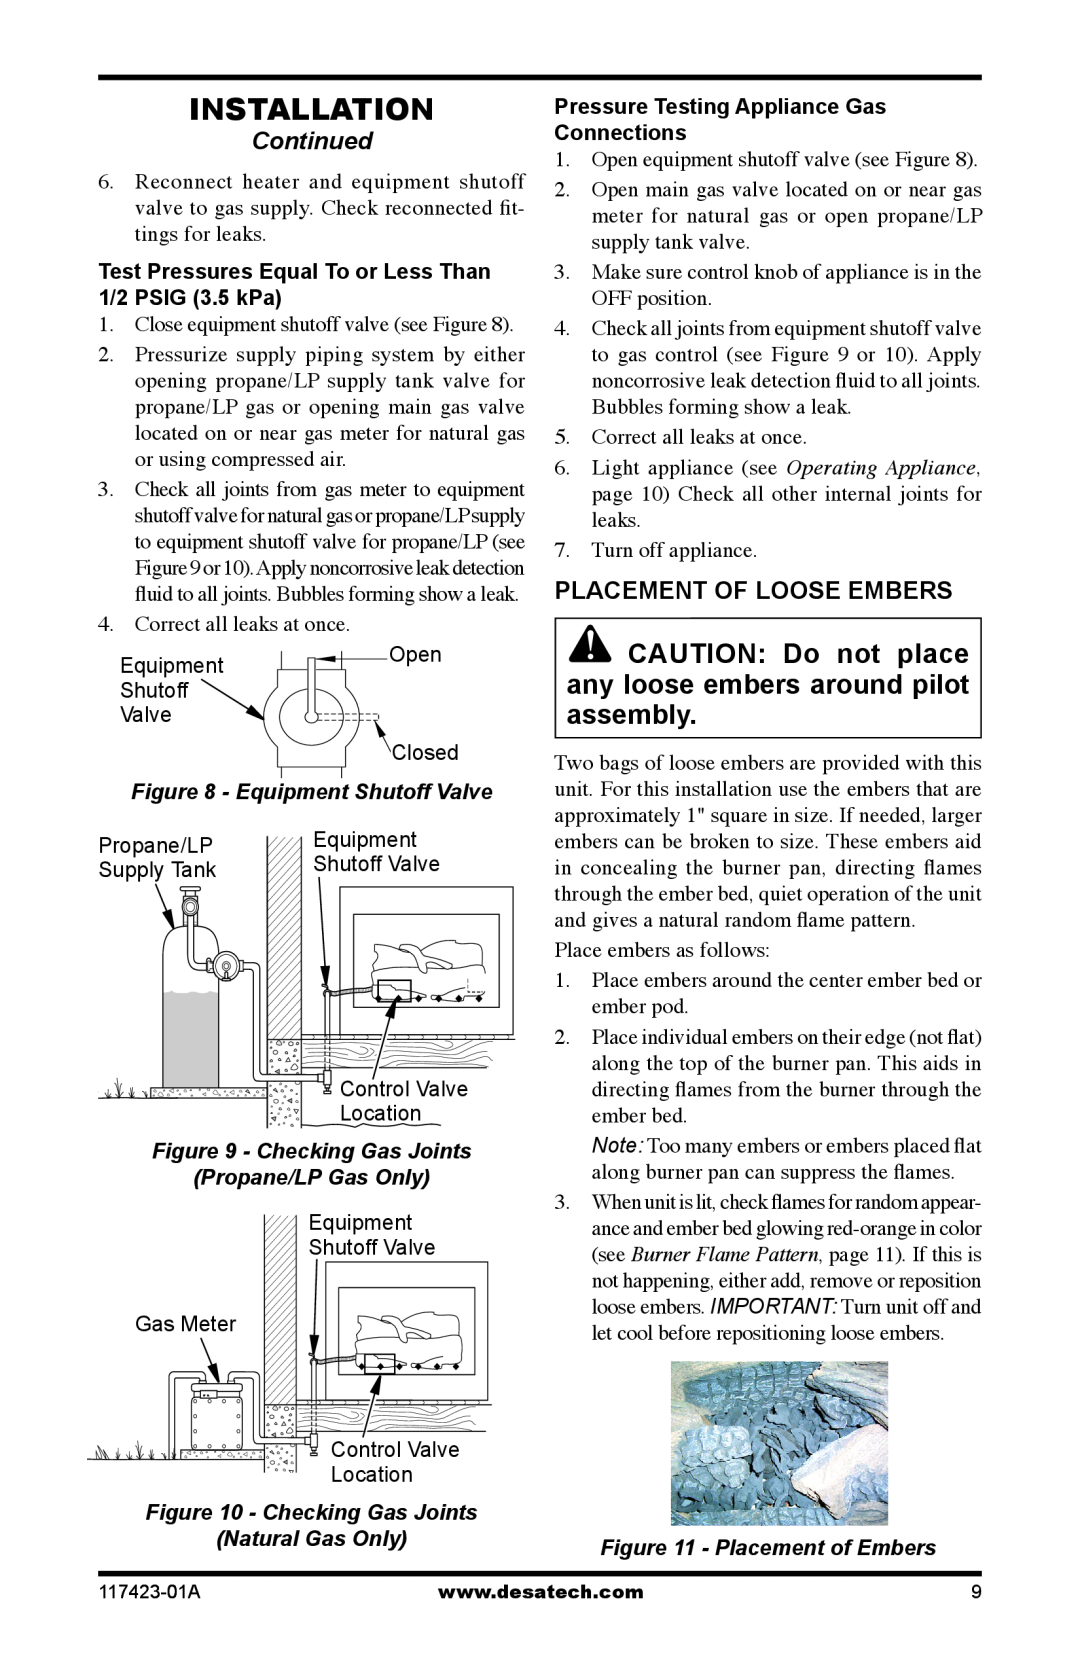
| Figure 9 - Checking Gas Joints |
| Note: Too many embers or embers placed flat | |
| (Propane/LP Gas Only) |
| along burner pan can suppress the flames. | |
|
|
| ||
Equipment
Shutoff Valve
Gas Meter
Control Valve
Location
Figure 10 - Checking Gas Joints
(Natural Gas Only)
3.When unit is lit, check flames for random appear- ance and ember bed glowing
Figure 11 - Placement of Embers
www.desatech.com | 9 |