OPERATING APPLIANCE
Continued
NOTICE: You must light the pilot before using the
After lighting, let pilot flame burn for about one minute. Turn control knob to ON posi- tion. Adjust flame adjustment knob anywhere between HI and LO. Slide the selector switch to the REMOTE position (see Figure 13). Note: The burner may light if
IMPORTANT: Do not leave the selector switch in the REMOTE or ON position when the pilot is not lit. This will drain the battery.
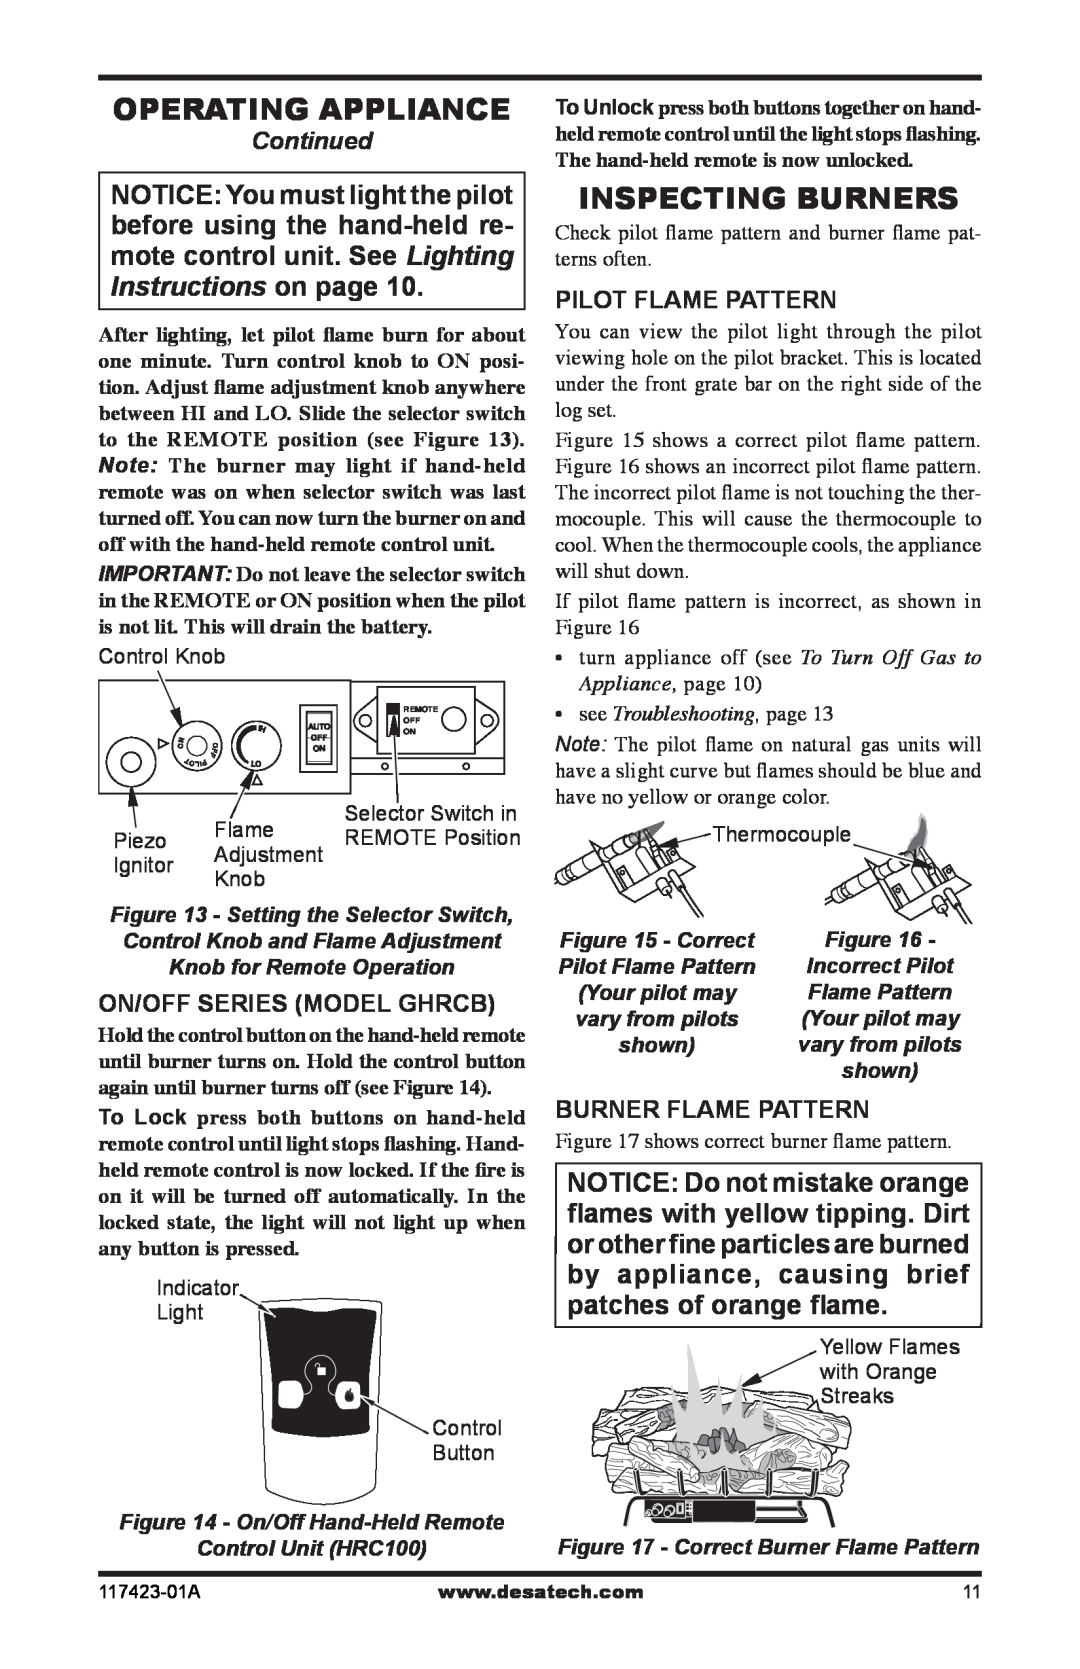
Control Knob
![]() REMOTE
REMOTE
OFF
ON
| Flame | Selector Switch in | |
Piezo | REMOTE Position | ||
Adjustment | |||
| |||
Ignitor |
| ||
Knob |
| ||
|
| ||
Figure 13 - Setting the Selector Switch, | |||
Control Knob and Flame Adjustment | |||
Knob for Remote Operation | |||
ON/OFF SERIES (MODEL GHRCB) | |||
Hold the control button on the | |||
until burner turns on. Hold the control button | |||
again until burner turns off (see Figure 14). | |||
To Lock press both buttons on | |||
remote control until light stops flashing. Hand- | |||
held remote control is now locked. If the fire is | |||
on it will be turned off automatically. In the | |||
locked state, the light will not light up when | |||
any button is pressed. |
| ||
Indicator |
| ||
Light |
|
| |
|
| Control | |
|
| Button | |
To Unlock press both buttons together on hand- held remote control until the light stops flashing. The
INSPECTING BURNERS
Check pilot flame pattern and burner flame pat- terns often.
PILOT FLAME PATTERN
You can view the pilot light through the pilot viewing hole on the pilot bracket. This is located under the front grate bar on the right side of the log set.
Figure 15 shows a correct pilot flame pattern. Figure 16 shows an incorrect pilot flame pattern. The incorrect pilot flame is not touching the ther- mocouple. This will cause the thermocouple to cool. When the thermocouple cools, the appliance will shut down.
If pilot flame pattern is incorrect, as shown in Figure 16
•turn appliance off (see To Turn Off Gas to Appliance, page 10)
•see Troubleshooting, page 13
Note: The pilot flame on natural gas units will | |
have a slight curve but flames should be blue and | |
| have no yellow or orange color. | |
Thermocouple | |
Figure 15 - Correct | Figure 16 - |
Pilot Flame Pattern | Incorrect Pilot |
(Your pilot may | Flame Pattern |
vary from pilots | (Your pilot may |
shown) | vary from pilots |
| shown) |
BURNER FLAME PATTERN | |
| Figure 17 shows correct burner flame pattern. | |
NOTICE: Do not mistake orange | |
flames with yellow tipping. Dirt | |
or other fine particles are burned | |
by appliance, | causing brief |
patches of orange flame. | |
| Yellow Flames |
| with Orange |
| Streaks |
Figure 14 - On/Off
Figure 17 - Correct Burner Flame Pattern
www.desatech.com | 11 |