NEVER LEAVE THE HEATER
UNATTENDED WHILE BURNING!
¢Ł UNPACKING AND ASSEMBLY
CAUTION: "RISK OF BURNS"
DO NOT OPERATE HEATER WITHOUT INSTALLING THE PROTECTIVE GUARD OR GRILLE.
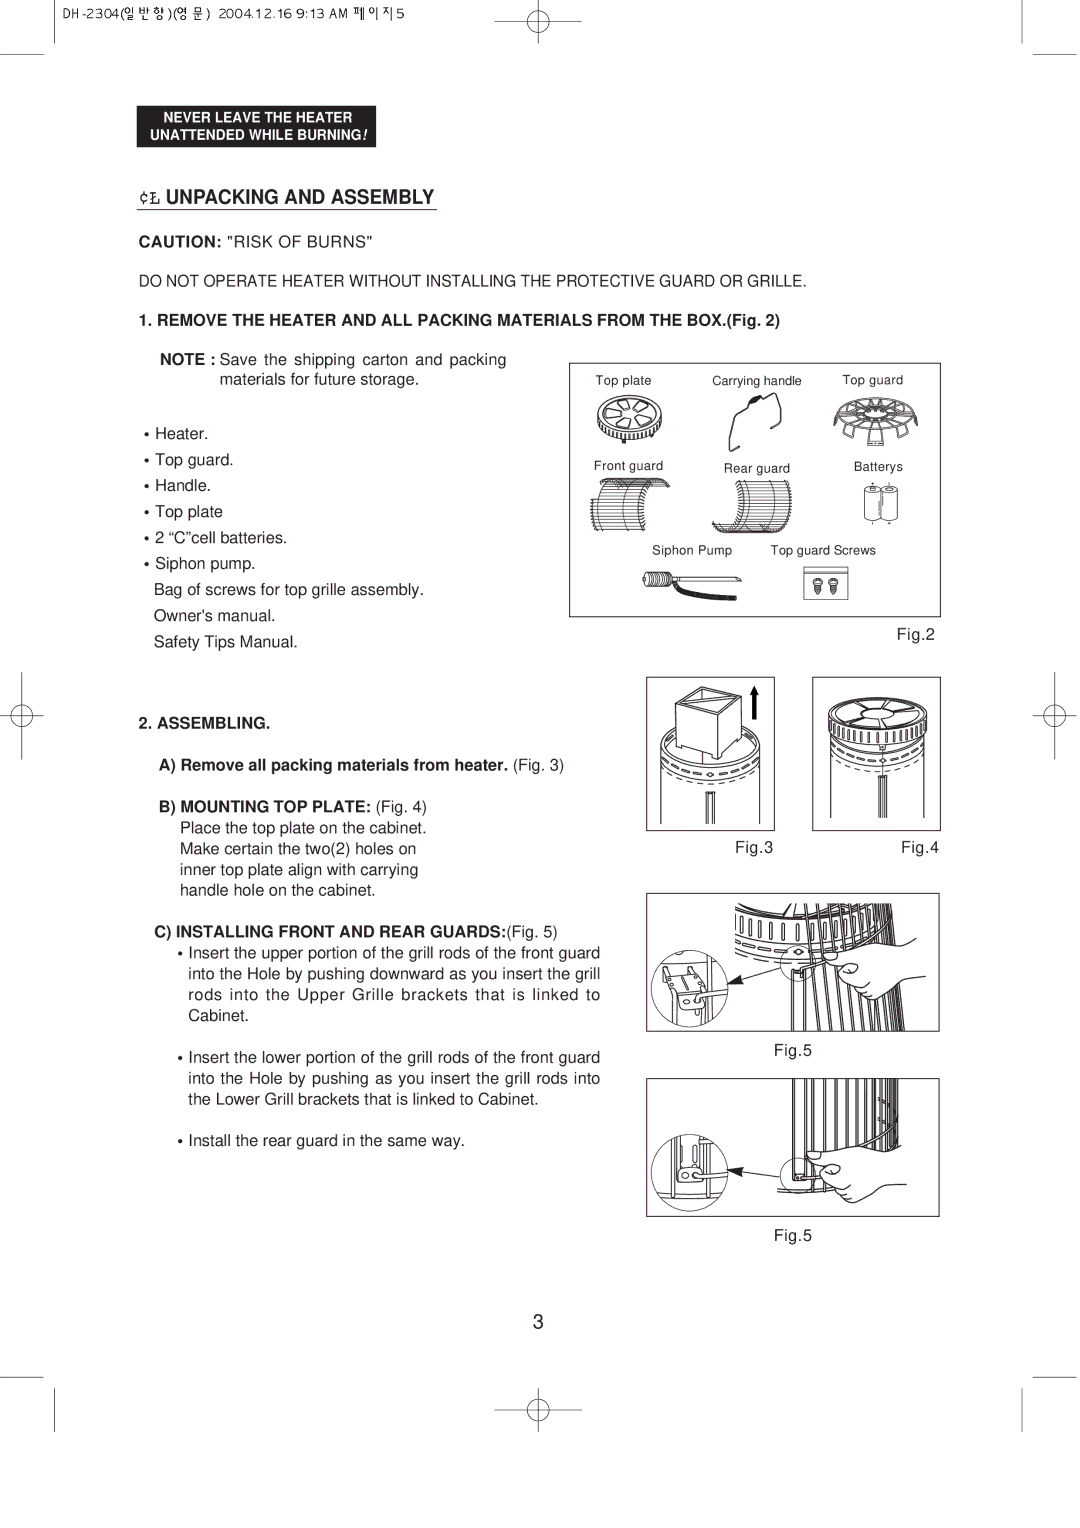
1. REMOVE THE HEATER AND ALL PACKING MATERIALS FROM THE BOX.(Fig. 2)
NOTE : Save the shipping carton and packing materials for future storage.
•Heater.
•Top guard.
•Handle.
•Top plate
•2 “C”cell batteries.
•Siphon pump.
Bag of screws for top grille assembly.
Owner's manual.
Safety Tips Manual.
Top plate | Carrying handle | Top guard | |
Front guard | Rear guard | Batterys | |
Siphon Pump | Top guard Screws | ||
|
|
| Fig.2 |
2. ASSEMBLING. |
|
|
A) Remove all packing materials from heater. (Fig. 3) |
|
|
B) MOUNTING TOP PLATE: (Fig. 4) |
|
|
Place the top plate on the cabinet. |
|
|
Make certain the two(2) holes on | Fig.3 | Fig.4 |
inner top plate align with carrying |
|
|
handle hole on the cabinet. |
|
|
C) INSTALLING FRONT AND REAR GUARDS:(Fig. 5)
•Insert the upper portion of the grill rods of the front guard into the Hole by pushing downward as you insert the grill rods into the Upper Grille brackets that is linked to Cabinet.
•Insert the lower portion of the grill rods of the front guard | Fig.5 |
| |
into the Hole by pushing as you insert the grill rods into |
|
| |
the Lower Grill brackets that is linked to Cabinet. |
|
•Install the rear guard in the same way.
Fig.5
3