
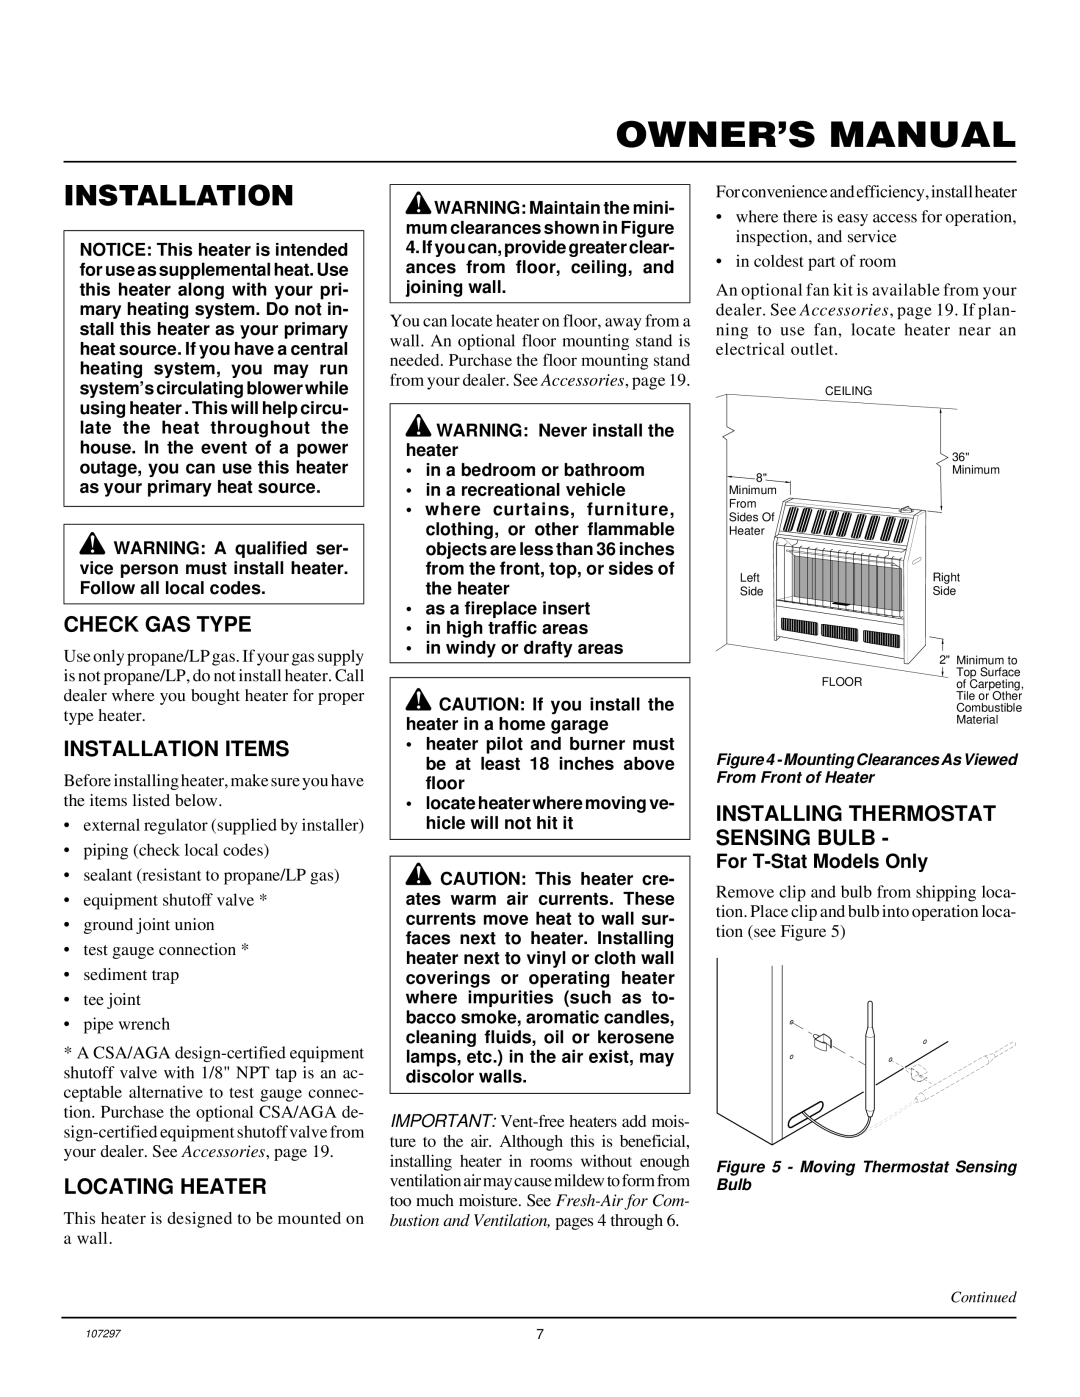
FBS-3C, FB-5B, FBS-5C specifications
Desa FBS-5C, FB-5B, and FBS-3C represent an innovative line of advanced heating solutions that prioritize energy efficiency, user comfort, and environmental sustainability. These models showcase cutting-edge technology and an array of features designed to meet the diverse needs of residential and commercial spaces.The Desa FBS-5C distinguishes itself with its high efficiency rating and sleek design. This model incorporates a robust heat exchanger that maximizes thermal efficiency, ensuring that energy consumption is minimized while delivering consistent warmth. The advanced digital thermostat allows users to set precise temperatures, while the programmable timing function enables enhanced control over heating schedules. Safety is paramount, and the FBS-5C features multiple safety mechanisms, including over-temperature protection and tip-over shutoff.
The FB-5B model is tailored for users seeking an effective heating solution without compromising on design. This model is compact and lightweight, making it ideal for smaller spaces or discrete installation. It incorporates advanced radiant heating technology that creates a comfortable warmth without the need for traditional forced air systems. Additionally, the FB-5B is equipped with a user-friendly control panel, allowing for easy adjustments and settings. Its low noise operation is particularly beneficial for environments where silence is essential, such as bedrooms or offices.
The FBS-3C model takes innovation a step further by integrating smart technology into its operating system. This model is Wi-Fi enabled, allowing users to control their heating remotely via smartphone applications. The adaptability of the FBS-3C ensures that it can seamlessly integrate with smart home systems, providing a convenient and user-friendly experience. Energy monitoring features enable users to track consumption and adjust settings to optimize efficiency, ultimately reducing heating costs and environmental impact.
In conclusion, Desa's FBS-5C, FB-5B, and FBS-3C models offer a range of features that cater to different heating needs. With their focus on efficiency, safety, and smart technology, these models exemplify the future of heating solutions. Whether for a cozy home setting or a commercial application, Desa's innovative approaches ensure warmth and comfort while promoting sustainability and user convenience.