12
INSTALLATION
Installing Heater Base Assembly (Cont.)
INSTALLATION
Continued
4. | Place logs in their proper position on heater base (see Installing |
| Logs, pages 15 through 17). |
5. | Center heater base and logs |
| fireplace. |
6. | Carefully remove logs without moving heater base. |
7. | Mark screw locations through one hole on each side of the |
| mounting bracket (see Figures 13, 14 or 15, depending on your |
| model). If installing in a |
| locations in mortar joint of bricks. |
8. | Remove heater base from fireplace. If installing optional con- |
| trol accessories, do so at this time |
| Only). Follow all directions provided with accessory. |
9. | Drill holes at marked locations using 3/16" drill bit. |
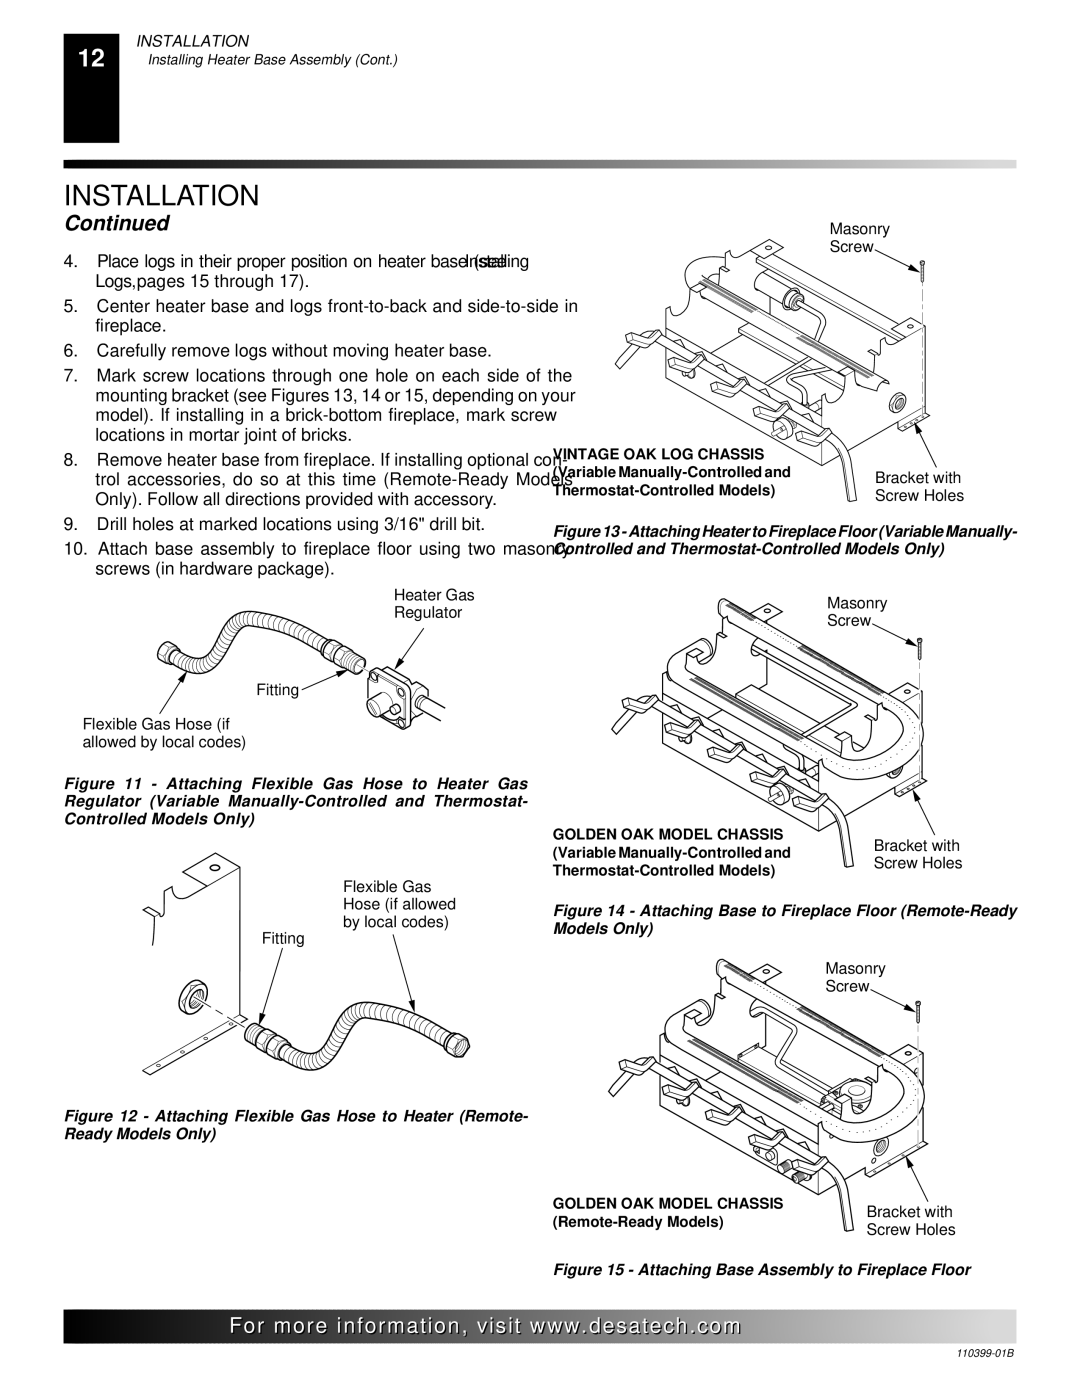
VINTAGE OAK LOG CHASSIS
(Variable
Masonry
Screw
Bracket with
Screw Holes
10. Attach base assembly to fireplace floor using two masonry |
screws (in hardware package). |
Heater Gas
Regulator
Fitting![]()
Flexible Gas Hose (if allowed by local codes)
Figure 11 - Attaching Flexible Gas Hose to Heater Gas Regulator (Variable Manually-Controlled and Thermostat- Controlled Models Only)
Flexible Gas Hose (if allowed by local codes)
Fitting
Figure 13 - Attaching Heater to Fireplace Floor (Variable Manually- Controlled and Thermostat-Controlled Models Only)
Masonry
Screw
GOLDEN OAK MODEL CHASSIS | Bracket with | |
(Variable | ||
Screw Holes | ||
|
Figure 14 - Attaching Base to Fireplace Floor (Remote-Ready Models Only)
Masonry
Screw
Figure 12 - Attaching Flexible Gas Hose to Heater (Remote-
Ready Models Only)
GOLDEN OAK MODEL CHASSIS | Bracket with | |
Screw Holes | ||
|
Figure 15 - Attaching Base Assembly to Fireplace Floor
![]()
![]()
![]()
![]()
![]() For
For![]()
![]()
![]()
![]()
![]()
![]()
![]()
![]()
![]()
![]()
![]()
![]()
![]() .
.![]()
![]()
![]()
![]() .com
.com![]()
![]()
![]()
![]()
![]()