18
INSPECTING BURNERS
Pilot Assembly
Burner Flame Pattern
CLEANING AND MAINTENANCE
Pilot and Burner
Logs
INSPECTING BURNERS
Check pilot flame pattern and burner flame patterns often.
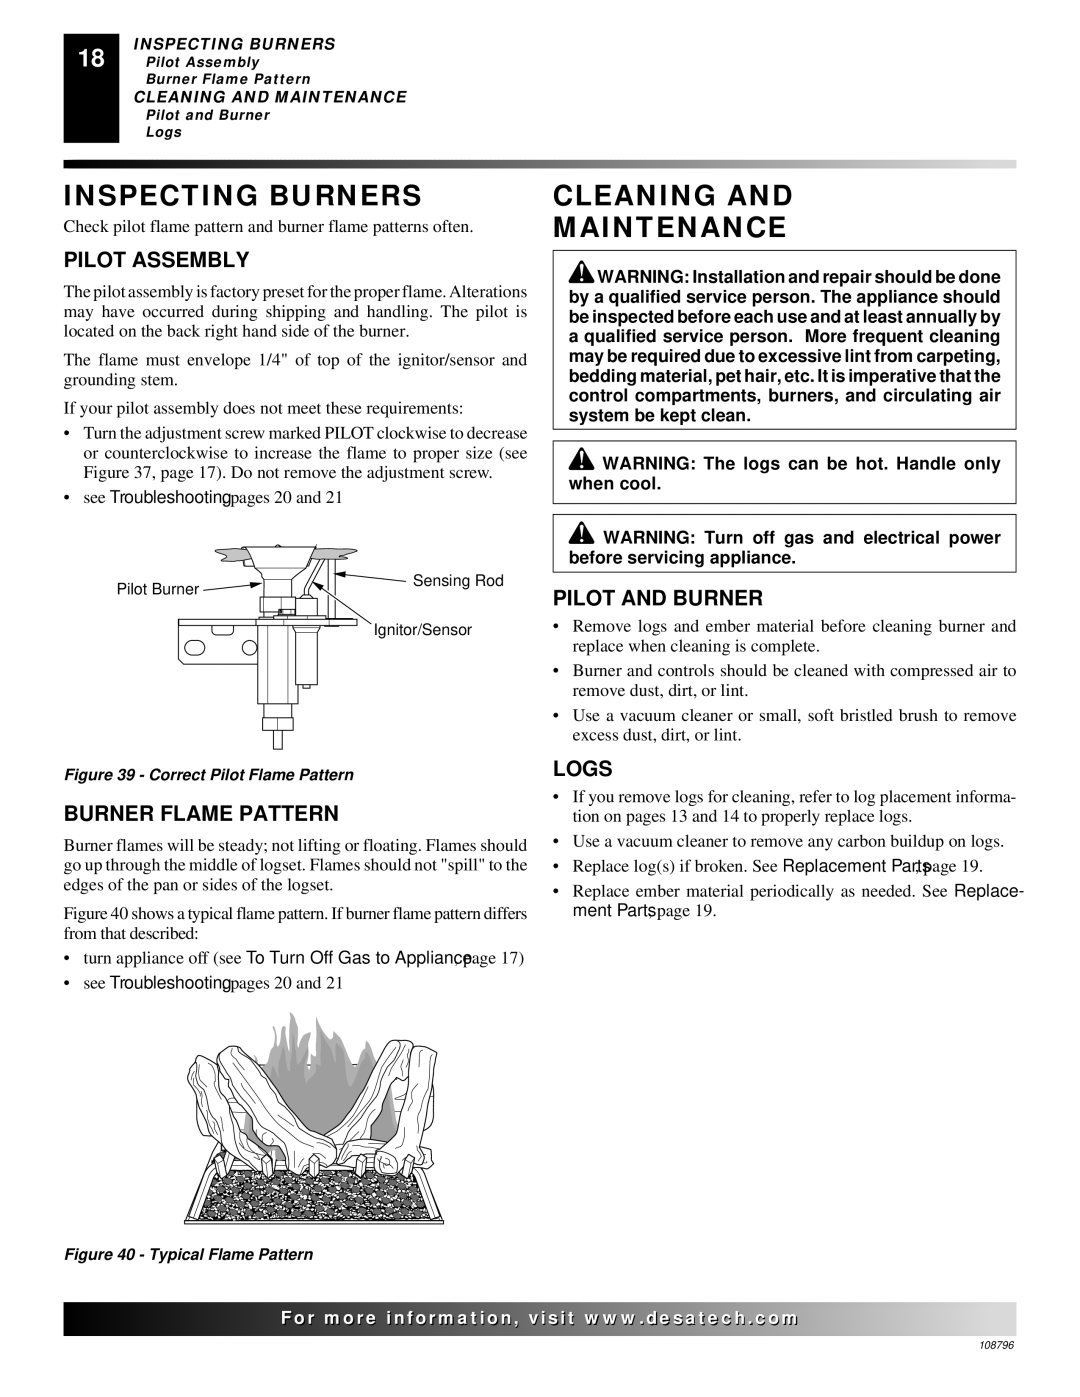
PILOT ASSEMBLY
The pilot assembly is factory preset for the proper flame. Alterations may have occurred during shipping and handling. The pilot is located on the back right hand side of the burner.
The flame must envelope 1/4" of top of the ignitor/sensor and grounding stem.
If your pilot assembly does not meet these requirements:
•Turn the adjustment screw marked PILOT clockwise to decrease or counterclockwise to increase the flame to proper size (see Figure 37, page 17). Do not remove the adjustment screw.
•see Troubleshooting, pages 20 and 21
Pilot Burner | Sensing Rod |
| |
| Ignitor/Sensor |
Figure 39 - Correct Pilot Flame Pattern
BURNER FLAME PATTERN
Burner flames will be steady; not lifting or floating. Flames should go up through the middle of logset. Flames should not "spill" to the edges of the pan or sides of the logset.
Figure 40 shows a typical flame pattern. If burner flame pattern differs from that described:
•turn appliance off (see To Turn Off Gas to Appliance, page 17)
•see Troubleshooting, pages 20 and 21
Figure 40 - Typical Flame Pattern
CLEANING AND
MAINTENANCE
![]() WARNING: Installation and repair should be done by a qualified service person. The appliance should be inspected before each use and at least annually by a qualified service person. More frequent cleaning may be required due to excessive lint from carpeting, bedding material, pet hair, etc. It is imperative that the control compartments, burners, and circulating air system be kept clean.
WARNING: Installation and repair should be done by a qualified service person. The appliance should be inspected before each use and at least annually by a qualified service person. More frequent cleaning may be required due to excessive lint from carpeting, bedding material, pet hair, etc. It is imperative that the control compartments, burners, and circulating air system be kept clean.
![]() WARNING: The logs can be hot. Handle only when cool.
WARNING: The logs can be hot. Handle only when cool.
![]() WARNING: Turn off gas and electrical power before servicing appliance.
WARNING: Turn off gas and electrical power before servicing appliance.
PILOT AND BURNER
•Remove logs and ember material before cleaning burner and replace when cleaning is complete.
•Burner and controls should be cleaned with compressed air to remove dust, dirt, or lint.
•Use a vacuum cleaner or small, soft bristled brush to remove excess dust, dirt, or lint.
LOGS
•If you remove logs for cleaning, refer to log placement informa- tion on pages 13 and 14 to properly replace logs.
•Use a vacuum cleaner to remove any carbon buildup on logs.
•Replace log(s) if broken. See Replacement Parts, page 19.
•Replace ember material periodically as needed. See Replace- ment Parts, page 19.
![]()
![]()
![]()
![]()
![]()
![]()
![]() For more
For more![]()
![]()
![]()
![]()
![]() visit www.
visit www.![]()
![]()
![]() .com
.com![]()
![]()
![]()
![]()
![]()
![]()
![]()
108796
