REASSEMBLY POINTS
Because this is an outdoor product where the control of water is important, the following steps for assembly must be followed.
1.The closed cell foam gasket must seal the hex shaped pan to the inside of the plastic housing (see Figure 8). The seal is to be completely even in the corners of joined parts.
2.The tubular heating element rubber sealing washers must be against the top surface of the steel pan and under the brass flat washers as shown in Figure 9. Nuts on opposite side of pan must be tightened 1/2 turn past finger tight.
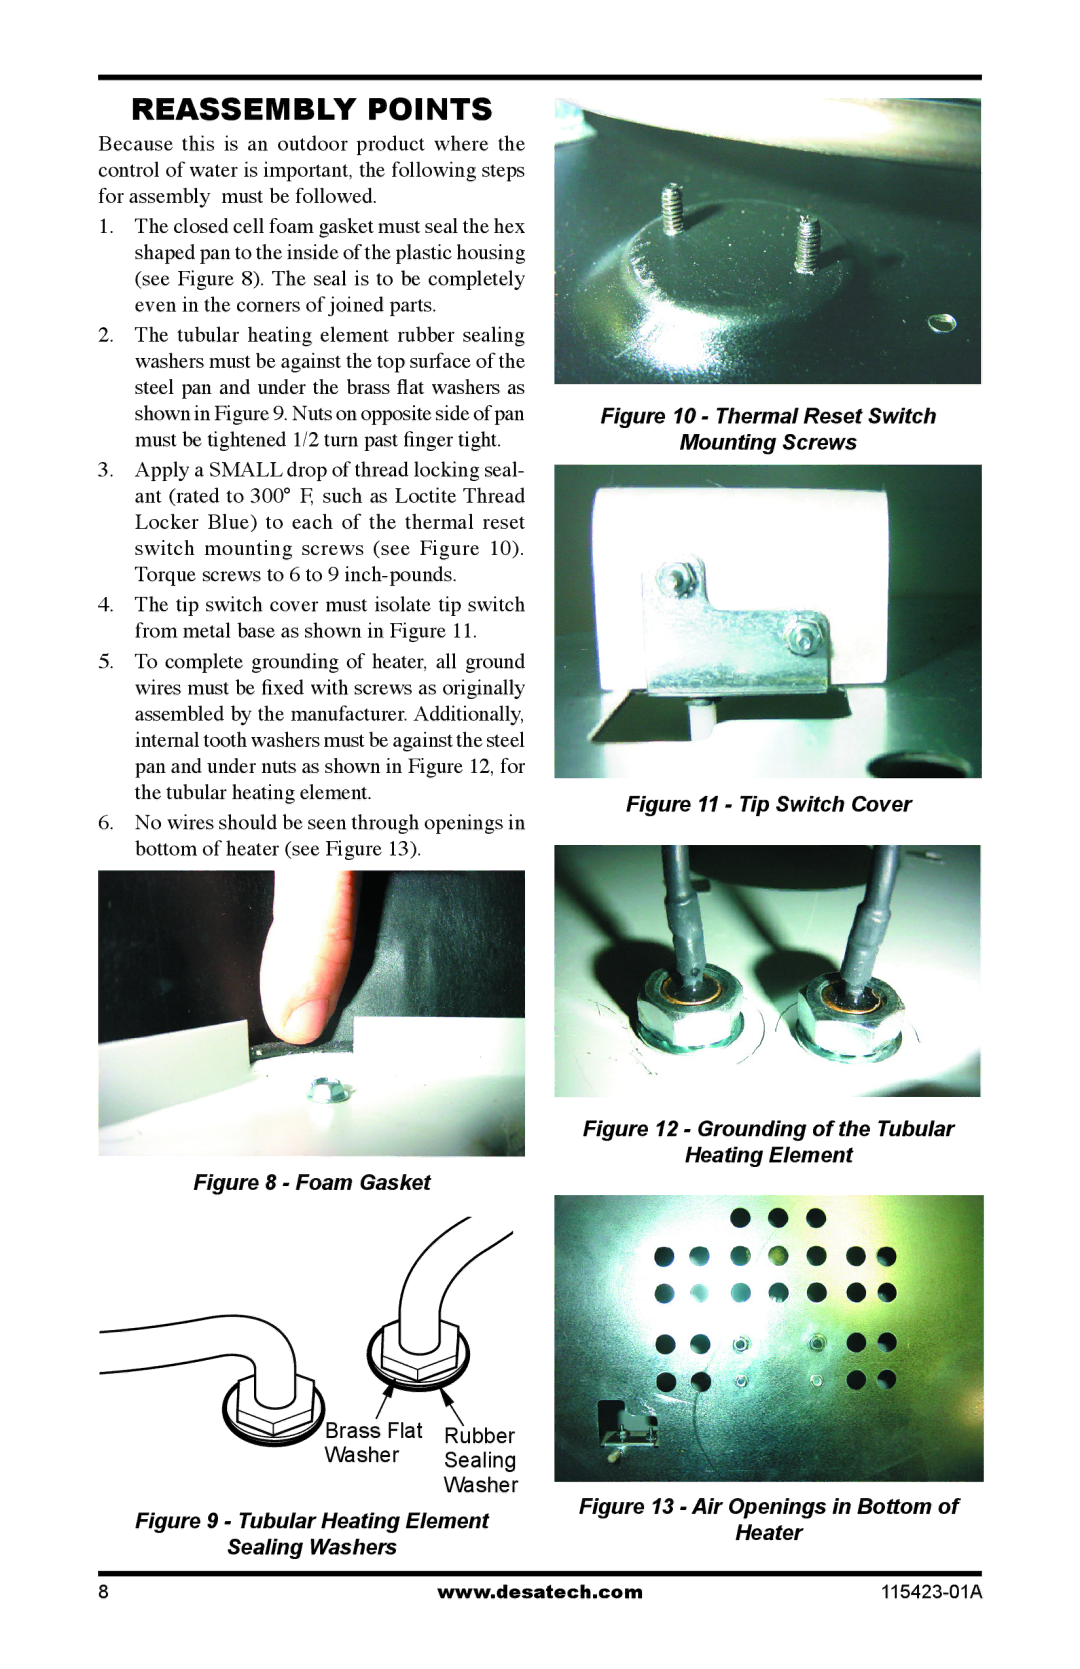
3.Apply a SMALL drop of thread locking seal- ant (rated to 300° F, such as Loctite Thread Locker Blue) to each of the thermal reset switch mounting screws (see Figure 10). Torque screws to 6 to 9
4.The tip switch cover must isolate tip switch from metal base as shown in Figure 11.
5.To complete grounding of heater, all ground wires must be fixed with screws as originally assembled by the manufacturer. Additionally, internal tooth washers must be against the steel pan and under nuts as shown in Figure 12, for the tubular heating element.
6.No wires should be seen through openings in bottom of heater (see Figure 13).
Figure 8 - Foam Gasket
Figure 10 - Thermal Reset Switch
Mounting Screws
Figure 11 - Tip Switch Cover
Figure 12 - Grounding of the Tubular
Heating Element
Brass Flat | Rubber | |
Washer | ||
Sealing | ||
| ||
| Washer |
Figure 13 - Air Openings in Bottom of
Figure 9 - Tubular Heating ElementHeater
Sealing Washers
8 | www.desatech.com |