VENT-FREE PROPANE/LP HEATER

INSTALLATION

Continued

Attaching Mounting Bracket to Wall

Note: Wall anchors, mounting screws, and spacers are in hardware package. The hard- ware package is provided with heater.

Attaching To Wall Stud Method

For attaching mounting bracket to wall studs.

1.Drill holes at marked locations using 9/64" drill bit.

2.Place mounting bracket onto wall. Line up last hole on each end of bracket with holes drilled in wall.

3.Insert mounting screws through bracket and into wall studs.

4.Tighten screws until mounting bracket is firmly fastened to wall studs.

Attaching To Wall Anchor Method

For attaching mounting bracket to hollow walls (wall areas between studs) or solid walls (concrete or masonry).

1.Drill holes at marked locations using 5/16" drill bit. For solid walls (concrete or masonry), drill at least 1" deep.

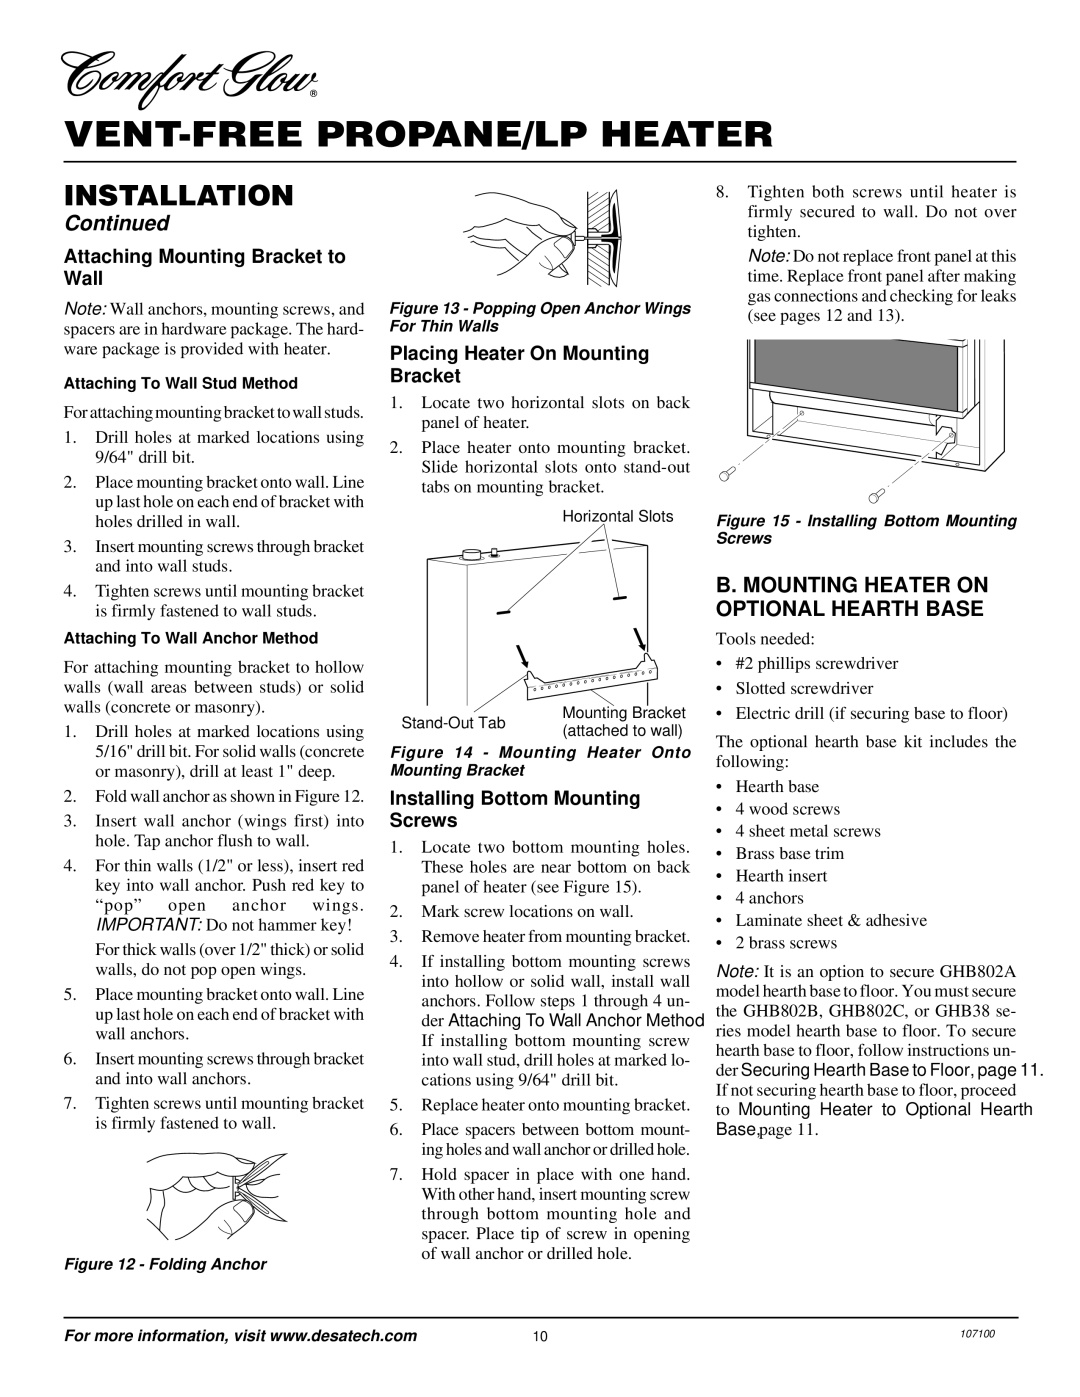
2.Fold wall anchor as shown in Figure 12.

3.Insert wall anchor (wings first) into hole. Tap anchor flush to wall.

4.For thin walls (1/2" or less), insert red key into wall anchor. Push red key to “pop” open anchor wings.

IMPORTANT: Do not hammer key!

For thick walls (over 1/2" thick) or solid walls, do not pop open wings.

5.Place mounting bracket onto wall. Line up last hole on each end of bracket with wall anchors.

6.Insert mounting screws through bracket and into wall anchors.

7.Tighten screws until mounting bracket is firmly fastened to wall.

Figure 12 - Folding Anchor

Figure 13 - Popping Open Anchor Wings For Thin Walls

Placing Heater On Mounting Bracket

1.Locate two horizontal slots on back panel of heater.

2.Place heater onto mounting bracket. Slide horizontal slots onto stand-out tabs on mounting bracket.

Horizontal Slots

Stand-Out Tab

Mounting Bracket

(attached to wall)


Figure 14 - Mounting Heater Onto

Mounting Bracket


Installing Bottom Mounting Screws

1.Locate two bottom mounting holes. These holes are near bottom on back panel of heater (see Figure 15).

2.Mark screw locations on wall.

3.Remove heater from mounting bracket.

4.If installing bottom mounting screws into hollow or solid wall, install wall anchors. Follow steps 1 through 4 un- der Attaching To Wall Anchor Method. If installing bottom mounting screw into wall stud, drill holes at marked lo- cations using 9/64" drill bit.

5.Replace heater onto mounting bracket.

6.Place spacers between bottom mount- ing holes and wall anchor or drilled hole.

7.Hold spacer in place with one hand. With other hand, insert mounting screw through bottom mounting hole and spacer. Place tip of screw in opening of wall anchor or drilled hole.

8.Tighten both screws until heater is firmly secured to wall. Do not over tighten.

Note: Do not replace front panel at this time. Replace front panel after making gas connections and checking for leaks (see pages 12 and 13).

Figure 15 - Installing Bottom Mounting Screws

B. MOUNTING HEATER ON OPTIONAL HEARTH BASE

Tools needed:

#2 phillips screwdriver

Slotted screwdriver

Electric drill (if securing base to floor)

The optional hearth base kit includes the following:

Hearth base

4 wood screws

4 sheet metal screws

Brass base trim

Hearth insert

4 anchors

Laminate sheet & adhesive

2 brass screws

Note: It is an option to secure GHB802A model hearth base to floor. You must secure the GHB802B, GHB802C, or GHB38 se- ries model hearth base to floor. To secure hearth base to floor, follow instructions un- der Securing Hearth Base to Floor, page 11. If not securing hearth base to floor, proceed to Mounting Heater to Optional Hearth Base, page 11.

For more information, visit www.desatech.com

10

107100

Page 10
Image 10
Desa RFP30TA installation manual Mounting Heater on Optional Hearth Base, Attaching Mounting Bracket to Wall

RFP30TA specifications

The Desa RFP30TA is a standout heating solution designed for residential and light commercial spaces. With a powerful output and a variety of features, this gas-fired heater is built to provide efficient warmth while ensuring safety and convenience for users.

One of the main features of the Desa RFP30TA is its impressive heating capacity. With an output of up to 30,000 BTUs, it is capable of warming spaces of approximately 1,000 square feet, making it suitable for larger rooms or open areas. This makes it an excellent choice for basements, workshops, or other spaces that require effective heating during colder months.

The heater is designed with efficiency in mind. It boasts a high Annual Fuel Utilization Efficiency (AFUE) rating, which translates to lower energy bills and reduced greenhouse gas emissions. Its innovative design ensures that more of the fuel is converted into usable heat, which is not only economical for users but also beneficial for the environment.

As for technology, the Desa RFP30TA incorporates advanced safety features that prioritize user protection. The unit is equipped with a built-in safety shut-off system that automatically turns off the heater if it detects any irregularities in operation. Additionally, it utilizes a reliable thermocouple that monitors flame presence, ensuring that the heater operates safely at all times.

Another characteristic that sets the Desa RFP30TA apart is its versatility in installation. The heater comes with options for both vented and unvented installations, allowing users to choose the best setup for their specific needs. This flexibility means that the unit can be installed in a variety of locations, whether it’s vented to the outdoors or designed for indoor use without the need for a flue.

Furthermore, the Desa RFP30TA is designed with user-friendly controls. The adjustable thermostat allows for precise temperature management, enabling users to maintain their desired comfort level. This feature, combined with the unit's robust build quality, makes it a reliable option for long-term use.

In summary, the Desa RFP30TA is an efficient and powerful heating solution that combines modern technology with user-centric design. With its impressive output, safety features, installation flexibility, and user-friendly controls, it stands as a top choice for those looking for an effective heating solution for their spaces.