OPERATING |
|
| TO TURN OFF GAS TO APPLIANCE |
|
|
|
| ||
HEATER |
|
|
| |
Shutting Off Heater | ||||
Continued | 1. Turn control knob clockwise Clockwise to the PILOT position. | |||
| 2. | Press in control knob and turn clockwise Clockwise to the OFF position. | ||
| 3. | Turn off all electric power to the appliance if service is to be performed. | ||
| Shutting Off Burner Only (pilot stays lit) | |||
| 1. | Turn control knob clockwise Clockwise to the PILOT position. | ||
|
|
| MANUAL LIGHTING PROCEDURE |
|
|
|
|
| |
|
|
|
|
|
| 1. | Remove front panel (see Figure 6, page 11). | ||
| 2. | Follow steps 1 through 5 under Lighting Instructions, pages 17 and 18. | ||
| 3. | With control knob pressed in, strike match. Hold match to pilot until pilot | ||
|
| lights. | ||
| 4. | Keep control knob pressed in for 30 seconds after lighting pilot. After 30 | ||
|
| seconds, release control knob. | ||
| 5. | Replace front panel. | ||
INSPECTING | Check pilot flame pattern and burner flame pattern often. | |||
BURNER | PILOT FLAME PATTERN | |||
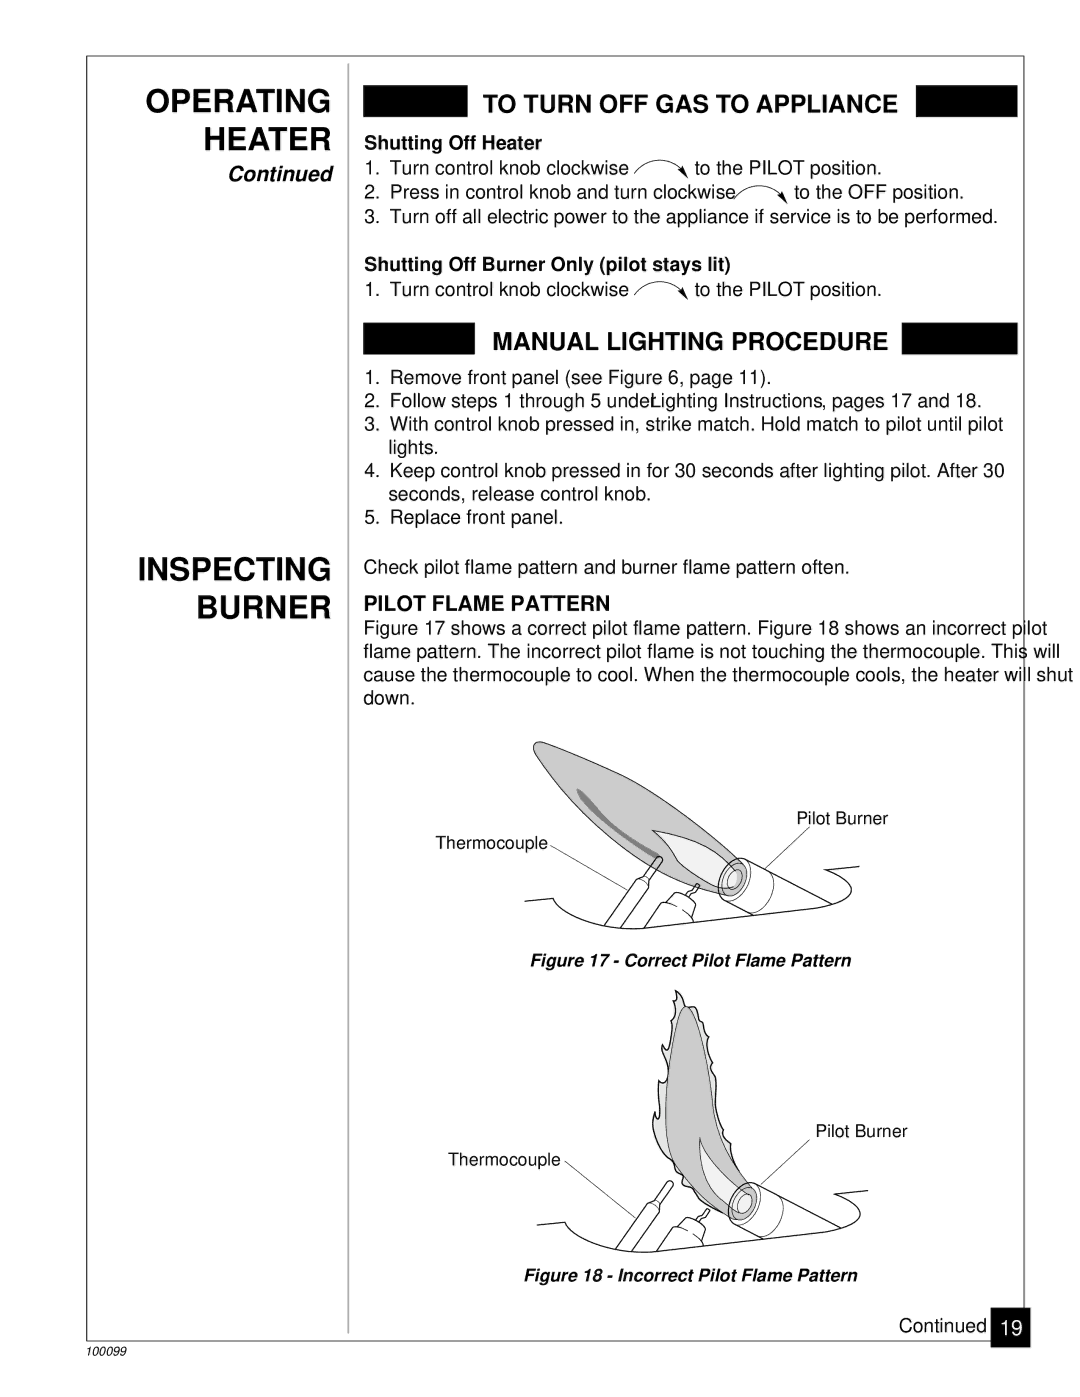
| Figure 17 shows a correct pilot flame pattern. Figure 18 shows an incorrect pilot | |||
| flame pattern. The incorrect pilot flame is not touching the thermocouple. This will | |||
| cause the thermocouple to cool. When the thermocouple cools, the heater will shut | |||
| down. | |||
Pilot Burner
Thermocouple
GOOD PILOT | GRH/OV 009 |
Figure 17 - Correct Pilot Flame Pattern
Pilot Burner
Thermocouple
BAD PILOT | GRH/OV 010 |
Figure 18 - Incorrect Pilot Flame Pattern
Continued 19
100099
