
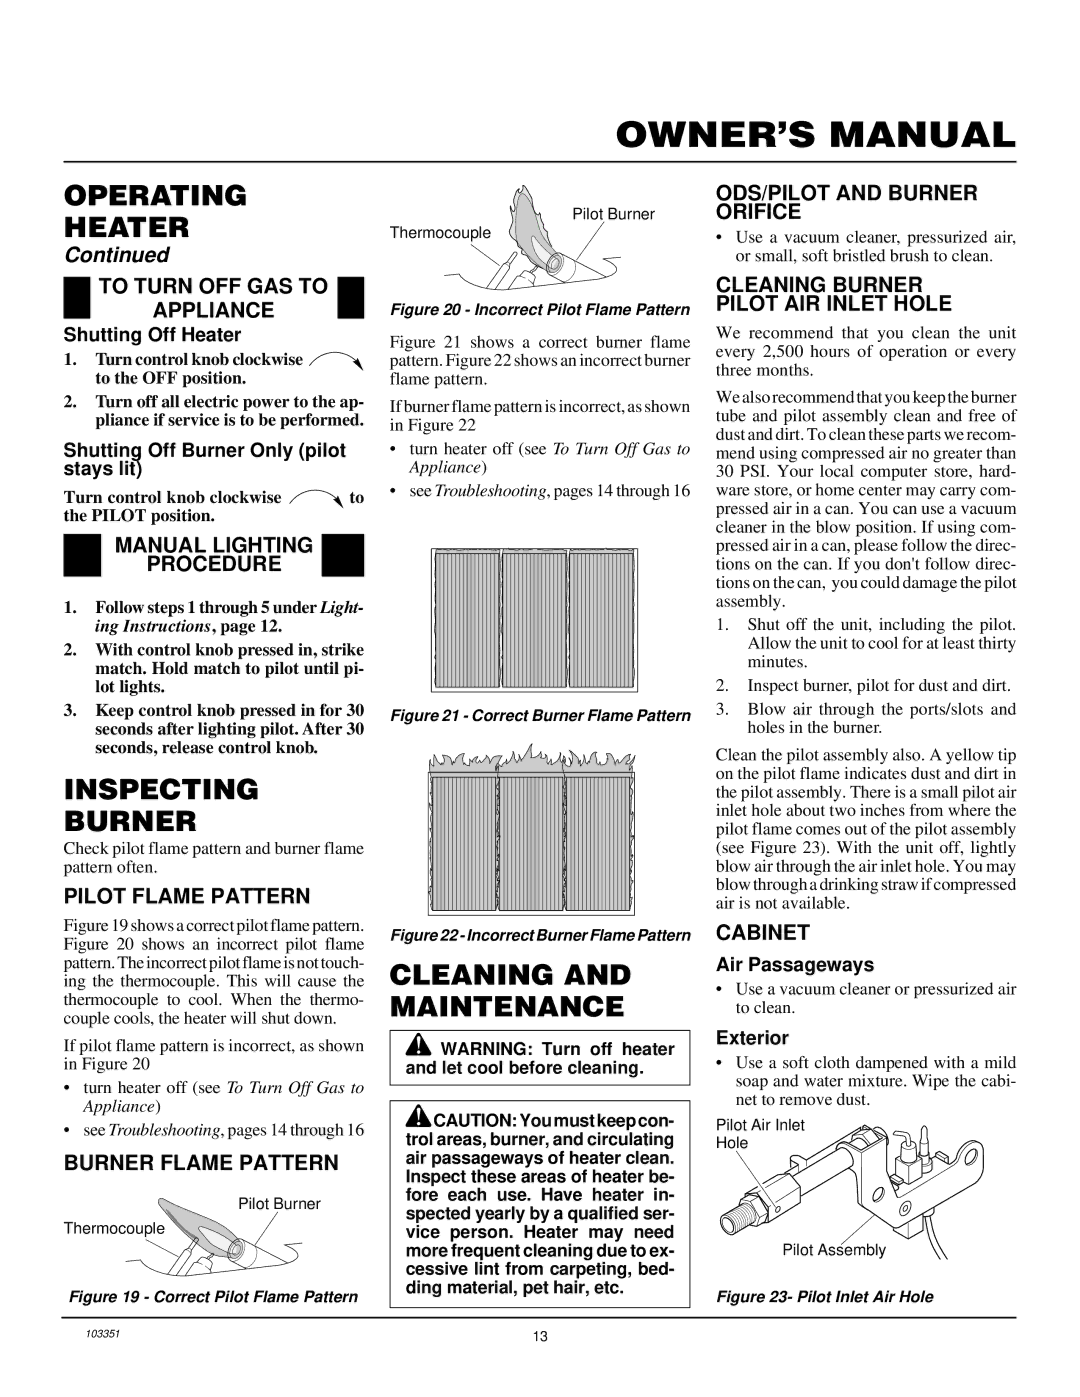
VP1600E, VP2600E specifications
The Desa VP2600E and VP1600E are advanced electric heaters renowned for their efficiency and technology. These models are designed to provide rapid and consistent warmth, making them ideal for both residential and commercial applications. Their sleek design and user-friendly features ensure they can fit seamlessly into any space while providing optimal comfort.One of the standout features of the VP2600E and VP1600E is their advanced heating technology. Both heaters are equipped with high-performance heating elements that ensure quick heat-up times and even heat distribution. This means that users can benefit from immediate warmth as soon as the unit is turned on, eliminating long wait periods commonly associated with traditional heaters.
Energy efficiency is another significant characteristic of these models. The Desa VP series has been designed to operate at a high efficiency rate, which helps in reducing energy consumption and lowering utility bills. With their built-in thermostats, these heaters can automatically adjust their output based on the ambient temperature, ensuring that energy is not wasted while maintaining a consistent level of comfort.
Safety is a top priority in the design of the Desa VP2600E and VP1600E. Both models are incorporated with multiple safety features such as tip-over protection, overheat protection, and a built-in shut-off mechanism. These features enhance user confidence, making them safe for use in homes with children and pets.
In terms of versatility, both the VP2600E and VP1600E offer adjustable settings that allow users to customize their heating experience according to personal preferences. This includes various heat settings and fan speeds, making them suitable for different occasions and environmental conditions.
Portability is another critical aspect of these heaters. With their lightweight construction and built-in handles, they can be easily moved from room to room, providing warmth wherever it is needed the most. This flexibility is particularly beneficial during seasonal changes when different areas of a home or workspace require additional heating.
In summary, the Desa VP2600E and VP1600E heaters stand out for their combination of efficient heating technology, energy savings, safety features, and portability. These characteristics make them excellent choices for anyone looking to enhance their comfort while maintaining control over their energy consumption. Whether for a cozy living room or a chilly office environment, these heaters meet diverse heating needs with reliability and ease of use.