ASSEMBLY
Some models require no assembly. Select the picture below of your unit and follow the assembly instructions for that unit.
“Hotdog” unit
|
| CONTRACTOR | SERIES |
2 | HP |
| |
4 | GAL |
| |
|
| ||
“Sidestack” unit - requires no assembly
2 | HP | 4 | GAL |
|
|
“Pancake” unit
“Horizontal” unit
(some “horizontal” units are equipped with a console)
“Vertical” unit
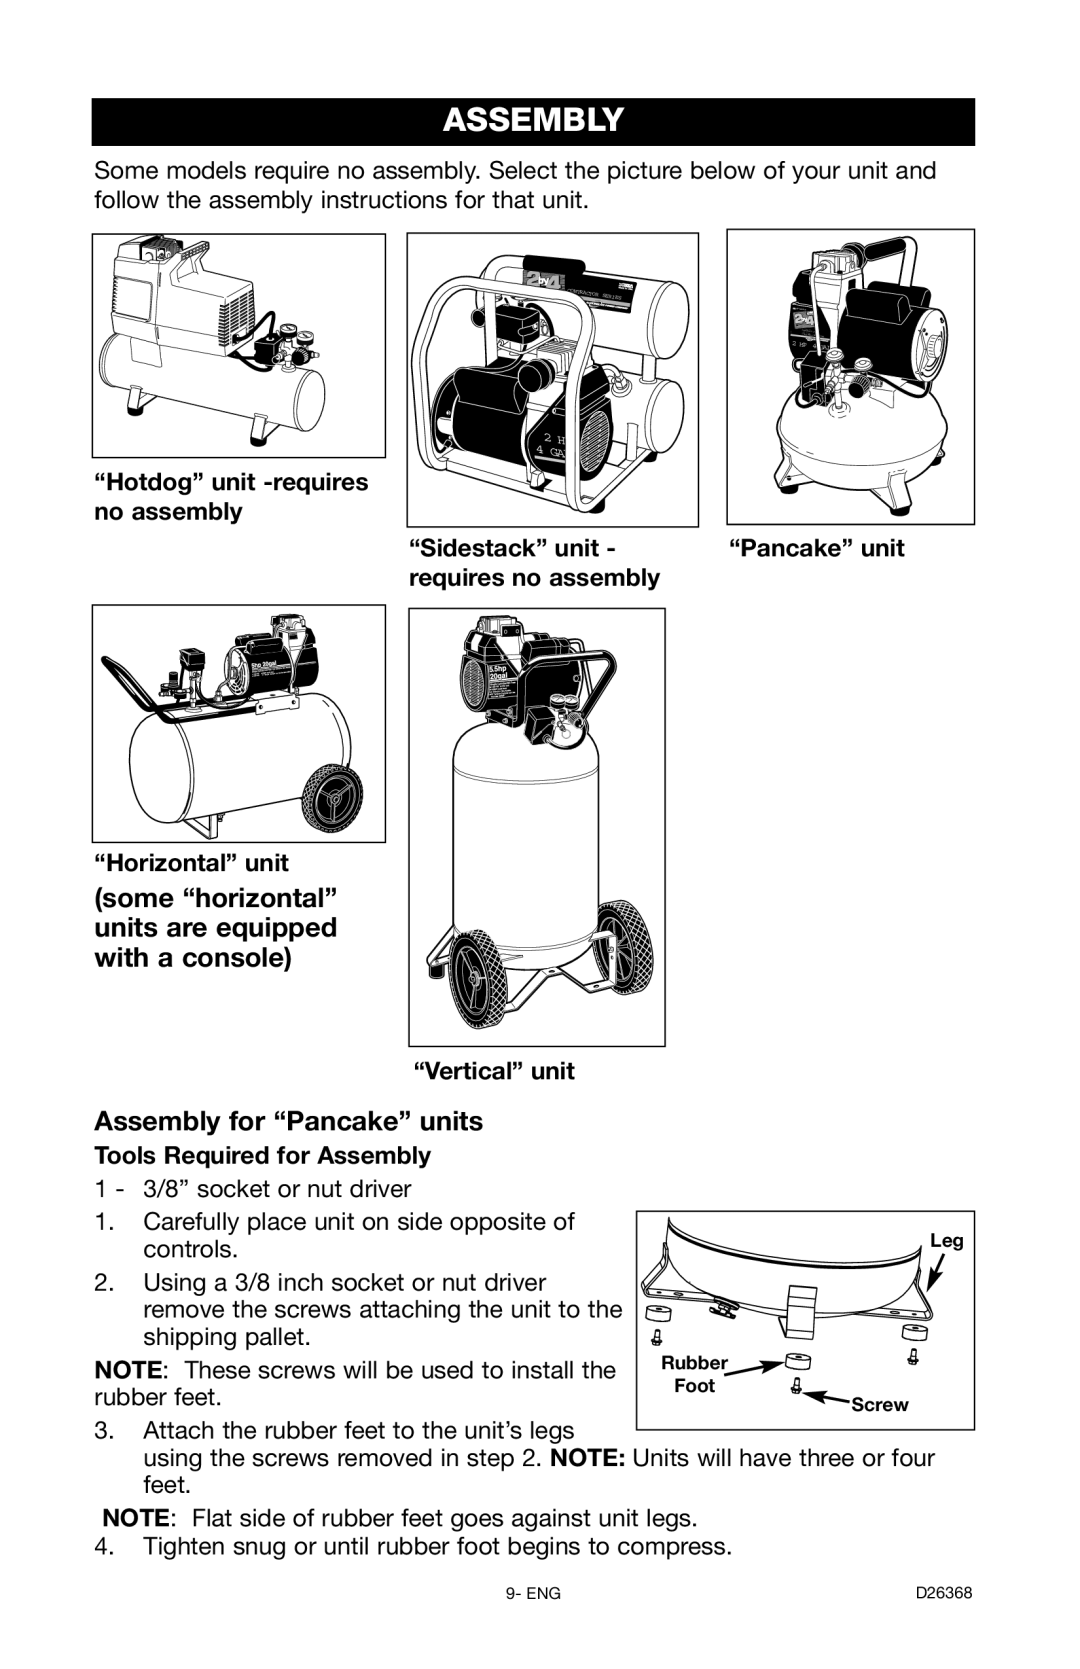
Assembly for “Pancake” units
Tools Required for Assembly
1 - 3/8” socket or nut driver
1.Carefully place unit on side opposite of
controls. | Leg |
| |
2. Using a 3/8 inch socket or nut driver |
|
remove the screws attaching the unit to the |
|
shipping pallet. |
|
NOTE: These screws will be used to install the | Rubber |
rubber feet. | Foot |
Screw |
3.Attach the rubber feet to the unit’s legs
using the screws removed in step 2. NOTE: Units will have three or four feet.
NOTE: Flat side of rubber feet goes against unit legs.
4.Tighten snug or until rubber foot begins to compress.
9- ENG | D26368 |