FENCE
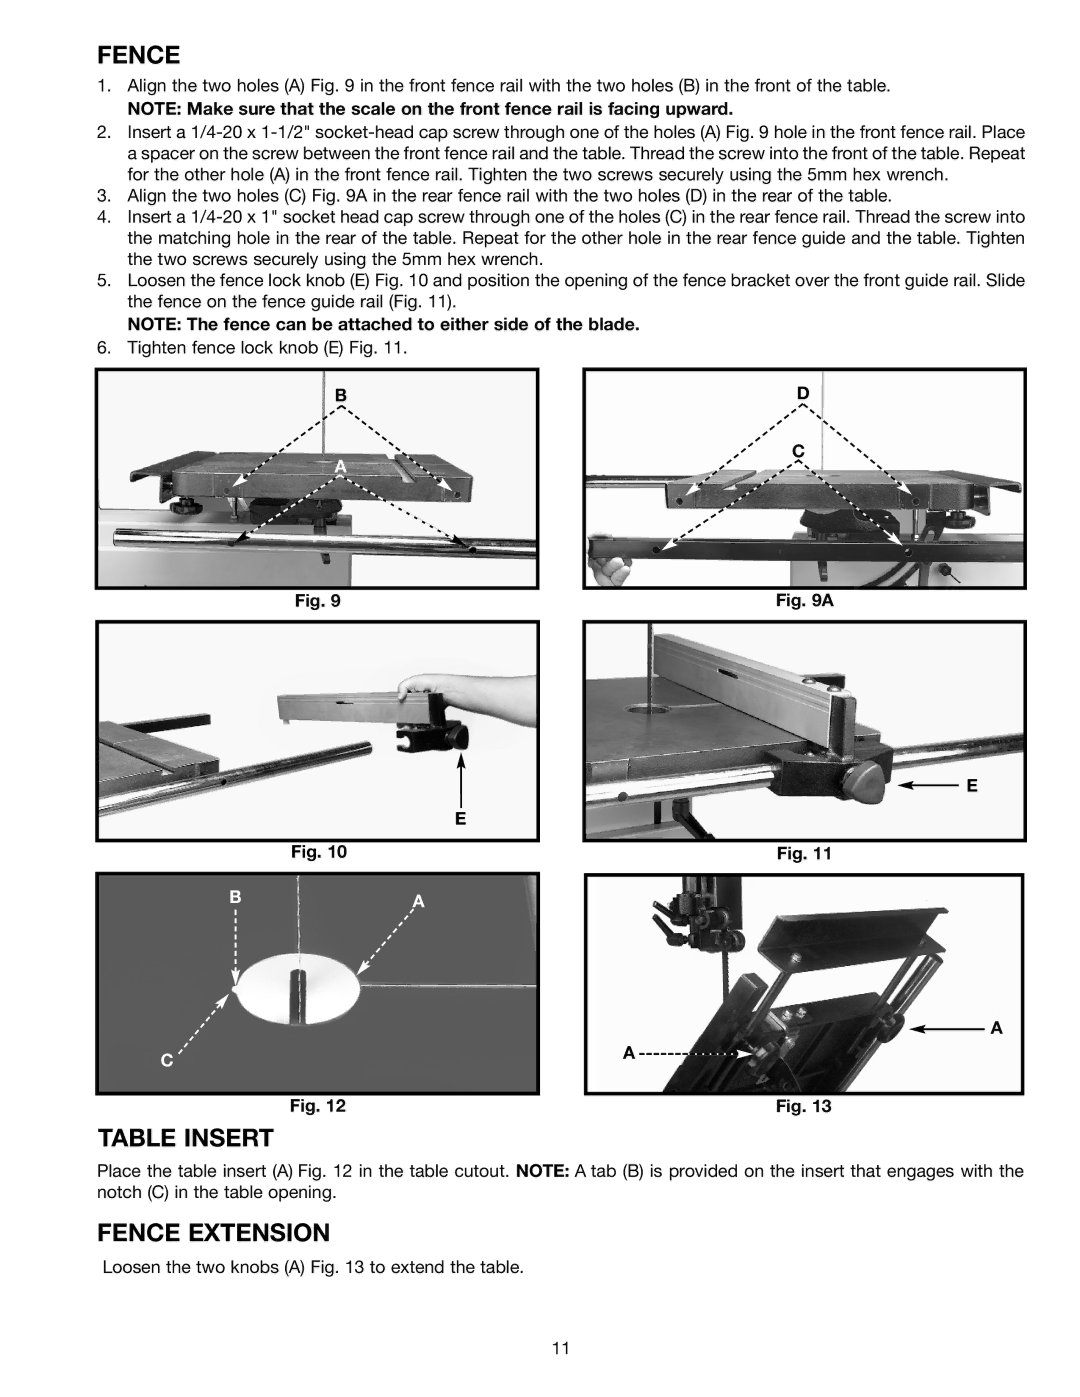
1.Align the two holes (A) Fig. 9 in the front fence rail with the two holes (B) in the front of the table.
NOTE: Make sure that the scale on the front fence rail is facing upward.
2.Insert a
3.Align the two holes (C) Fig. 9A in the rear fence rail with the two holes (D) in the rear of the table.
4.Insert a
5.Loosen the fence lock knob (E) Fig. 10 and position the opening of the fence bracket over the front guide rail. Slide the fence on the fence guide rail (Fig. 11).
NOTE: The fence can be attached to either side of the blade.
6.Tighten fence lock knob (E) Fig. 11.
B
A
D
C
Fig. 9 | Fig. 9A |
E
![]() E
E
Fig. 10
BA
C
Fig. 12
TABLE INSERT
Fig. 11
A
A ![]()
![]()
Fig. 13
Place the table insert (A) Fig. 12 in the table cutout. NOTE: A tab (B) is provided on the insert that engages with the notch (C) in the table opening.
FENCE EXTENSION
Loosen the two knobs (A) Fig. 13 to extend the table.
11