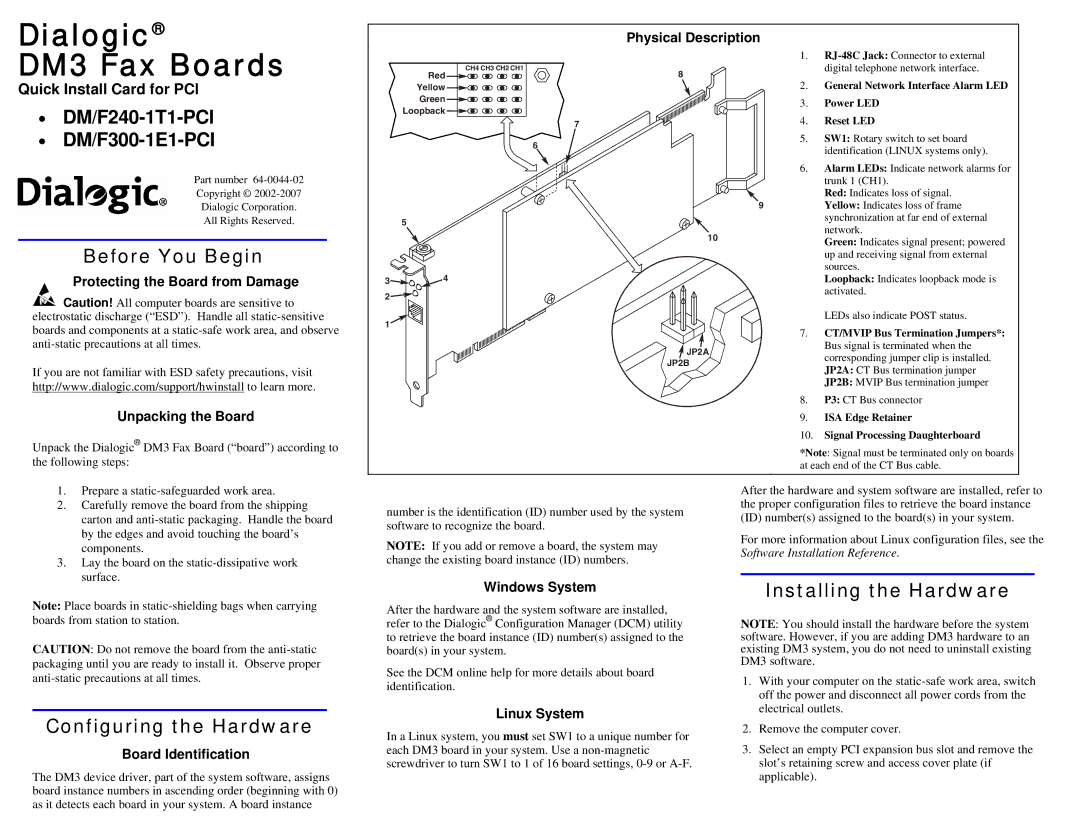
DM/F300-1E1-PCI, DM/F240-1T1-PCI specifications
The Dialogic DM/F300-1E1-PCI and DM/F240-1T1-PCI are advanced telecommunication interface cards designed for seamless connectivity in voice and data applications. These cards are part of Dialogic’s extensive portfolio and serve as robust solutions for various networking needs, particularly in telephony and data communications systems.One of the standout features of the DM/F300-1E1-PCI card is its ability to support E1 connections. It provides users with a reliable interface capable of handling up to 30 voice channels, making it ideal for organizations that require high-density communication. The card operates with advanced signaling protocols including ISDN and CAS, which ensures compatibility with a wide range of telephony systems.
Conversely, the DM/F240-1T1-PCI card focuses on T1 connections, supporting up to 24 voice channels. This flexibility allows businesses to tailor their communication strategies based on their specific infrastructure and service requirements. Both cards leverage Dialogic's proprietary technologies, providing superior voice quality, echo cancellation, and call handling capabilities.
In terms of installation and integration, these cards feature a PCI interface that is straightforward to integrate into existing systems. Their design ensures compatibility with a variety of operating systems, enhancing their usability across multiple platforms. Additionally, the DM/F300 and DM/F240 cards offer extensive debugging and diagnostics capabilities, which simplify troubleshooting and maintenance tasks.
Their versatility is further enhanced with support for common voice applications such as Interactive Voice Response (IVR), automatic call distribution (ACD), and unified communications. This makes them suitable for various environments ranging from call centers to enterprise telephony, allowing organizations to improve customer interaction and operational efficiency.
Moreover, both cards support multiple-channel voice coding, including G.711, G.729, and G.723. This allows users to effectively balance voice quality and bandwidth usage, adapting to specific business needs while ensuring cost-efficiency.
In summary, the Dialogic DM/F300-1E1-PCI and DM/F240-1T1-PCI cards are engineered to provide high-density, high-quality voice and data communication. With their extensive features, compatibility with various signaling protocols, and support for multiple voice applications, these interface cards stand out as essential components in modern telecommunications infrastructure. Their capabilities empower businesses to improve communication efficiency and enhance customer experiences across diverse platforms.