a matching hole in the front fork dropout (fi g. 12c).
Ask your dealer to explain the particular secondary retention device on your bike.
![]() ! WARNING: Removing or disabling the secondary retention device is extremely dangerous and may lead to serious injury or death. It also may void the warranty.
! WARNING: Removing or disabling the secondary retention device is extremely dangerous and may lead to serious injury or death. It also may void the warranty.
2.Removing and Installing Quick Release Wheels a. Removing a Quick Release Front Wheel
(1)If your bike has rim brakes, disengage the brake’s quick- release mechanism to open the clearance between the wheel rim and the brake pads (See Section 4.A
fi gs. 7 through 10).
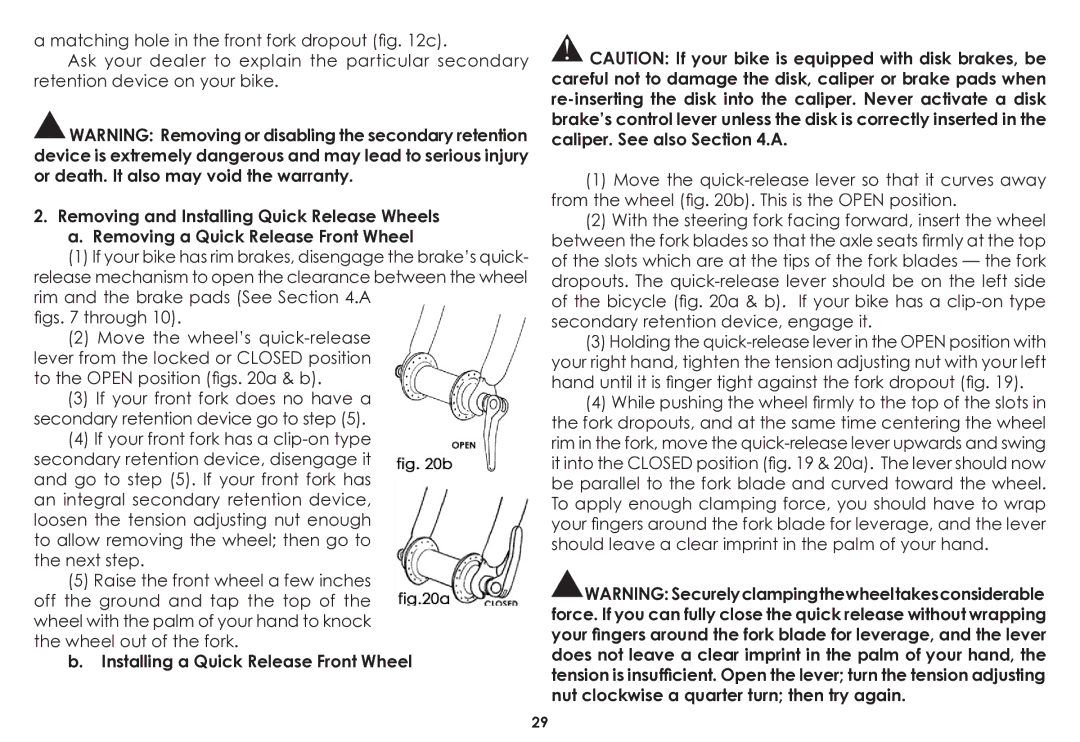
(2)Move the wheel’s
lever from the locked or CLOSED position to the OPEN position (fi gs. 20a & b).
(3)If your front fork does no have a secondary retention device go to step (5).
(4)If your front fork has a
(5)Raise the front wheel a few inches off the ground and tap the top of the wheel with the palm of your hand to knock the wheel out of the fork.
b. Installing a Quick Release Front Wheel
!CAUTION: If your bike is equipped with disk brakes, be careful not to damage the disk, caliper or brake pads when
(1)Move the
(2)With the steering fork facing forward, insert the wheel between the fork blades so that the axle seats fi rmly at the top of the slots which are at the tips of the fork blades — the fork dropouts. The
(3)Holding the
(4)While pushing the wheel fi rmly to the top of the slots in the fork dropouts, and at the same time centering the wheel rim in the fork, move the
!![]() WARNING: Securelyclampingthewheeltakesconsiderable force. If you can fully close the quick release without wrapping your fi ngers around the fork blade for leverage, and the lever does not leave a clear imprint in the palm of your hand, the tension is insuffi cient. Open the lever; turn the tension adjusting nut clockwise a quarter turn; then try again.
WARNING: Securelyclampingthewheeltakesconsiderable force. If you can fully close the quick release without wrapping your fi ngers around the fork blade for leverage, and the lever does not leave a clear imprint in the palm of your hand, the tension is insuffi cient. Open the lever; turn the tension adjusting nut clockwise a quarter turn; then try again.
29