User Manual DataDesk 100
InteriorInterior equipmentequip ent
Case lid (Fig. 1)
(1)Document / printer paper compartment
(2)Accessory compartment with combination lock
(3)Accessory compartment
(3)
(2) | (1) |
|
Fig. 1
InstallationInstallation ofof youryour mobileobile printerprinter
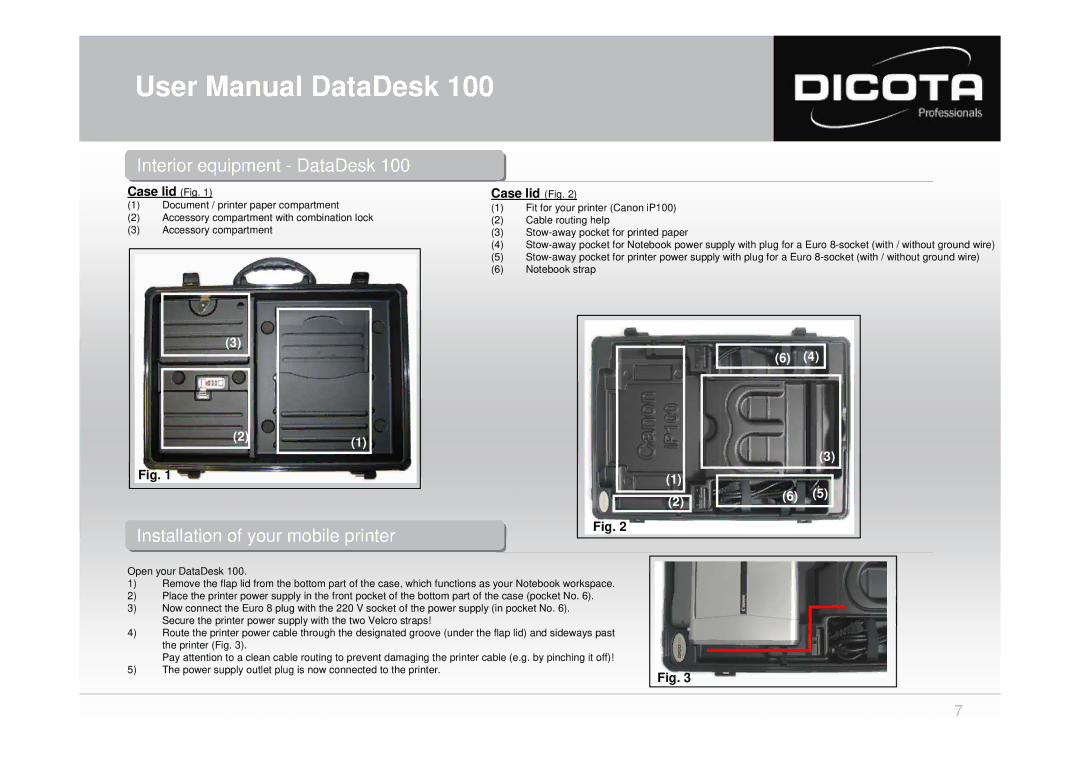
Case lid (Fig. 2)
(1)Fit for your printer (Canon iP100)
(2)Cable routing help
(3)
(4)
(5)
(6)Notebook strap
(6)(4)
|
| (3) | |
(1) | (6) | (5) | |
(2) | |||
|
|
Fig. 2
Open your DataDesk 100. |
|
|
|
| |
1) | Remove the flap lid from the bottom part of the case, which functions as your Notebook workspace. |
|
|
|
|
2) | Place the printer power supply in the front pocket of the bottom part of the case (pocket No. 6). |
|
|
|
|
3) | Now connect the Euro 8 plug with the 220 V socket of the power supply (in pocket No. 6). |
|
|
|
|
|
|
|
| ||
| Secure the printer power supply with the two Velcro straps! |
|
|
|
|
4) | Route the printer power cable through the designated groove (under the flap lid) and sideways past |
|
|
|
|
| the printer (Fig. 3). |
|
|
|
|
| Pay attention to a clean cable routing to prevent damaging the printer cable (e.g. by pinching it off)! |
|
|
|
|
5) | The power supply outlet plug is now connected to the printer. | Fig. 3 | |||
|
| ||||
7