ASSEMBLY
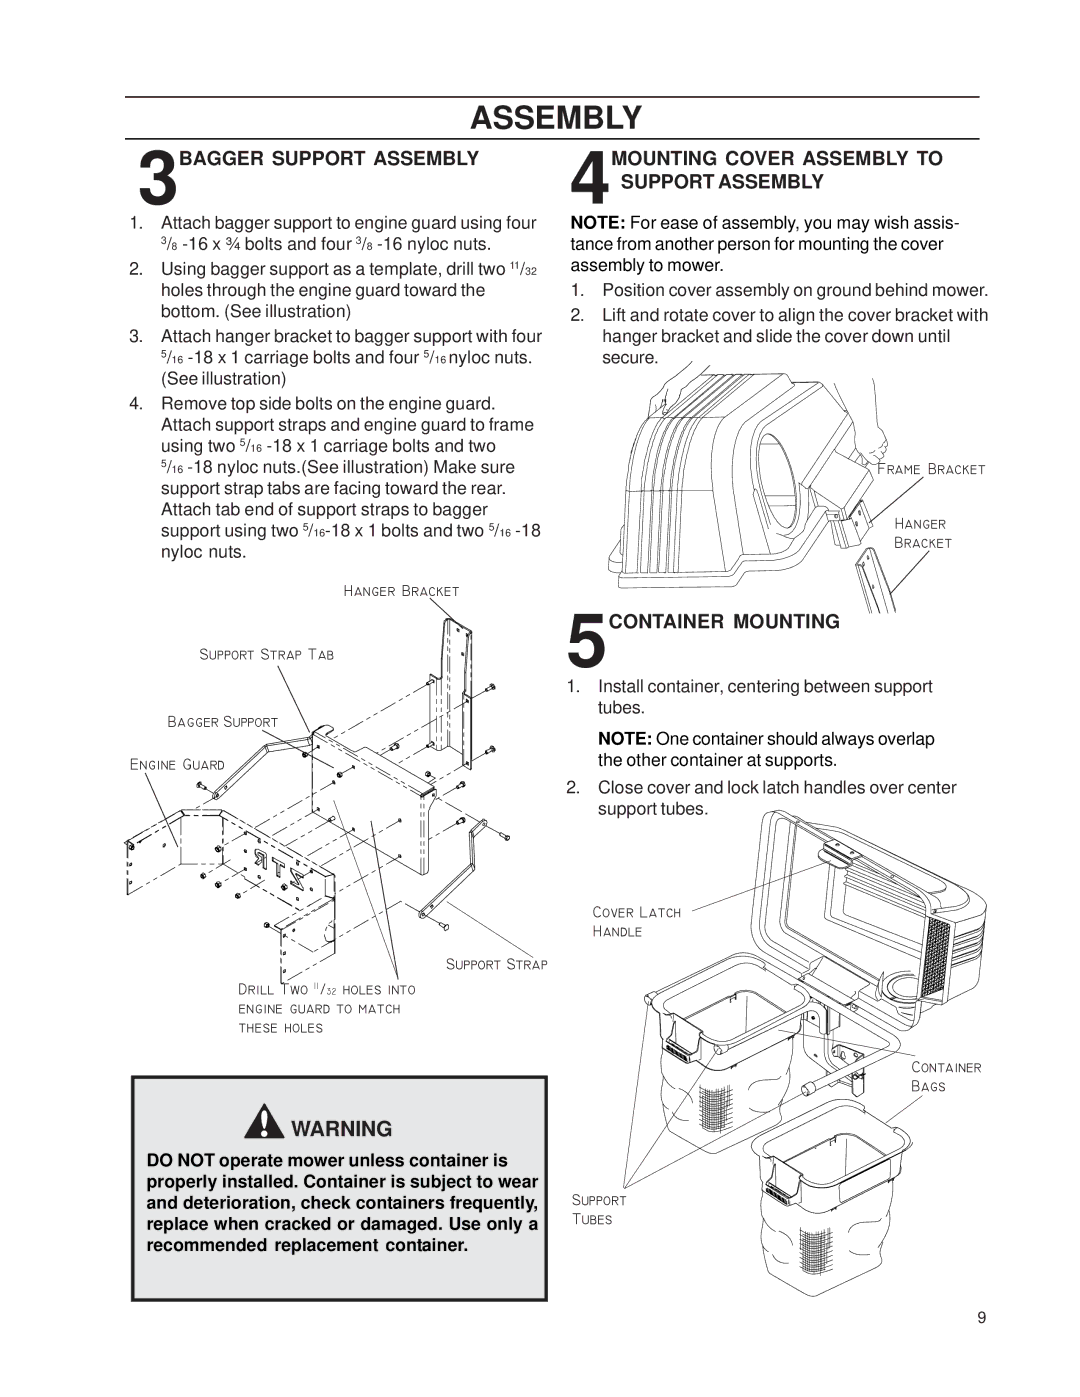
3BAGGER SUPPORT ASSEMBLY
1.Attach bagger support to engine guard using four 3/8
2.Using bagger support as a template, drill two 11/32 holes through the engine guard toward the bottom. (See illustration)
3.Attach hanger bracket to bagger support with four 5/16
4.Remove top side bolts on the engine guard. Attach support straps and engine guard to frame using two 5/16
5/16
Hanger Bracket
Support Strap Tab
Bagger Support
Engine Guard
Support Strap
Drill Two 11/32 holes into engine guard to match these holes
![]() WARNING
WARNING
DO NOT operate mower unless container is properly installed. Container is subject to wear and deterioration, check containers frequently, replace when cracked or damaged. Use only a recommended replacement container.
4MOUNTING COVER ASSEMBLY TO SUPPORT ASSEMBLY
NOTE: For ease of assembly, you may wish assis- tance from another person for mounting the cover assembly to mower.
1.Position cover assembly on ground behind mower.
2.Lift and rotate cover to align the cover bracket with hanger bracket and slide the cover down until secure.
Frame Bracket
Hanger
Bracket
5CONTAINER MOUNTING
1.Install container, centering between support tubes.
NOTE: One container should always overlap the other container at supports.
2.Close cover and lock latch handles over center support tubes.
Cover Latch
Handle
Container
Bags
Support
Tubes
9
