ASSEMBLY
Collection System
Tools Required |
|
Ratchet | ¾" Socket |
Torque Wrench | Flat Screw Driver |
½" Wrench | 5/32" Allen Wrench |
½" Socket | Hacksaw |
9/16" Wrench | 11/32" Drill Bit |
9/16" Socket | Drill |
5/8" Socket |
|
1.Open the mounting kit box and remove all of the components.
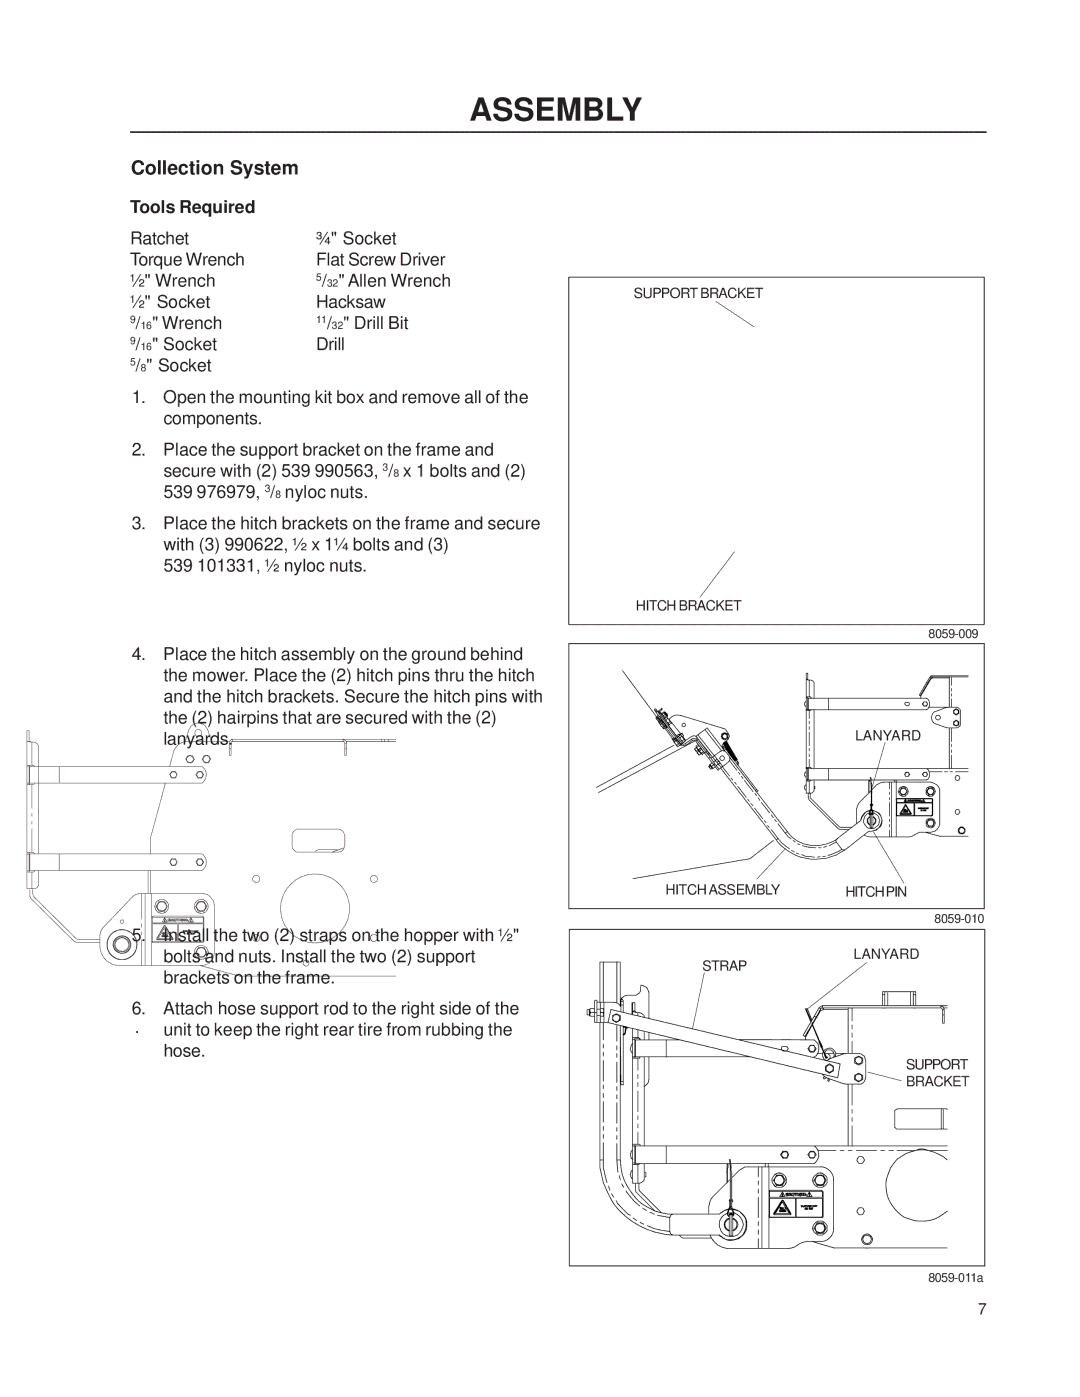
2.Place the support bracket on the frame and secure with (2) 539 990563, 3/8 x 1 bolts and (2) 539 976979, 3/8 nyloc nuts.
3.Place the hitch brackets on the frame and secure with (3) 990622, ½ x 1¼ bolts and (3)
539 101331, ½ nyloc nuts.
4.Place the hitch assembly on the ground behind the mower. Place the (2) hitch pins thru the hitch and the hitch brackets. Secure the hitch pins with the (2) hairpins that are secured with the (2) lanyards.
5.Install the two (2) straps on the hopper with ½" bolts and nuts. Install the two (2) support brackets on the frame.
6.Attach hose support rod to the right side of the
. unit to keep the right rear tire from rubbing the hose.
SUPPORT BRACKET
HITCH BRACKET
| |
| LANYARD |
HITCHASSEMBLY | HITCHPIN |
| |
STRAP | LANYARD |
| |
| SUPPORT |
| BRACKET |
7
