ASSEMBLY
Handle Assembly
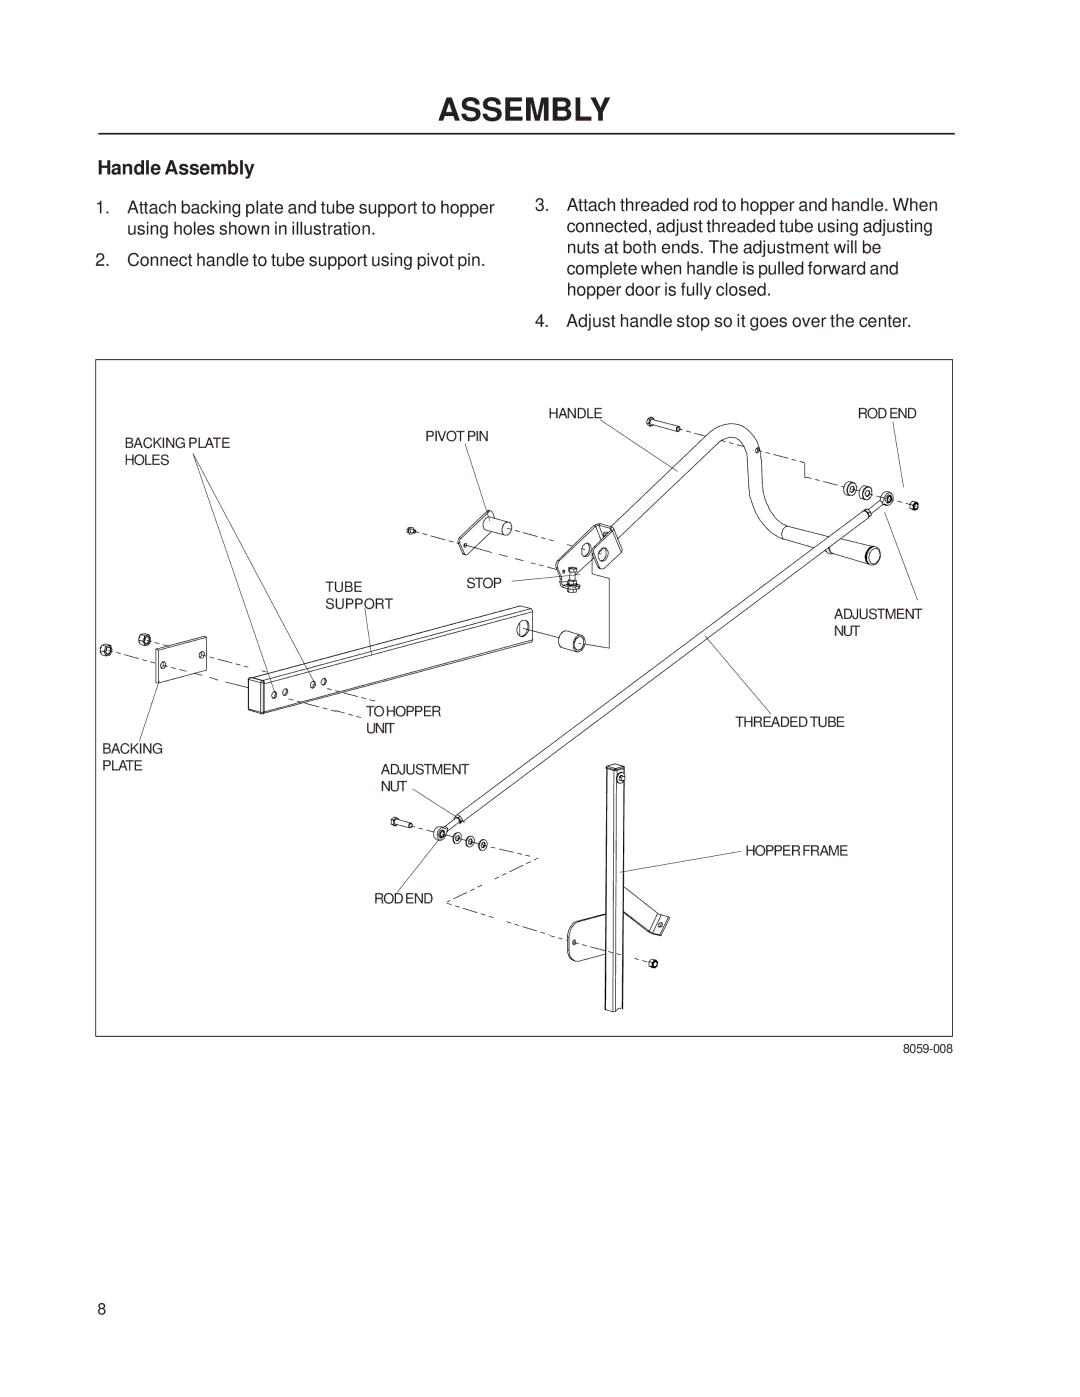
1.Attach backing plate and tube support to hopper using holes shown in illustration.
2.Connect handle to tube support using pivot pin.
3.Attach threaded rod to hopper and handle. When connected, adjust threaded tube using adjusting nuts at both ends. The adjustment will be complete when handle is pulled forward and hopper door is fully closed.
4.Adjust handle stop so it goes over the center.
| HANDLE | RODEND |
BACKING PLATE | PIVOT PIN |
|
|
| |
HOLES |
|
|
TUBE | STOP |
|
SUPPORT | ADJUSTMENT | |
|
| |
|
| NUT |
| TOHOPPER | THREADEDTUBE |
| UNIT | |
|
| |
BACKING |
|
|
PLATE | ADJUSTMENT |
|
| NUT |
|
|
| HOPPERFRAME |
| RODEND |
|
|
| |
8
