600312 & 600315 Series Installation Instructions
FIG. 4 | 4" |
| 4" |
|
|
| |
|
|
| |
| REAR | ||
| OF | ||
|
|
| |
|
|
| UNIT |
| Center Line |
| |
| (±1/8”) OPENING | of Unit |
|
|
|
| |
|
|
| |
KEEP THESE AREAS |
| 12" | |
FREE OF OBSTRUCTIONS |
| ||
|
| ||
| 2 7/8 | |
4 |
| 4 |
|
| 2 7/8 |
C.Roof Preparation
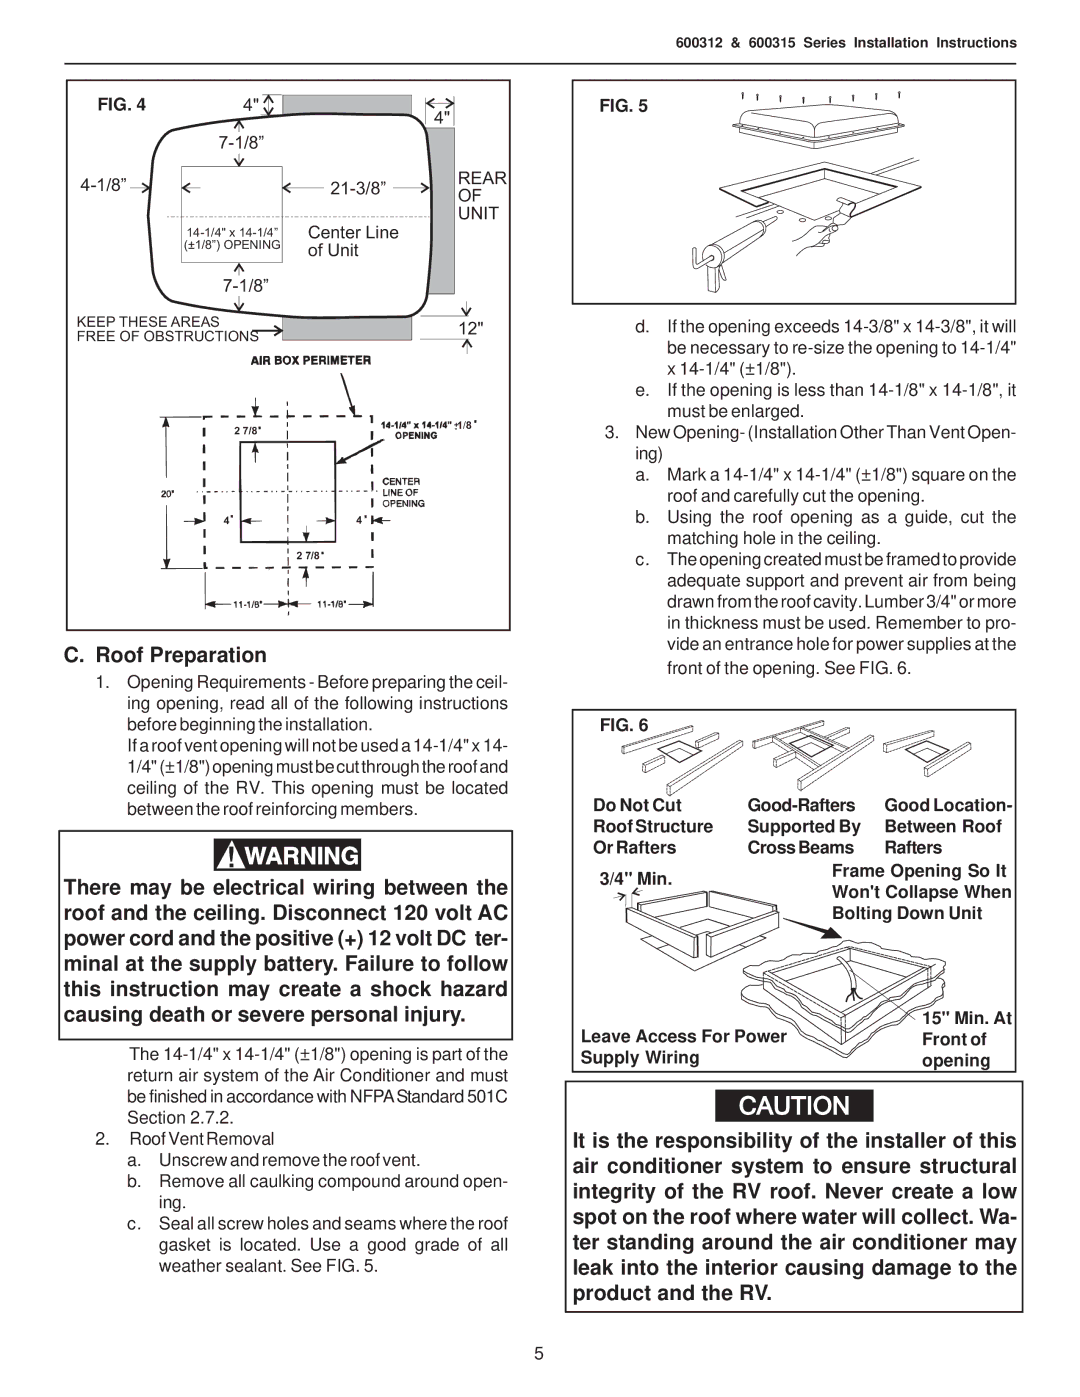
1.Opening Requirements - Before preparing the ceil- ing opening, read all of the following instructions before beginning the installation.
If a roof vent opening will not be used a
There may be electrical wiring between the roof and the ceiling. Disconnect 120 volt AC power cord and the positive (+) 12 volt DC ter- minal at the supply battery. Failure to follow this instruction may create a shock hazard causing death or severe personal injury.
The
2.Roof Vent Removal
a.Unscrew and remove the roof vent.
b.Remove all caulking compound around open- ing.
c.Seal all screw holes and seams where the roof gasket is located. Use a good grade of all weather sealant. See FIG. 5.
FIG. 5
d.If the opening exceeds
e.If the opening is less than
3.New Opening- (Installation Other Than Vent Open- ing)
a.Mark a
b.Using the roof opening as a guide, cut the matching hole in the ceiling.
c.The opening created must be framed to provide adequate support and prevent air from being drawn from the roof cavity. Lumber 3/4" or more in thickness must be used. Remember to pro- vide an entrance hole for power supplies at the front of the opening. See FIG. 6.
FIG. 6 |
|
| |
Do Not Cut | Good Location- | ||
Roof Structure | Supported By | Between Roof | |
Or Rafters | Cross Beams | Rafters | |
3/4" Min. | Frame Opening So It | ||
Won't Collapse When | |||
| |||
| Bolting Down Unit | ||
Leave Access For Power | 15" Min. At | ||
Front of | |||
Supply Wiring |
| opening | |
CAUTION
It is the responsibility of the installer of this air conditioner system to ensure structural integrity of the RV roof. Never create a low spot on the roof where water will collect. Wa- ter standing around the air conditioner may leak into the interior causing damage to the product and the RV.
5
