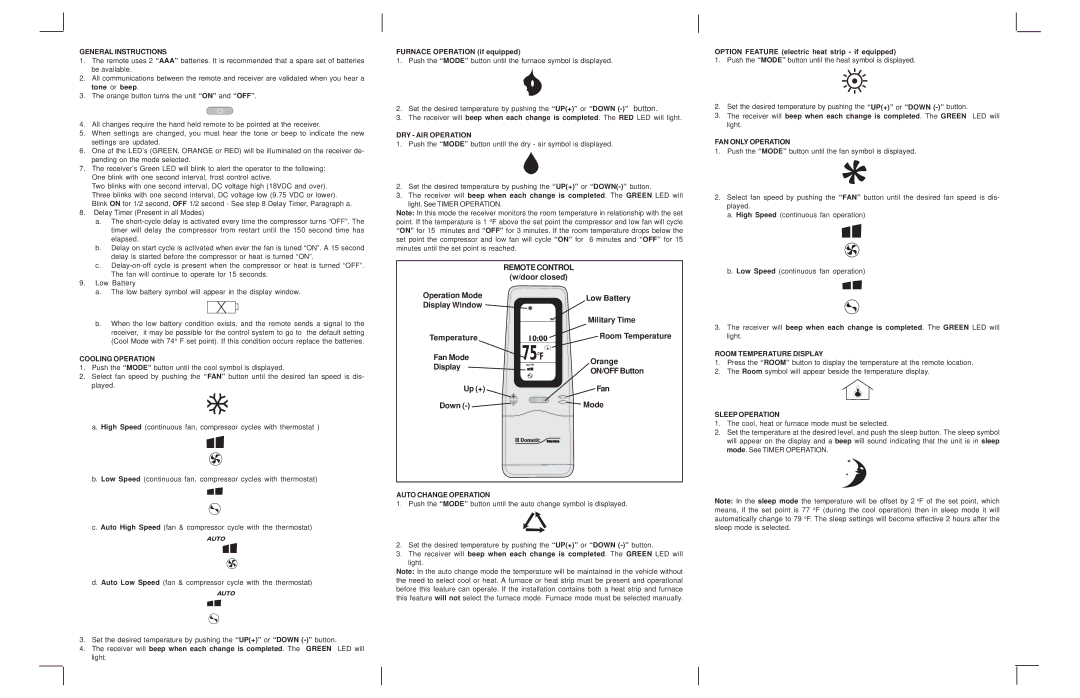
GENERAL INSTRUCTIONS

1.The remote uses 2 “AAA” batteries. It is recommended that a spare set of batteries be available.

2.All communications between the remote and receiver are validated when you hear a tone or beep.

3.The orange button turns the unit “ON” and “OFF”.

4.All changes require the hand held remote to be pointed at the receiver.

5.When settings are changed, you must hear the tone or beep to indicate the new settings are updated.

6.One of the LED’s (GREEN, ORANGE or RED) will be illuminated on the receiver de- pending on the mode selected.

7.The receiver’s Green LED will blink to alert the operator to the following: One blink with one second interval, frost control active.

Two blinks with one second interval, DC voltage high (18VDC and over). Three blinks with one second interval, DC voltage low (9.75 VDC or lower). Blink ON for 1/2 second, OFF 1/2 second - See step 8 Delay Timer, Paragraph a.

8.Delay Timer (Present in all Modes)

a.The short-cycle delay is activated every time the compressor turns “OFF”. The timer will delay the compressor from restart until the 150 second time has elapsed.

b.Delay on start cycle is activated when ever the fan is tuned “ON”. A 15 second delay is started before the compressor or heat is turned “ON”.

c.Delay-on-off cycle is present when the compressor or heat is turned “OFF”. The fan will continue to operate for 15 seconds.

9.Low Battery

a.The low battery symbol will appear in the display window.

b.When the low battery condition exists, and the remote sends a signal to the receiver, it may be possible for the control system to go to the default setting (Cool Mode with 74° F set point). If this condition occurs replace the batteries.

COOLING OPERATION

1.Push the “MODE” button until the cool symbol is displayed.

2.Select fan speed by pushing the “FAN” button until the desired fan speed is dis- played.

a.High Speed (continuous fan, compressor cycles with thermostat )

b.Low Speed (continuous fan, compressor cycles with thermostat)

c.Auto High Speed (fan & compressor cycle with the thermostat)

AUTO

d. Auto Low Speed (fan & compressor cycle with the thermostat)

AUTO

3.Set the desired temperature by pushing the “UP(+)” or “DOWN (-)”button.

4.The receiver will beep when each change is completed. The GREEN LED will light.

FURNACE OPERATION (if equipped)

1.Push the “MODE” button until the furnace symbol is displayed.

2.Set the desired temperature by pushing the “UP(+)” or “DOWN (-)”button.

3.The receiver will beep when each change is completed. The RED LED will light.

DRY - AIR OPERATION

1.Push the “MODE” button until the dry - air symbol is displayed.

2.Set the desired temperature by pushing the “UP(+)” or “DOWN(-)”button.

3.The receiver will beep when each change is completed. The GREEN LED will light. See TIMER OPERATION.

Note: In this mode the receiver monitors the room temperature in relationship with the set point. If the temperature is 1 °F above the set point the compressor and low fan will cycle “ON” for 15 minutes and “OFF” for 3 minutes. If the room temperature drops below the set point the compressor and low fan will cycle “ON” for 6 minutes and “OFF” for 15 minutes until the set point is reached.

REMOTE CONTROL

(w/door closed)

Operation Mode


Low Battery

Display Window


Military Time

Temperature

10:00


Room Temperature

Fan Mode

75°F


Orange

Display

AUTO


ON/OFF Button


Up (+)


Fan


+


Down (-)

-

MODE

Mode


AUTO CHANGE OPERATION

1.Push the “MODE” button until the auto change symbol is displayed.

2.Set the desired temperature by pushing the “UP(+)” or “DOWN (-)”button.

3.The receiver will beep when each change is completed. The GREEN LED will light.

Note: In the auto change mode the temperature will be maintained in the vehicle without the need to select cool or heat. A furnace or heat strip must be present and operational before this feature can operate. If the installation contains both a heat strip and furnace this feature will not select the furnace mode. Furnace mode must be selected manually.

OPTION FEATURE (electric heat strip - if equipped)

1.Push the “MODE” button until the heat symbol is displayed.

2.Set the desired temperature by pushing the “UP(+)” or “DOWN (-)”button.

3.The receiver will beep when each change is completed. The GREEN LED will light.

FAN ONLY OPERATION

1.Push the “MODE” button until the fan symbol is displayed.

2.Select fan speed by pushing the “FAN” button until the desired fan speed is dis- played.

a. High Speed (continuous fan operation)

b. Low Speed (continuous fan operation)

3.The receiver will beep when each change is completed. The GREEN LED will light.

ROOM TEMPERATURE DISPLAY

1.Press the “ROOM” button to display the temperature at the remote location.

2.The Room symbol will appear beside the temperature display.

SLEEP OPERATION

1.The cool, heat or furnace mode must be selected.

2.Set the temperature at the desired level, and push the sleep button. The sleep symbol will appear on the display and a beep will sound indicating that the unit is in sleep mode. See TIMER OPERATION.

Note: In the sleep mode the temperature will be offset by 2 oF of the set point, which means, if the set point is 77 oF (during the cool operation) then in sleep mode it will automatically change to 79 oF. The sleep settings will become effective 2 hours after the sleep mode is selected.

Page 2
Image 2
Dometic REMOTE COMFORT CONTROL manual General Instructions, Cooling Operation, DRY AIR Operation, Auto Change Operation

REMOTE COMFORT CONTROL specifications

The Dometic Remote Comfort Control is a cutting-edge solution designed to enhance user experience in managing climate control systems in recreational vehicles (RVs), boats, and other mobile spaces. This innovative control system offers a user-friendly interface that simplifies the process of regulating temperature, air conditioning, and heating, ensuring a comfortable environment regardless of the outdoor conditions.

One of the standout features of the Dometic Remote Comfort Control is its intuitive touchscreen interface. With vibrant graphics and easy-to-navigate menus, users can effortlessly adjust settings to meet their comfort preferences. Additionally, the system supports multiple zones, allowing users to customize temperatures in different areas of their RV or boat, ensuring optimal comfort for everyone on board.

In terms of technology, the Dometic Remote Comfort Control utilizes Bluetooth connectivity, enabling users to control their climate systems from their smartphones or tablets. The accompanying mobile app offers remote access to adjust the settings while providing notifications and diagnostics, which allows users to stay informed about their climate control system's performance. This level of integration significantly enhances the user experience by eliminating the need to be physically present in the vehicle or vessel to make adjustments.

Efficiency is another hallmark of the Dometic Remote Comfort Control. Designed with energy-saving features, the system monitors usage patterns and adjusts operation accordingly, helping users to conserve energy and reduce costs. Moreover, the control system is compatible with Dometic's advanced air conditioning and heating units, ensuring optimal performance and synergy between devices.

The Dometic Remote Comfort Control is also built to withstand the rigors of mobile life. It is constructed with durable materials, ensuring longevity and resistance to the elements, making it an ideal choice for those who frequently travel. Its sleek design seamlessly integrates with existing interiors, providing a modern aesthetic while maintaining functionality.

In summary, the Dometic Remote Comfort Control redefines convenience in climate management for mobile applications. With features such as a user-friendly touchscreen, Bluetooth connectivity, multiple zones, and energy efficiency, this innovative control system is designed to meet the diverse needs of users, ensuring a comfortable living environment on the go. The combination of advanced technology and practical design makes it an indispensable tool for those seeking to elevate their outdoor experiences.