6![]()
![]() EN
EN![]()
![]()
![]()
![]()
![]()
![]()
![]()
![]()
![]()
![]()
![]()
![]()
![]()
![]()
![]()
![]()
![]()
![]()
![]()
![]()
![]()
![]()
![]()
![]()
![]()
![]()
![]()
![]()
![]()
![]()
![]()
![]()
![]()
![]()
![]()
![]()
![]()
![]()
![]()
![]()
![]()
![]()
![]()
![]()
![]()
![]()


 GETTING
 STARTED


Power
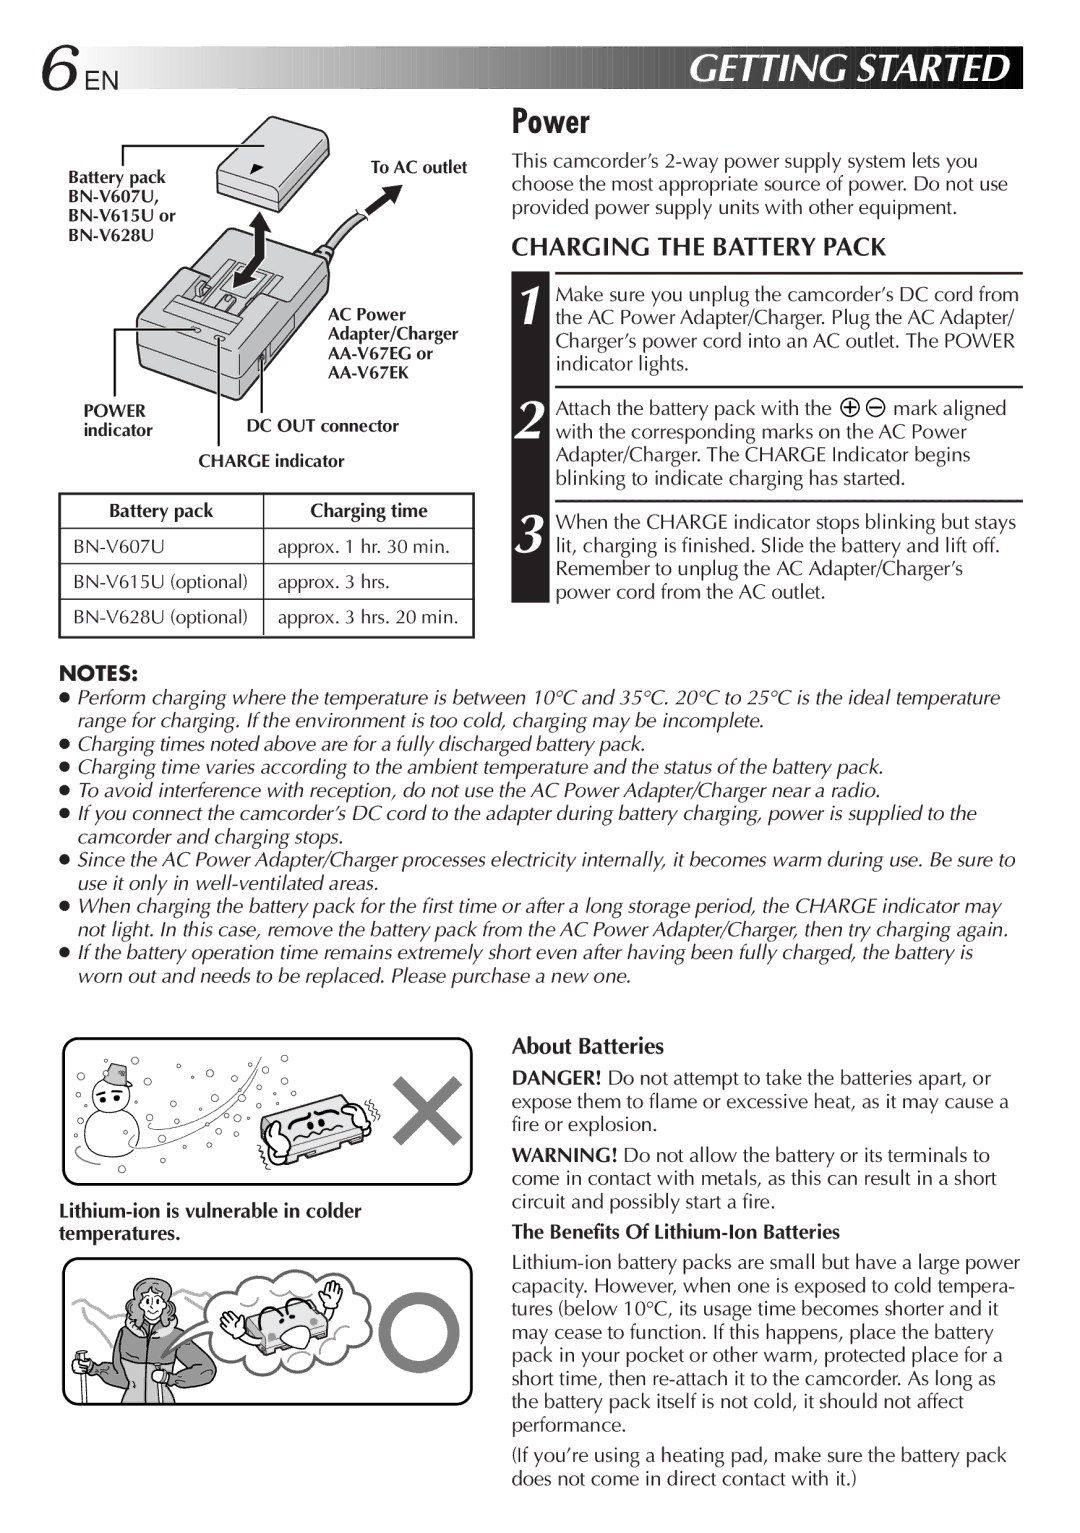
Battery pack
POWER indicator
To AC outlet
AC Power
Adapter/Charger
AA-V67EK
DC OUT connector
CHARGE indicator
This camcorder’s
CHARGING THE BATTERY PACK
1 Make sure you unplug the camcorder’s DC cord from the AC Power Adapter/Charger. Plug the AC Adapter/ Charger’s power cord into an AC outlet. The POWER indicator lights.
2 Attach the battery pack with the ![]()
![]() mark aligned with the corresponding marks on the AC Power Adapter/Charger. The CHARGE Indicator begins blinking to indicate charging has started.
mark aligned with the corresponding marks on the AC Power Adapter/Charger. The CHARGE Indicator begins blinking to indicate charging has started.
Battery pack | Charging time |
|
|
approx. 1 hr. 30 min. | |
|
|
approx. 3 hrs. | |
|
|
approx. 3 hrs. 20 min. | |
|
|
3 When the CHARGE indicator stops blinking but stays lit, charging is finished. Slide the battery and lift off. Remember to unplug the AC Adapter/Charger’s power cord from the AC outlet.
NOTES:
●Perform charging where the temperature is between 10°C and 35°C. 20°C to 25°C is the ideal temperature range for charging. If the environment is too cold, charging may be incomplete.
●Charging times noted above are for a fully discharged battery pack.
●Charging time varies according to the ambient temperature and the status of the battery pack.
●To avoid interference with reception, do not use the AC Power Adapter/Charger near a radio.
●If you connect the camcorder’s DC cord to the adapter during battery charging, power is supplied to the camcorder and charging stops.
●Since the AC Power Adapter/Charger processes electricity internally, it becomes warm during use. Be sure to use it only in
●When charging the battery pack for the first time or after a long storage period, the CHARGE indicator may not light. In this case, remove the battery pack from the AC Power Adapter/Charger, then try charging again.
●If the battery operation time remains extremely short even after having been fully charged, the battery is worn out and needs to be replaced. Please purchase a new one.
Lithium-ion is vulnerable in colder temperatures.
About Batteries
DANGER! Do not attempt to take the batteries apart, or expose them to flame or excessive heat, as it may cause a fire or explosion.
WARNING! Do not allow the battery or its terminals to come in contact with metals, as this can result in a short circuit and possibly start a fire.
The Benefits Of Lithium-Ion Batteries
(If you’re using a heating pad, make sure the battery pack does not come in direct contact with it.)