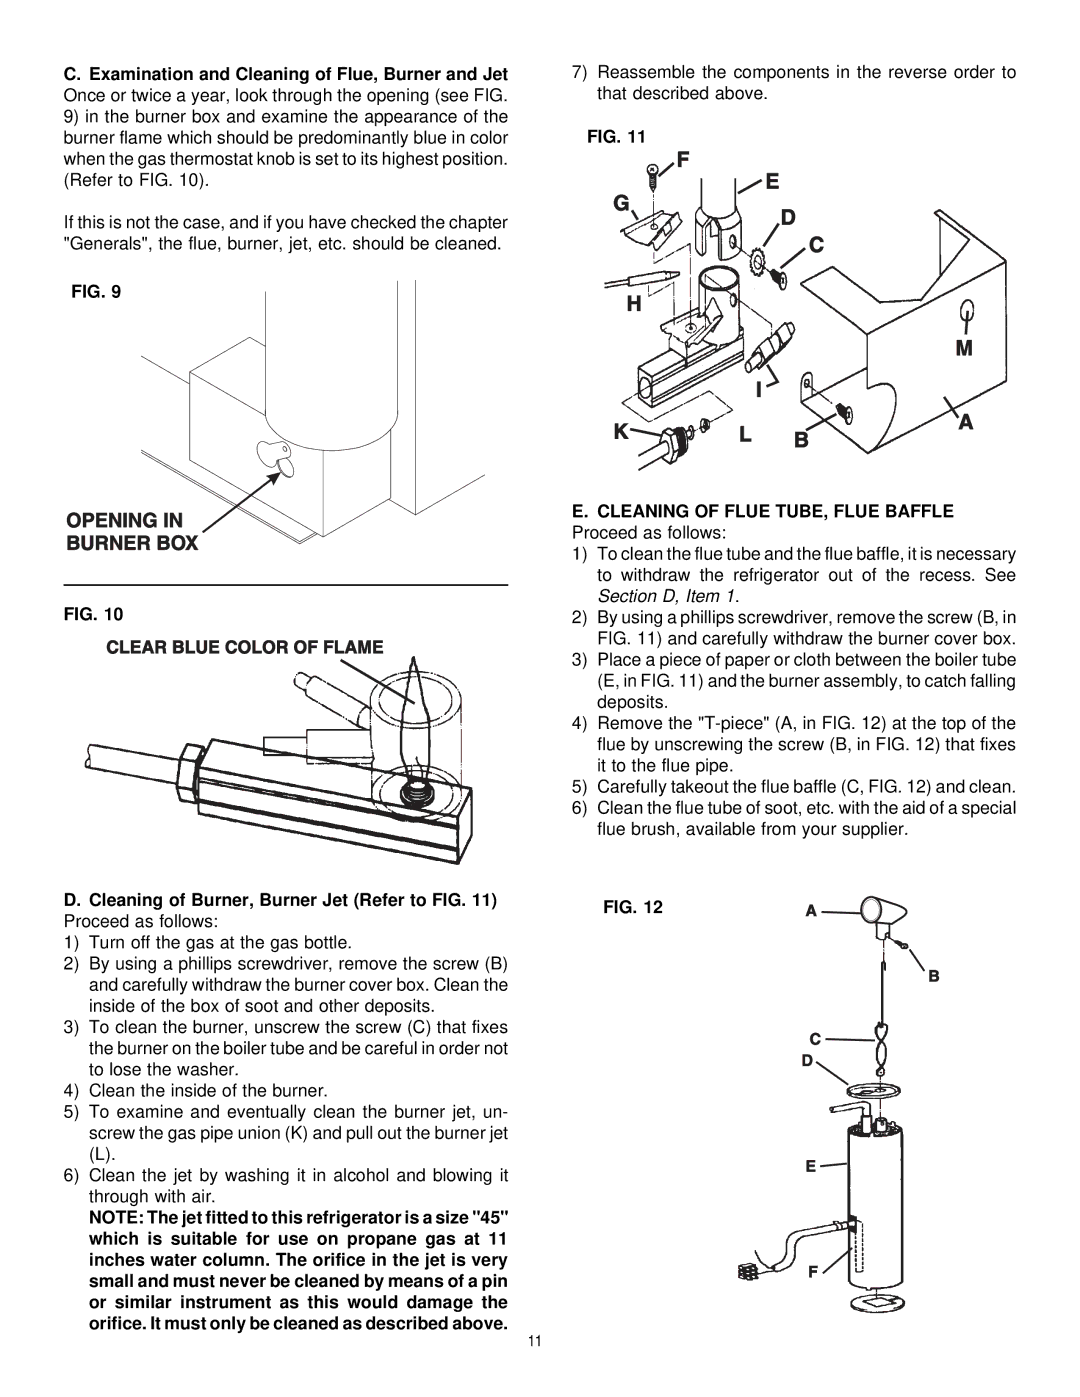
C.Examination and Cleaning of Flue, Burner and Jet Once or twice a year, look through the opening (see FIG. 9) in the burner box and examine the appearance of the burner flame which should be predominantly blue in color when the gas thermostat knob is set to its highest position. (Refer to FIG. 10).
If this is not the case, and if you have checked the chapter "Generals", the flue, burner, jet, etc. should be cleaned.
FIG. 9
FIG. 10
D.Cleaning of Burner, Burner Jet (Refer to FIG. 11) Proceed as follows:
1) Turn off the gas at the gas bottle.
2) By using a phillips screwdriver, remove the screw (B) and carefully withdraw the burner cover box. Clean the inside of the box of soot and other deposits.
3) To clean the burner, unscrew the screw (C) that fixes the burner on the boiler tube and be careful in order not to lose the washer.
4) Clean the inside of the burner.
5) To examine and eventually clean the burner jet, un- screw the gas pipe union (K) and pull out the burner jet
(L).
6) Clean the jet by washing it in alcohol and blowing it through with air.
NOTE: The jet fitted to this refrigerator is a size "45" which is suitable for use on propane gas at 11 inches water column. The orifice in the jet is very small and must never be cleaned by means of a pin or similar instrument as this would damage the orifice. It must only be cleaned as described above.
7)Reassemble the components in the reverse order to that described above.
FIG. 11
E.CLEANING OF FLUE TUBE, FLUE BAFFLE Proceed as follows:
1) To clean the flue tube and the flue baffle, it is necessary to withdraw the refrigerator out of the recess. See Section D, Item 1.
2) By using a phillips screwdriver, remove the screw (B, in FIG. 11) and carefully withdraw the burner cover box.
3) Place a piece of paper or cloth between the boiler tube (E, in FIG. 11) and the burner assembly, to catch falling deposits.
4) Remove the
5) Carefully takeout the flue baffle (C, FIG. 12) and clean.
6) Clean the flue tube of soot, etc. with the aid of a special flue brush, available from your supplier.
FIG. 12
11
