GETTING TO KNOW YOUR
CORDLESS DRILL/CHARGER
| ✴✌ | ✮✌ |
|
|
|
| |
✬✌ |
| ✱✌ | ✭✌ |
|
| ||
|
|
| |
|
| ✫✌ |
|
|
| ✪✌ |
|
✲✌ |
|
|
|
✳✌ |
|
|
|
|
|
| ✯✌ |
|
| ✰✌ | FIG.B |
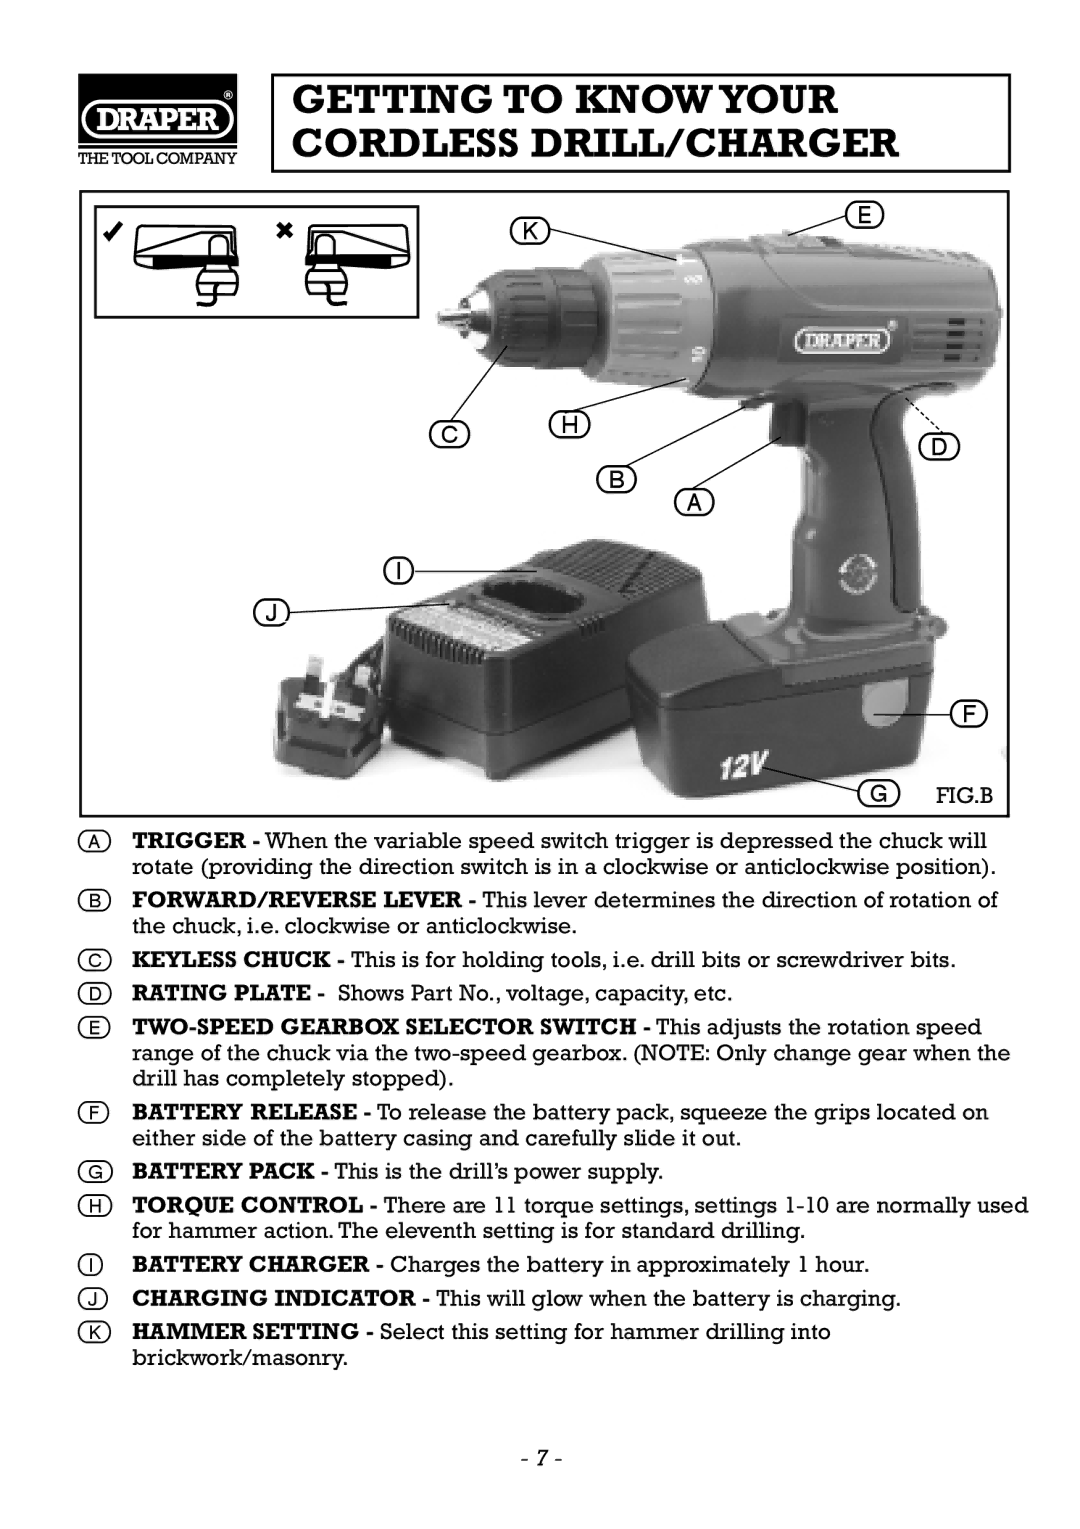
✪✌ TRIGGER - When the variable speed switch trigger is depressed the chuck will rotate (providing the direction switch is in a clockwise or anticlockwise position).
✫✌ FORWARD/REVERSE LEVER - This lever determines the direction of rotation of the chuck, i.e. clockwise or anticlockwise.
✬✌ KEYLESS CHUCK - This is for holding tools, i.e. drill bits or screwdriver bits. ✭✌ RATING PLATE - Shows Part No., voltage, capacity, etc.
✮✌
✯✌ BATTERY RELEASE - To release the battery pack, squeeze the grips located on either side of the battery casing and carefully slide it out.
✰✌ BATTERY PACK - This is the drill’s power supply.
✱✌ TORQUE CONTROL - There are 11 torque settings, settings
✲✌ BATTERY CHARGER - Charges the battery in approximately 1 hour. ✳✌ CHARGING INDICATOR - This will glow when the battery is charging.
✴✌ HAMMER SETTING - Select this setting for hammer drilling into brickwork/masonry.
- 7 -
