commode assembly
instructions and precautions
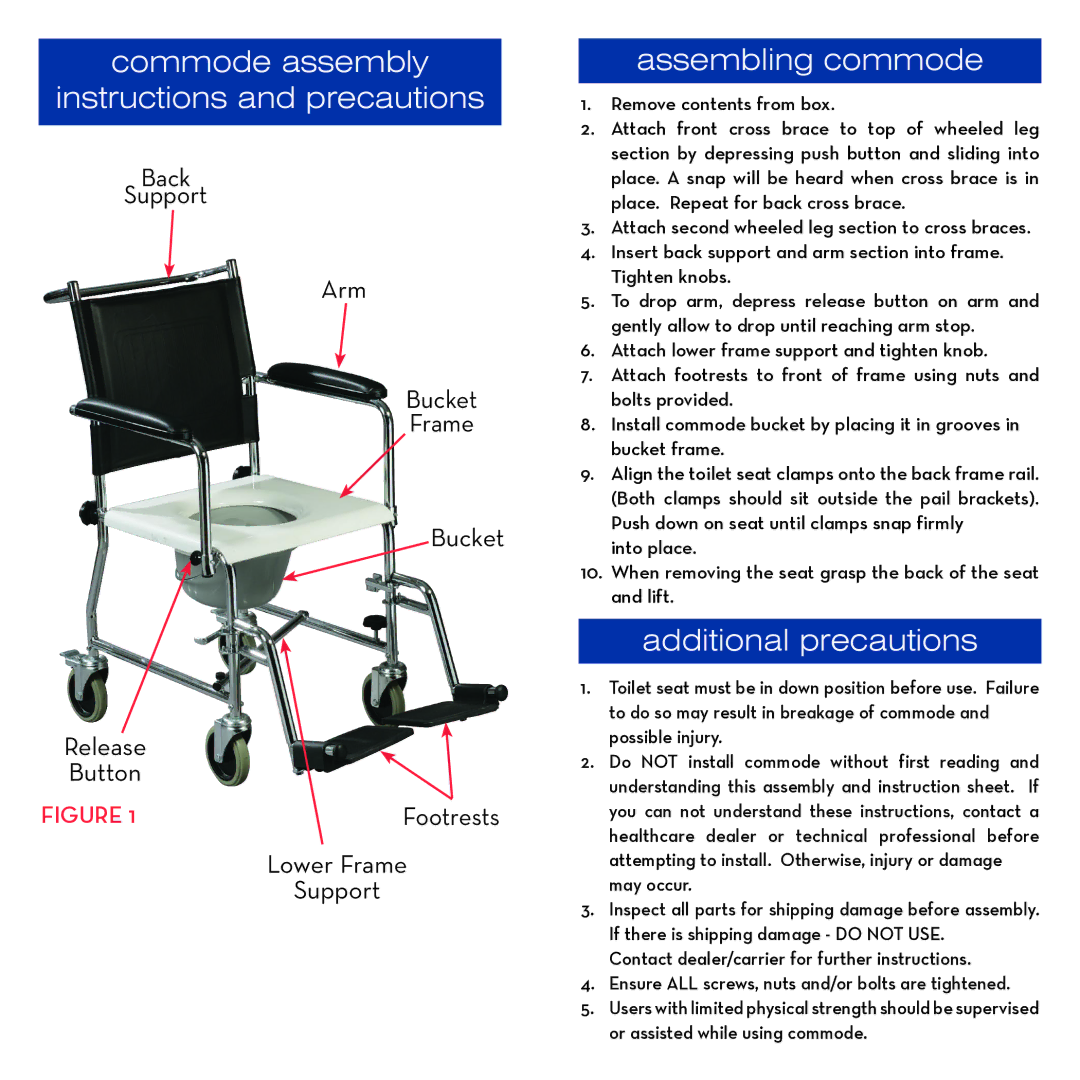
Back
Support
Arm
Bucket
Frame
Bucket
Release
Button
FIGURE 1 | Footrests |
| Lower Frame |
| Support |
assembling commode
1.Remove contents from box.
2.Attach front cross brace to top of wheeled leg section by depressing push button and sliding into place. A snap will be heard when cross brace is in place. Repeat for back cross brace.
3.Attach second wheeled leg section to cross braces.
4.Insert back support and arm section into frame. Tighten knobs.
5.To drop arm, depress release button on arm and gently allow to drop until reaching arm stop.
6.Attach lower frame support and tighten knob.
7.Attach footrests to front of frame using nuts and bolts provided.
8.Install commode bucket by placing it in grooves in bucket frame.
9.Align the toilet seat clamps onto the back frame rail. (Both clamps should sit outside the pail brackets). Push down on seat until clamps snap firmly
into place.
10.When removing the seat grasp the back of the seat and lift.
additional precautions
1.Toilet seat must be in down position before use. Failure to do so may result in breakage of commode and possible injury.
2.Do NOT install commode without first reading and understanding this assembly and instruction sheet. If you can not understand these instructions, contact a healthcare dealer or technical professional before attempting to install. Otherwise, injury or damage may occur.
3.Inspect all parts for shipping damage before assembly. If there is shipping damage - DO NOT USE.
Contact dealer/carrier for further instructions.
4.Ensure ALL screws, nuts and/or bolts are tightened.
5.Users with limited physical strength should be supervised or assisted while using commode.