CONNECTION Natural Gas Grills
IMPORTANT
Installation must conform with local codes or, in the absence of local codes, with either the National Fuel Gas Code, ANSI Z223.1/NFPA 54, or CAN/CGA- B149.1; Natural Gas and Propane Installation Code.
IMPORTANT
When connecting or replacing any gas pipe or fi ttings, all joints must be sealed with
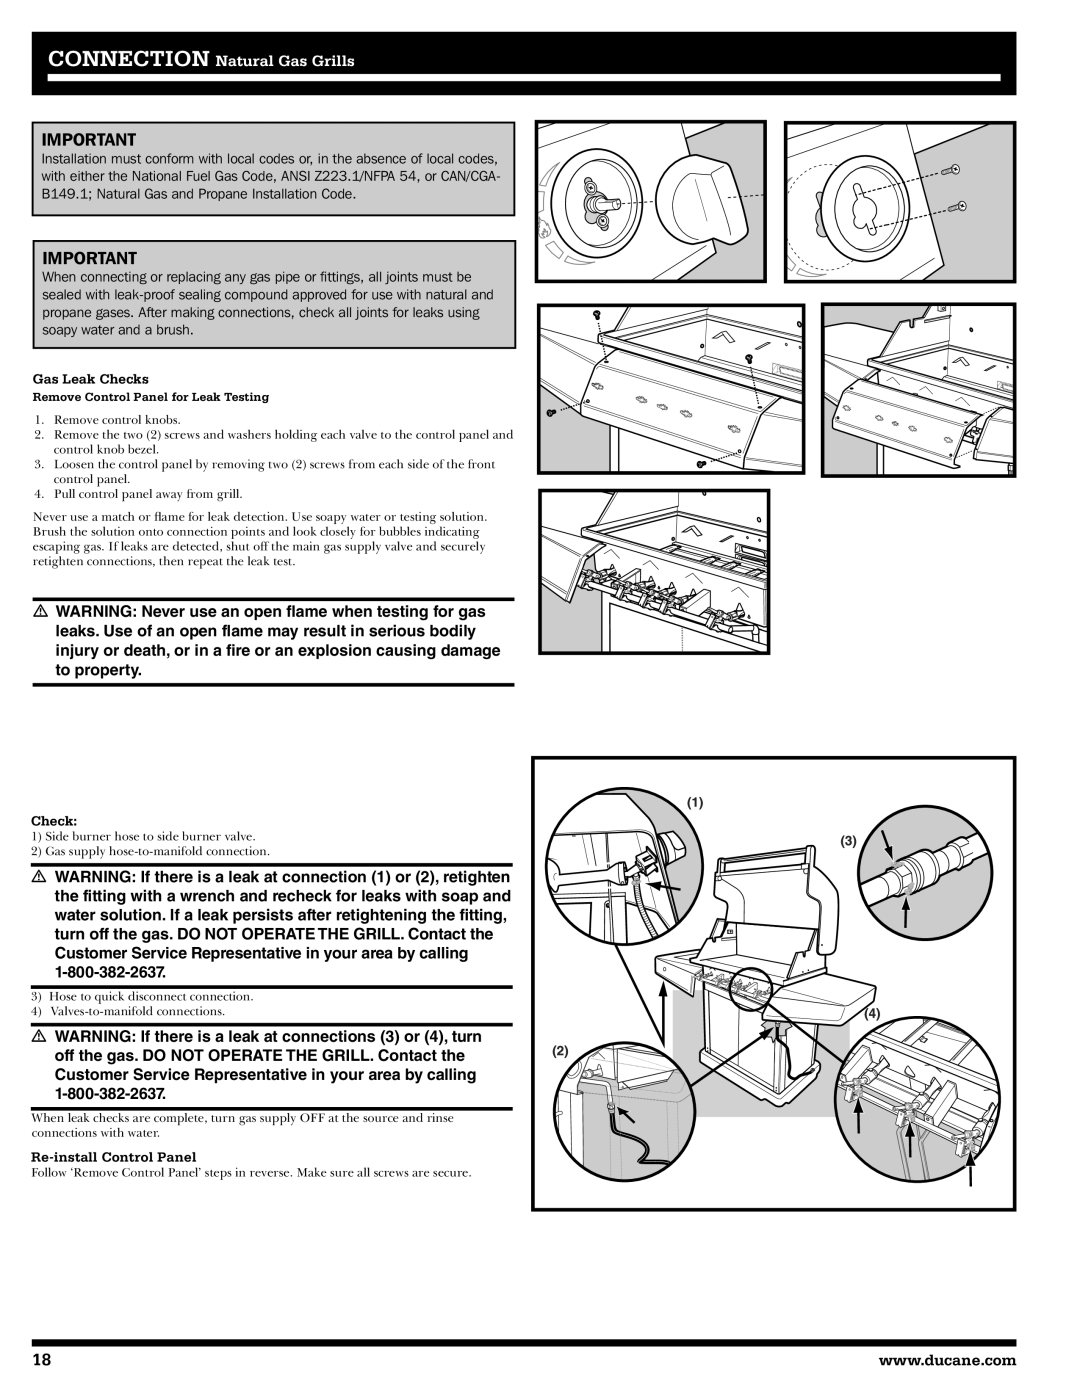
Gas Leak Checks
Remove Control Panel for Leak Testing
1.Remove control knobs.
2.Remove the two (2) screws and washers holding each valve to the control panel and control knob bezel.
3.Loosen the control panel by removing two (2) screws from each side of the front control panel.
4.Pull control panel away from grill.
Never use a match or flame for leak detection. Use soapy water or testing solution. Brush the solution onto connection points and look closely for bubbles indicating escaping gas. If leaks are detected, shut off the main gas supply valve and securely retighten connections, then repeat the leak test.
WARNING: Never use an open flame when testing for gas leaks. Use of an open flame may result in serious bodily injury or death, or in a fire or an explosion causing damage to property.
Check: |
|
1) Side burner hose to side burner valve. |
|
2) Gas supply |
|
WARNING: If there is a leak at connection (1) or (2), retighten |
|
the fitting with a wrench and recheck for leaks with soap and |
|
water solution. If a leak persists after retightening the fitting, |
|
turn off the gas. DO NOT OPERATE THE GRILL. Contact the |
|
Customer Service Representative in your area by calling |
|
| |
3) Hose to quick disconnect connection. |
|
4) |
|
WARNING: If there is a leak at connections (3) or (4), turn |
|
off the gas. DO NOT OPERATE THE GRILL. Contact the |
|
Customer Service Representative in your area by calling |
|
| |
When leak checks are complete, turn gas supply OFF at the source and rinse |
|
connections with water. |
|
|
|
Follow ‘Remove Control Panel’ steps in reverse. Make sure all screws are secure. |
|
18 | www.ducane.com |
