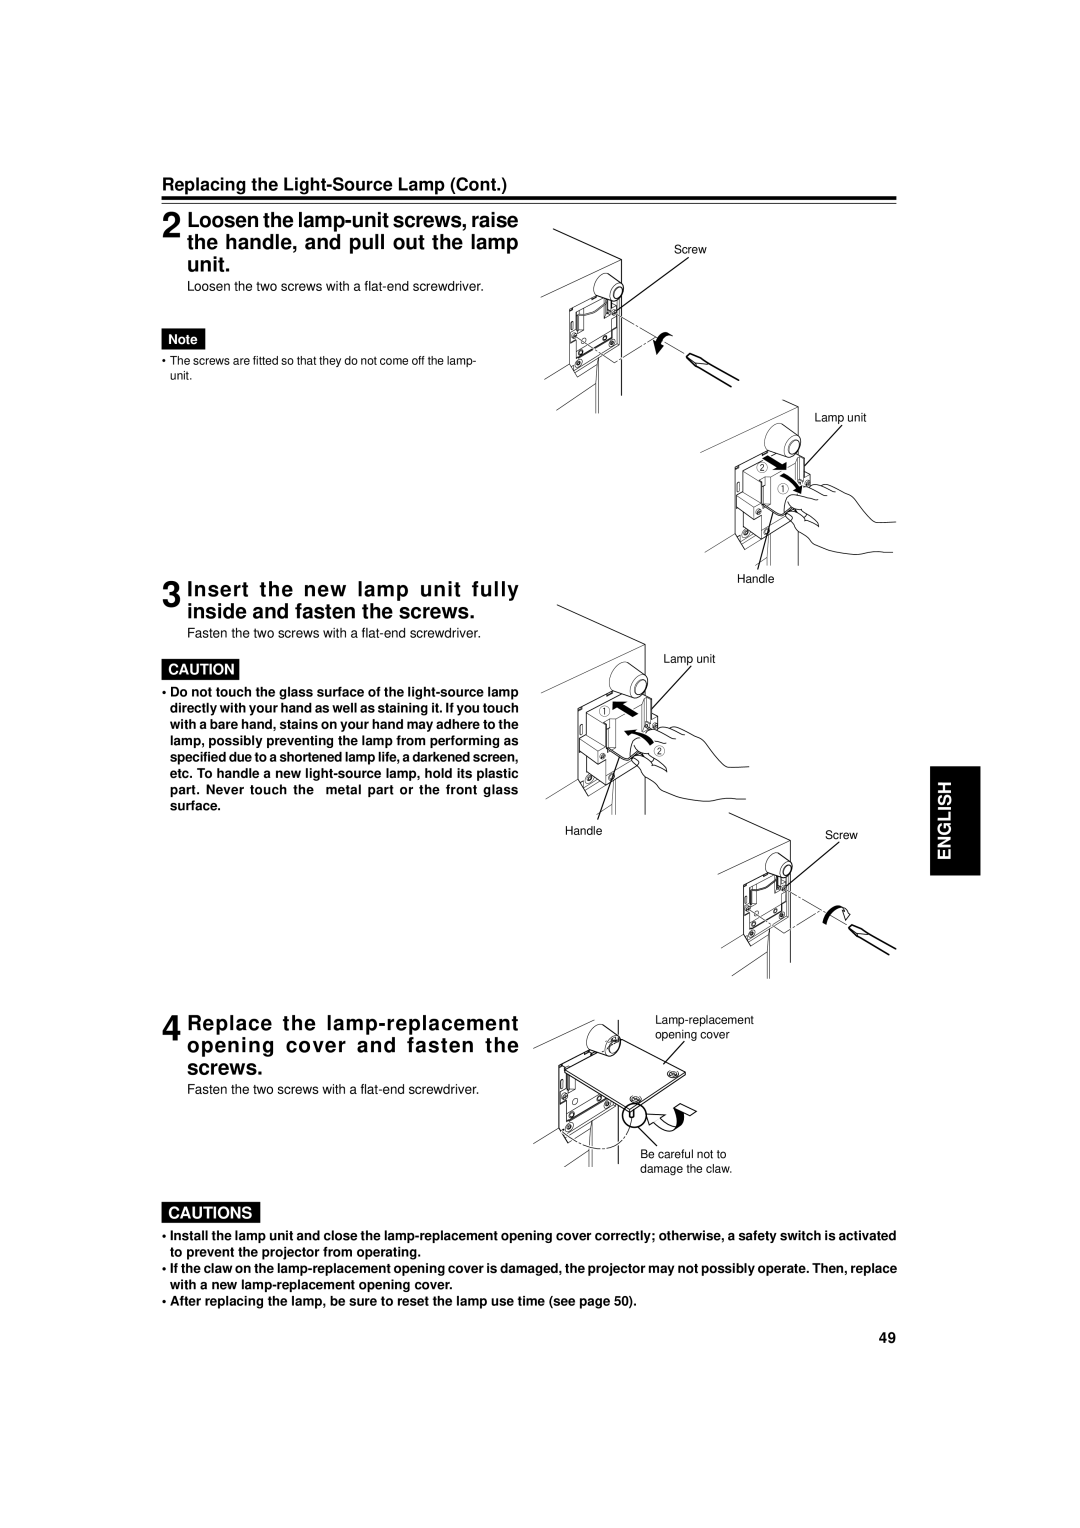
Dukane 9015 manual Insert the new lamp unit fully inside and fasten the screws, Handle Lamp unit

Models: 9015

1 57
Download 57 pages 29.67 Kb
Page 49
Image 49

Replacing the Light-Source Lamp (Cont.)

2 Loosen the lamp-unit screws, raise the handle, and pull out the lamp unit.

Loosen the two screws with a flat-end screwdriver.

Note

The screws are fitted so that they do not come off the lamp- unit.

Screw

Lamp unit

2

1

3 Insert the new lamp unit fully inside and fasten the screws.

Fasten the two screws with a flat-end screwdriver.

CAUTION

Do not touch the glass surface of the light-source lamp directly with your hand as well as staining it. If you touch with a bare hand, stains on your hand may adhere to the lamp, possibly preventing the lamp from performing as specified due to a shortened lamp life, a darkened screen, etc. To handle a new light-source lamp, hold its plastic part. Never touch the metal part or the front glass surface.

4 Replace the lamp-replacement opening cover and fasten the screws.

Fasten the two screws with a flat-end screwdriver.

Handle

Lamp unit

1

2

Handle

Screw


Lamp-replacement opening cover

Be careful not to damage the claw.

ENGLISH

CAUTIONS

Install the lamp unit and close the lamp-replacement opening cover correctly; otherwise, a safety switch is activated to prevent the projector from operating.

If the claw on the lamp-replacement opening cover is damaged, the projector may not possibly operate. Then, replace with a new lamp-replacement opening cover.

After replacing the lamp, be sure to reset the lamp use time (see page 50).

49

Page 49
Image 49
Dukane 9015 Insert the new lamp unit fully inside and fasten the screws, Fasten the two screws with a flat-end screwdriver