
Electronic Date/Time Stamper specifications
The Dymo Electronic Date/Time Stamper is an innovative and versatile tool that offers a modern solution for marking documents, packages, and other items with essential date and time information. This electronic stamper is designed for ease of use, making it an ideal companion for offices, warehouses, and other environments where accurate date documentation is critical.One of the standout features of the Dymo Electronic Date/Time Stamper is its ability to customize date formats. Users can select from various date styles, enabling the stamper to accommodate different regional preferences and organizational needs. This flexibility allows businesses to align their stamping practices with compliance standards while ensuring that all date-related information is clear and legible.
The device employs advanced thermal printing technology, which ensures sharp, high-quality impressions every time. This method not only delivers durable and smudge-proof prints but also minimizes wear and tear on the device, promoting longevity. The integrated ink roller is easy to replace, ensuring that users can maintain optimal performance without hassle.
Convenience is a significant characteristic of the Dymo Electronic Date/Time Stamper. It features a user-friendly interface with a simple control panel, allowing users to quickly set the desired date and time. The large display ensures that information can be read clearly, further enhancing efficiency in fast-paced work environments.
Another important feature is its robust design. The Dymo Electronic Date/Time Stamper is built to endure the rigors of everyday use, making it suitable for both office and industrial settings. Its compact size means it can be easily stored or transported, while its durable construction ensures that it can handle various environmental conditions.
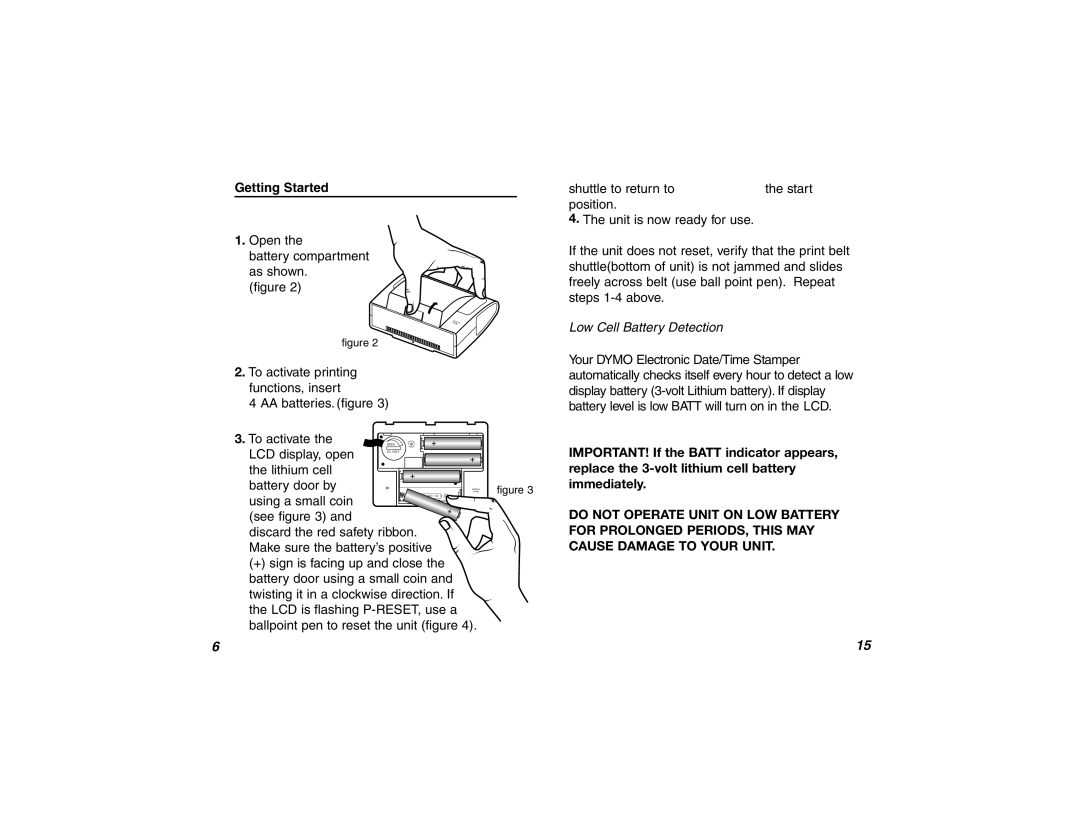
The electronic nature of this stamper also means that it can be integrated with other systems or used independently according to user needs. It can be powered by batteries or plugged into an electrical source, offering a versatile power solution for different operational requirements.
In summary, the Dymo Electronic Date/Time Stamper is a valuable tool for any organization that requires reliable and customizable date documentation. With its thermal printing technology, user-friendly controls, and durable design, it stands out as an efficient and effective solution for stamping dates and times across various applications. Whether used in offices, shipping departments, or manufacturing facilities, this electronic stamper simplifies the task of date marking, ultimately enhancing productivity and accuracy in documentation processes.