Installing your UPS
| Component | Description |
|
|
|
10 | Vertical stand | Position this end of your UPS on the bottom |
|
| so you can stand your UPS vertically. |
|
|
|
11 | COAX/Cable/DDS | Plug your DSL or cable modem, CATV |
| jacks | converter, or DSS receiver into these jacks. |
|
|
|
Installing your UPS
You can use your UPS immediately. The first time you plug in your UPS, turn it on and leave it connected to AC power for at least 16 hours to fully charge the battery.
To install your UPS:
1Before you plug in and turn on your UPS, plug your computer, monitor, and external storage devices into the
Plug your other devices into the
Caution: Do not plug a laser printer, paper shredder, copier, space heater, vacuum, or other large electrical devices into your UPS. The amount of electricity used by these types of devices could overload and possibly damage your UPS.
2If you have a network connection, plug the network cable into the IN communication jack on your UPS, then plug the telephone cable into the OUT communication jack on your UPS.
3Plug your UPS into a
Caution: Do not plug your UPS into an extension cord, outlet strip, or surge protector.
4Press the power switch on your UPS. The power indicator turns on and your UPS beeps one time.
Caution: If your UPS detects an overload, your UPS sounds an audible alarm and makes one long beep. To correct this problem, turn off your UPS, then unplug at least one piece of equipment from the
Note: To maintain optimal battery charge, leave the UPS plugged into an AC outlet at all times.
Note: To store your UPS for an extended period, cover it and store it with the battery fully charged. If you store it for an extended period of time, recharge the battery every three months to make sure that the battery retains a charge.
3
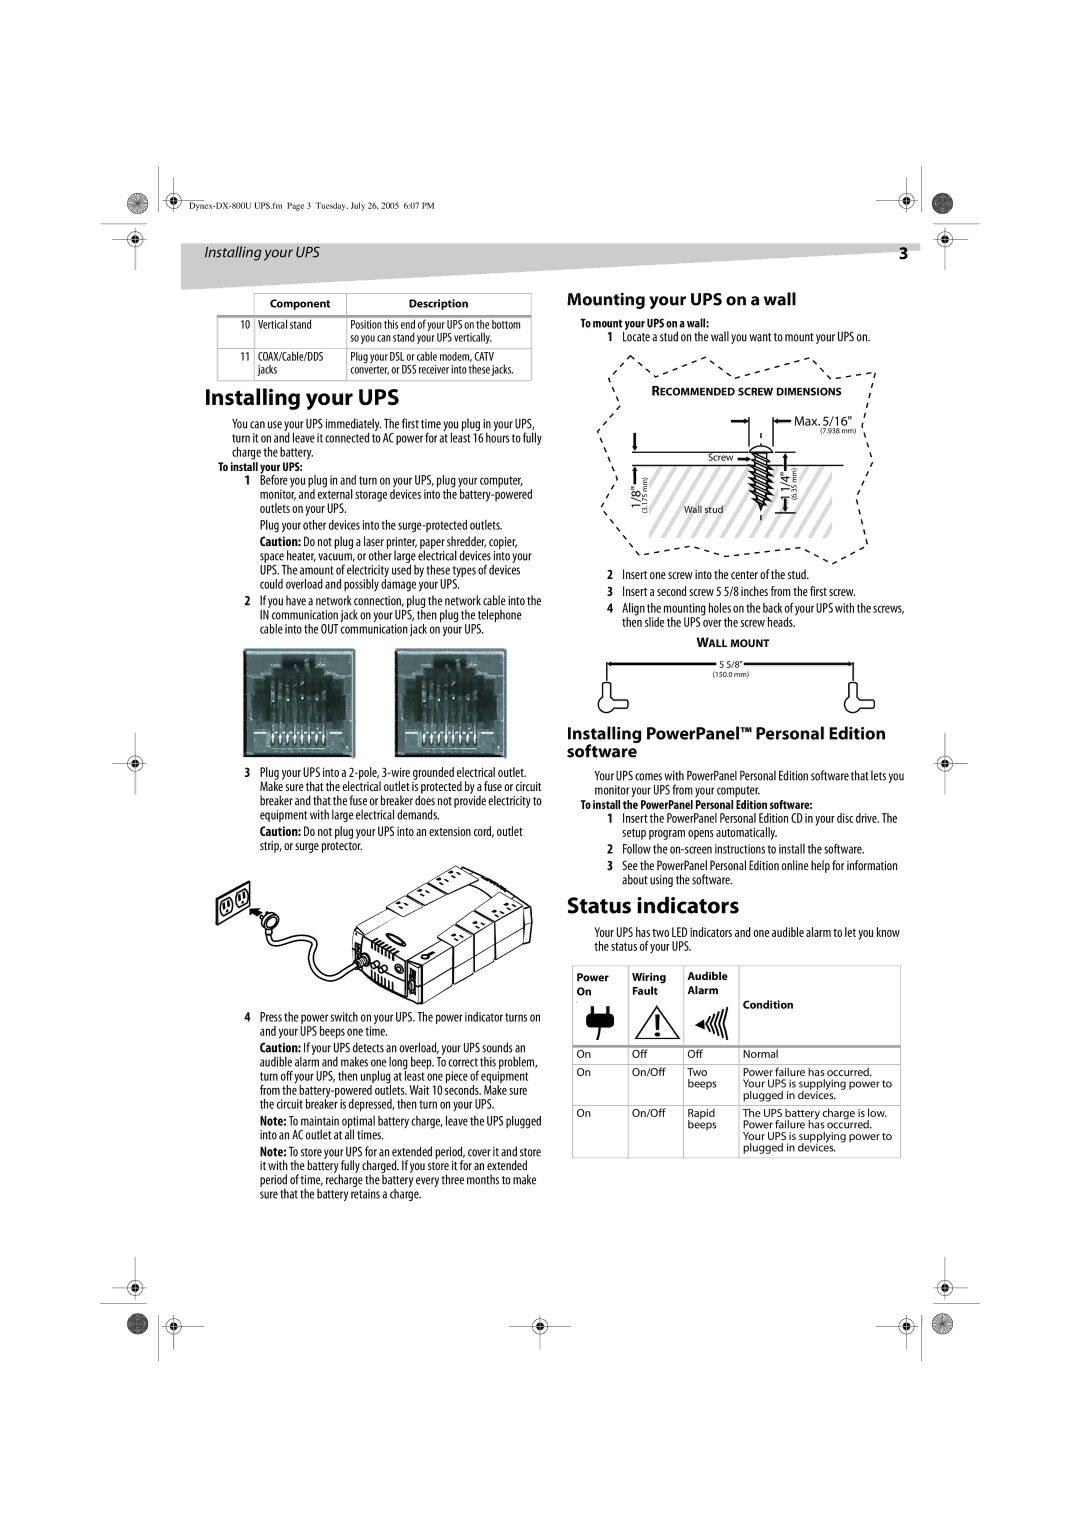
Mounting your UPS on a wall
To mount your UPS on a wall:
1Locate a stud on the wall you want to mount your UPS on.
RECOMMENDED SCREW DIMENSIONS
|
| Max. 5/16" |
|
| (7.938 mm) |
| Screw |
|
1/8" (3.175 mm) | Wall stud | 1 1/4" (6.35 mm) |
2Insert one screw into the center of the stud.
3Insert a second screw 5 5/8 inches from the first screw.
4Align the mounting holes on the back of your UPS with the screws, then slide the UPS over the screw heads.
WALL MOUNT
![]() 5 5/8"
5 5/8" ![]()
(150.0 mm)
Installing PowerPanel™ Personal Edition software
Your UPS comes with PowerPanel Personal Edition software that lets you monitor your UPS from your computer.
To install the PowerPanel Personal Edition software:
1Insert the PowerPanel Personal Edition CD in your disc drive. The setup program opens automatically.
2Follow the
3See the PowerPanel Personal Edition online help for information about using the software.
Status indicators
Your UPS has two LED indicators and one audible alarm to let you know the status of your UPS.
Power | Wiring | Audible |
|
|
|
| ||
On | Fault | Alarm | Condition |
|
| |||
P |
|
|
|
| ||||
|
|
|
|
|
|
|
|
|
|
|
|
|
|
|
|
|
|
|
|
|
|
|
|
|
|
|
On | Off | Off | Normal |
|
| |||
|
|
|
|
|
|
|
|
|
On | On/Off | Two | Power failure has occurred. |
|
| |||
|
|
|
| beeps | Your UPS is supplying power to |
|
| |
|
|
|
|
| plugged in devices. |
|
| |
|
|
|
|
|
|
|
|
|
On | On/Off | Rapid | The UPS battery charge is low. |
|
| |||
|
|
|
| beeps | Power failure has occurred. |
|
| |
|
|
|
|
| Your UPS is supplying power to |
|
| |
|
|
|
|
| plugged in devices. |
|
| |
|
|
|
|
|
|
|
|
|
|
|
|
|
|
|
|
|
|
|
|
|
|
|
|
|
|
|
|
|
|
|
|
|
|
|
|