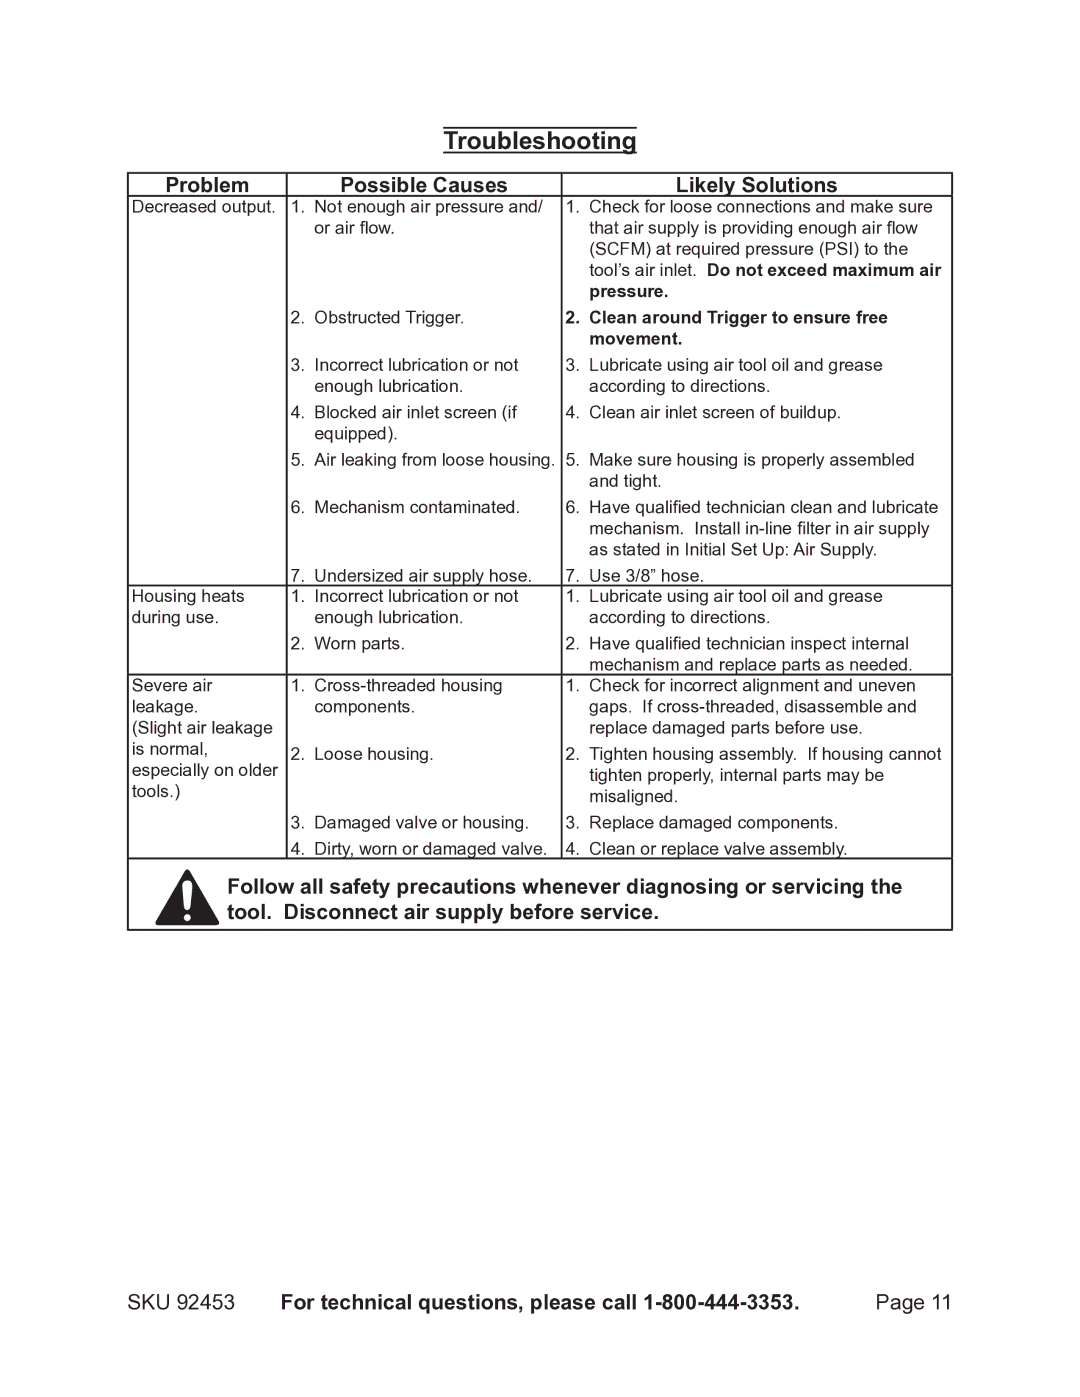
Troubleshooting
Problem | Possible Causes |
| Likely Solutions |
Decreased output. 1. Not enough air pressure and/ | 1. | Check for loose connections and make sure | |
| or air flow. |
| that air supply is providing enough air flow |
|
|
| (SCFM) at required pressure (PSI) to the |
|
|
| tool’s air inlet. Do not exceed maximum air |
|
|
| pressure. |
2. | Obstructed Trigger. | 2. | Clean around Trigger to ensure free |
|
|
| movement. |
3. | Incorrect lubrication or not | 3. | Lubricate using air tool oil and grease |
| enough lubrication. |
| according to directions. |
4. | Blocked air inlet screen (if | 4. | Clean air inlet screen of buildup. |
| equipped). |
|
|
5.Air leaking from loose housing. 5. Make sure housing is properly assembled and tight.
| 6. | Mechanism contaminated. | 6. | Have qualified technician clean and lubricate |
|
|
|
| mechanism. Install |
|
|
|
| as stated in Initial Set Up: Air Supply. |
| 7. | Undersized air supply hose. | 7. | Use 3/8” hose. |
Housing heats | 1. | Incorrect lubrication or not | 1. | Lubricate using air tool oil and grease |
during use. |
| enough lubrication. |
| according to directions. |
| 2. | Worn parts. | 2. | Have qualified technician inspect internal |
|
|
|
| mechanism and replace parts as needed. |
Severe air | 1. | 1. | Check for incorrect alignment and uneven | |
leakage. |
| components. |
| gaps. If |
(Slight air leakage |
|
|
| replace damaged parts before use. |
is normal, | 2. Loose housing. | 2. | Tighten housing assembly. If housing cannot | |
especially on older |
|
|
| tighten properly, internal parts may be |
tools.) |
|
|
| misaligned. |
| 3. | Damaged valve or housing. | 3. | Replace damaged components. |
| 4. | Dirty, worn or damaged valve. | 4. | Clean or replace valve assembly. |
Follow all safety precautions whenever diagnosing or servicing the tool. Disconnect air supply before service.
SKU 92453 | For technical questions, please call | Page 11 |