Use a control group to adjust the volume of two or more channels at the same time. All faders that are assigned to a control group will have their gain settings modified by the amount the control group fader is increased or decreased. For example, a control group might be used to adjust the overall volume for all the choir mics in a church by configuring a Level Remote Control to adjust the volume on a control group to which all the choir mics are assigned.
Note: Control Groups are controlled by Level Remote Control only.
Force-on:Assign a Force-on level to each input, from OFF to +10 dB. The Force-on setting can be set to either absolute or relative. In absolute mode, the fader level is set to the exact setting defined by the Force-on function. In relative mode, the current fader level is modified by the amount specified by the Force-on function.
Force-off:Assign a Force-off level to each input, from OFF to +10 dB. The Force-off setting can be set to either absolute or relative. In absolute mode, the fader level is set to the exact setting defined by the Force-off function. In relative mode, the current fader level is modified by the amount specified by the Force-off function.
Force-on Priority: Assign a priority level from 1 (highest) to 8 (lowest) for each channel’s Force-on function. The default setting is None. Higher priority Force-on commands override lower priority Force-on commands. For example, if Input 4 is assigned a Force- on priority of 4, which is activated, and Input 1 is assigned a Force-on priority of 1 and is activated, the Force-on command is removed from Input 4, and it is forced-off, along with all other lower-priority inputs (note that inputs with no priority assigned are not affected). If the Force-on command for Input 1 is removed, and the Force-on command for Input 4 is still present, Input 4 Force-on command is activated.
If Input 1 and Input 4 are both assigned a priority of 4, neither input overrides the other and Force-on commands can be active concurrently.
This rule implies that inputs are never forced-off by inputs with equal or lower priorities. It also implies that if force-on functions are active for several inputs with equal priorities, and there are no higher priorities active, then they are all forced-on. Inputs that do not have an assigned priority have no effect on, and are not affected by, the priority rule.
The Force-off function is not affected by priority. The priority rule is applied continuously to all active Force-on functions, i.e., at any time the active Force- on functions actually having an effect are those that are applied to inputs with the highest or no priority.
The following flow chart demonstrates the Force-on/off operation for any particular input:
| | START | | |
| | Is priority | | |
| | assigned? | | |
| | Yes | | |
| No | Is higher priority | Yes | Force this OFF |
| Force-on active? |
| | | |
| | No | | |
| | Force-on active? | Yes | Force this ON |
| | No | | |
| | Force-off active? | Yes | Force this OFF |
| | No | | |
| | No Force | | |
| | END | | |
| FORCE-ON/FORCE-OFF FLOW CHART | | |
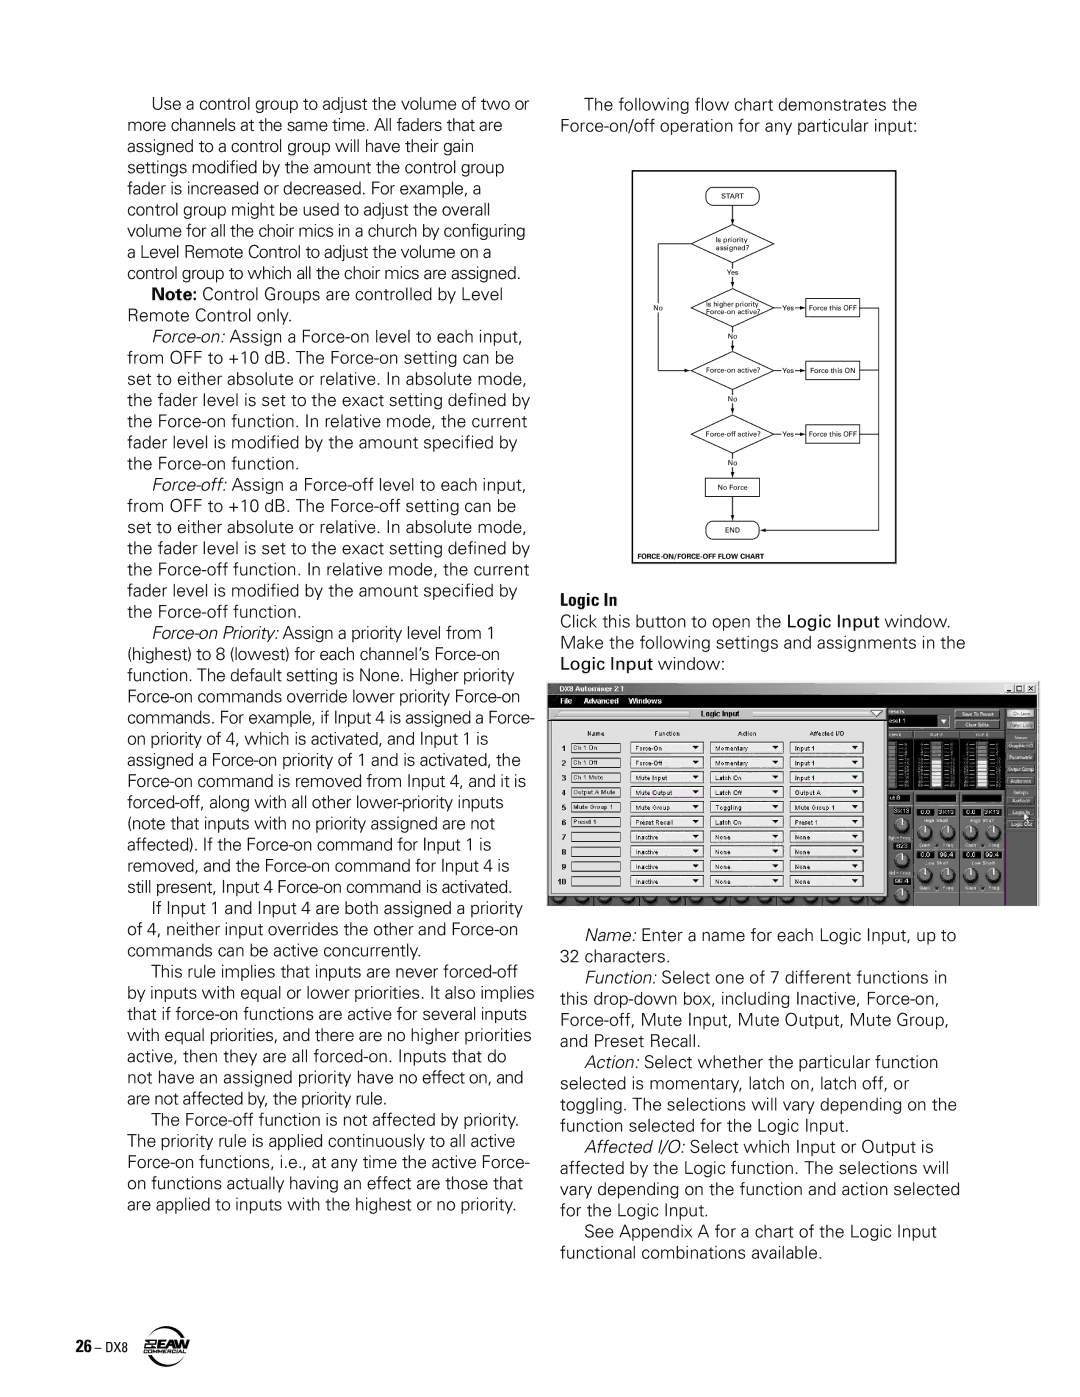
Logic In
Click this button to open the Logic Input window. Make the following settings and assignments in the Logic Input window:
Name: Enter a name for each Logic Input, up to
32characters.
Function: Select one of 7 different functions in
this drop-down box, including Inactive, Force-on, Force-off, Mute Input, Mute Output, Mute Group, and Preset Recall.
Action: Select whether the particular function selected is momentary, latch on, latch off, or toggling. The selections will vary depending on the function selected for the Logic Input.
Affected I/O: Select which Input or Output is affected by the Logic function. The selections will vary depending on the function and action selected for the Logic Input.
See Appendix A for a chart of the Logic Input functional combinations available.