V:E1.01
To the Installer
Thank you for choosing Eiki | Mounting |
The
Before commencing installation, please read these instructions carefully to get the best results from your
For your safety
Please ensure that any wiring used to connect
Make sure that the power supply you are using meets your local safety regulations and that its voltage does not exceed 15 volts DC. Unregulated power supplies can output voltages that are well above what is shown on their label.
The
This product conforms to the EMC directive 89/336 CCE
NOTE: This symbol and recycle system apply to EU countries only and do not apply to countries in other areas of the world.
Your EIKI product is designed and manufactured with high q u a l i t y m a t e r i a l s a n d components which can be recycled and reused.
This symbol means that electrical and electronic equipment, at their
separately from your household waste .
Please dispose of this equipment at your local community waste collection/recycling centre. In the European Union there are separate collection systems for used electrical and electronic products.
Choose a location on a wall that is preferably 3 to 4 metres from the floor, not adjacent to heating or air conditioning outlets or opposite windows and where people moving in the room can be “seen” by the
Remove the cover by placing a small flat- bladed screwdriver in the bottom of the case and gently prise the cover off.
DO NOT TOUCH THE PYRO SENSOR INSIDE WITH YOUR FINGERS!
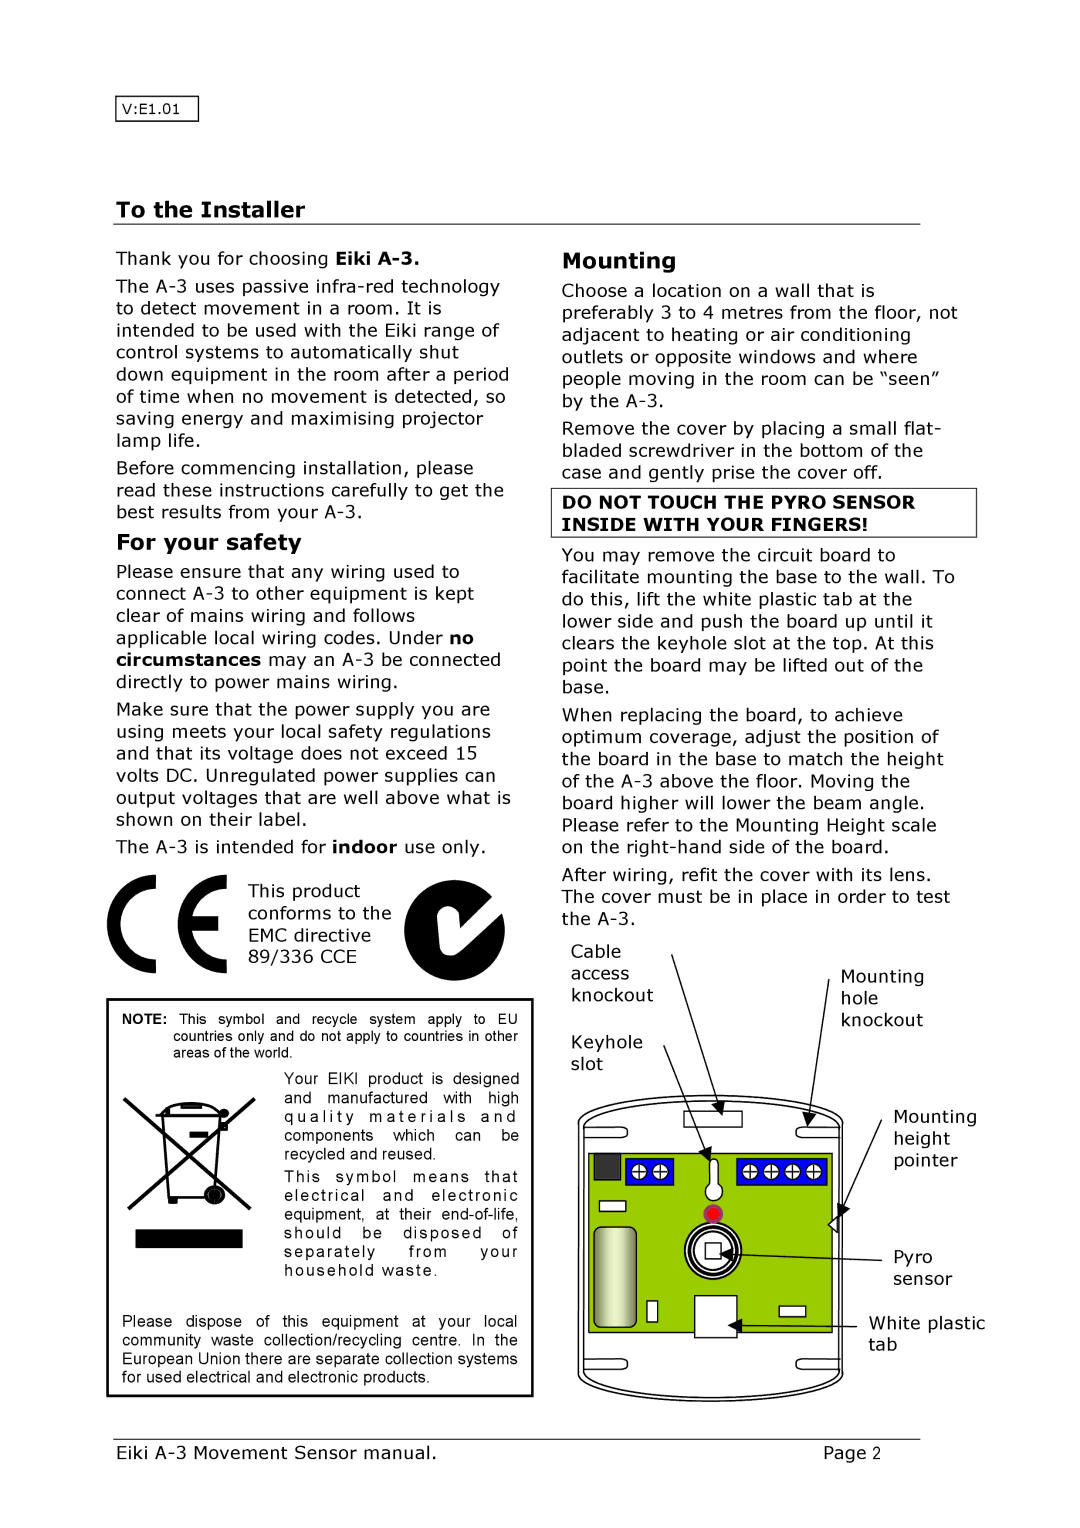
You may remove the circuit board to facilitate mounting the base to the wall. To do this, lift the white plastic tab at the lower side and push the board up until it clears the keyhole slot at the top. At this point the board may be lifted out of the base.
When replacing the board, to achieve optimum coverage, adjust the position of the board in the base to match the height of the
After wiring, refit the cover with its lens. The cover must be in place in order to test the
Cable |
|
access | Mounting |
knockout | hole |
| knockout |
Keyhole slot
Mounting height pointer
Pyro sensor
White plastic tab
Eiki | Page 2 |