ASSEMBLING TOP COVER AND DUST CHUTE
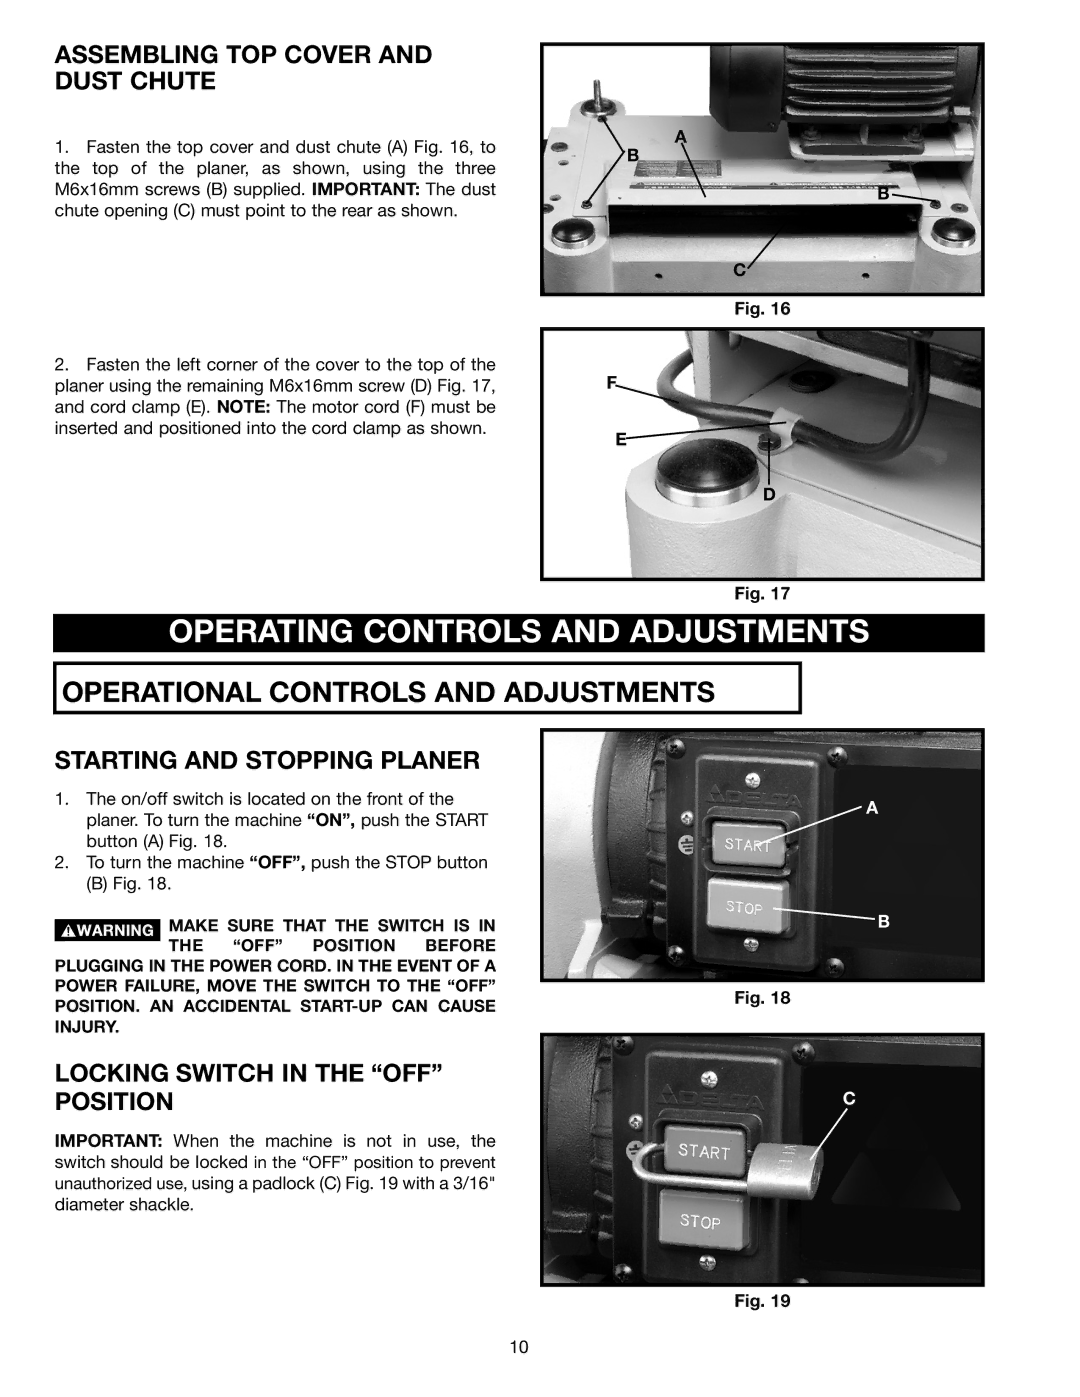
1.Fasten the top cover and dust chute (A) Fig. 16, to the top of the planer, as shown, using the three M6x16mm screws (B) supplied. IMPORTANT: The dust chute opening (C) must point to the rear as shown.
2.Fasten the left corner of the cover to the top of the planer using the remaining M6x16mm screw (D) Fig. 17, and cord clamp (E). NOTE: The motor cord (F) must be inserted and positioned into the cord clamp as shown.
A
B
B ![]()
C
Fig. 16
F
E
D
Fig. 17
OPERATING CONTROLS AND ADJUSTMENTS
OPERATIONAL CONTROLS AND ADJUSTMENTS
STARTING AND STOPPING PLANER
1.The on/off switch is located on the front of the planer. To turn the machine “ON”, push the START button (A) Fig. 18.
2.To turn the machine “OFF”, push the STOP button
(B) Fig. 18.
![]()
![]()
![]()
![]()
![]()
![]()
![]()
![]() MAKE SURE THAT THE SWITCH IS IN THE “OFF” POSITION BEFORE PLUGGING IN THE POWER CORD. IN THE EVENT OF A
MAKE SURE THAT THE SWITCH IS IN THE “OFF” POSITION BEFORE PLUGGING IN THE POWER CORD. IN THE EVENT OF A
POWER FAILURE, MOVE THE SWITCH TO THE “OFF” POSITION. AN ACCIDENTAL
LOCKING SWITCH IN THE “OFF” POSITION
IMPORTANT: When the machine is not in use, the switch should be locked in the “OFF” position to prevent unauthorized use, using a padlock (C) Fig. 19 with a 3/16" diameter shackle.
![]() A
A
B
Fig. 18
C
Fig. 19
10
