WARM & SERVE DRAWER INSTALLATION INSTRUCTIONS
Important Notes to the Installer
1.Read all instructions contained in these installation instructions before installing appliance.
2.Remove all packing material from appliance before connecting the electrical supply.
3.Observe all governing codes and ordinances.
4.Be sure to leave these instructions with the consumer.
Important Note to the Consumer
Keep these instructions for future reference.
IMPORTANT SAFETY INSTRUCTIONS
•Be sure your appliance is installed and plugged into a 120 Volt grounded outlet.
•This appliance must be electrically grounded in accordance with the National Electrical Code ANSI/ NFPA No.
2.Slide drawer into cutout opening until front frame of drawer is flush against cabinet. Be careful not to pinch electrical cord.
3.Remove the drawer as instructed in the Use & Care Guide and secure drawer housing to cabinet using the
3
4.The 60" (152,4 cm) appliance power cord can now be connected into the 120 Volt outlet.
5.Proceed with mounting
Tools You Will Need
Phillips® Screwdriver
Pencil
Ruler or Tape Measure and
Hand Saw or Saber Saw
Spirit Level
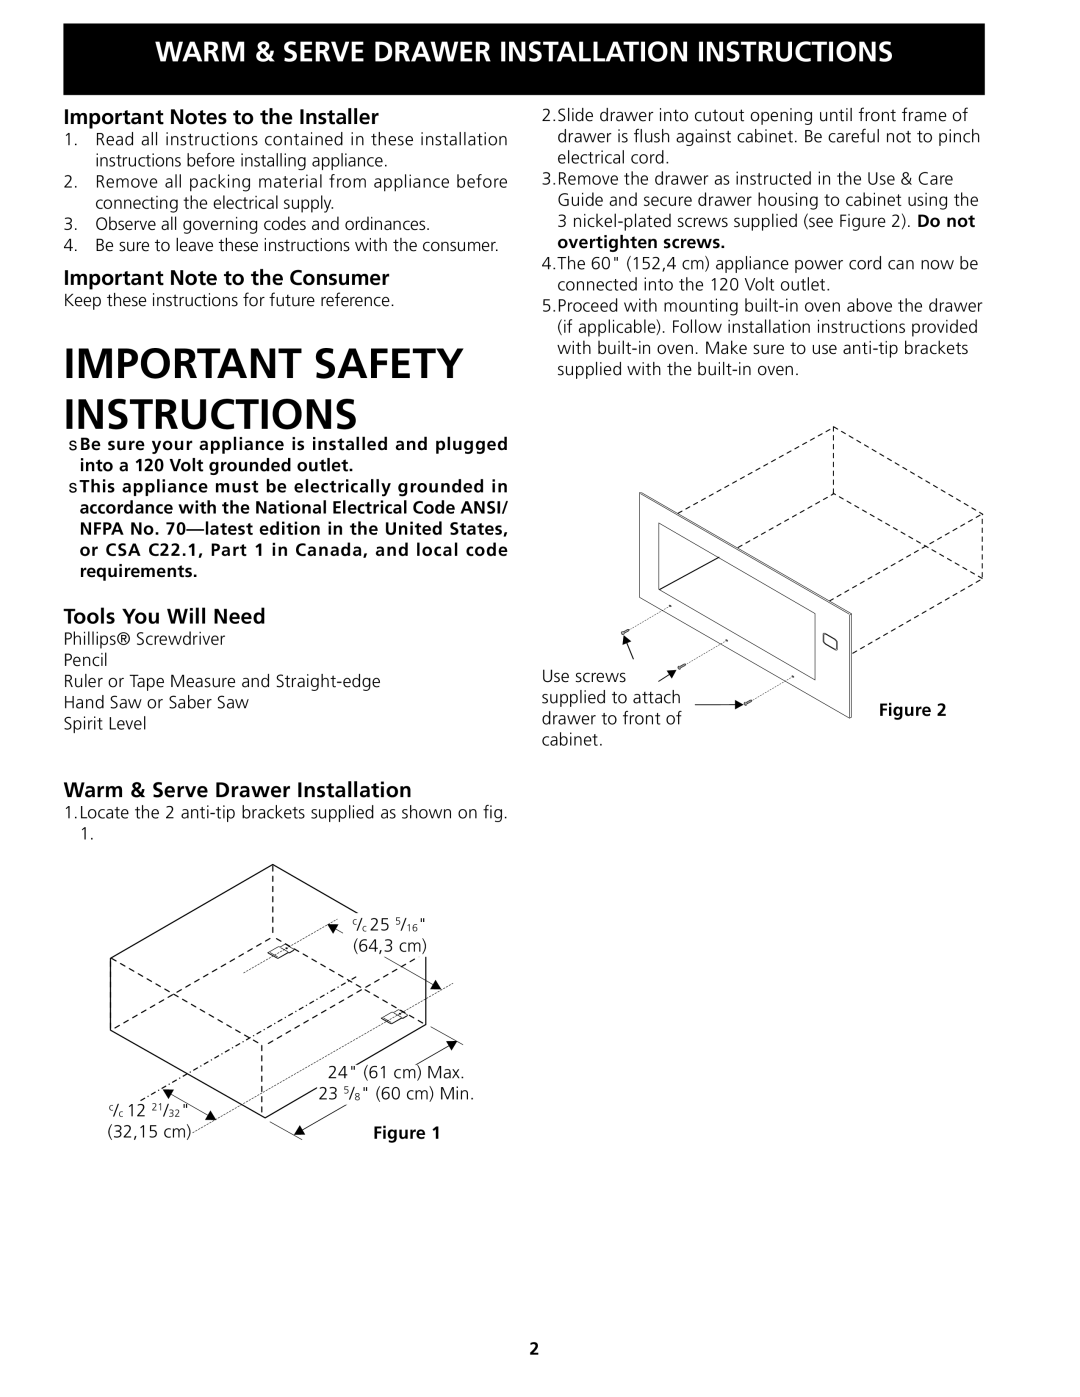
Warm & Serve Drawer Installation
1.Locate the 2
Use screws |
| |
supplied to attach | Figure 2 | |
drawer to front of | ||
| ||
cabinet. |
|
c/c 25 5/16"
(64,3 cm)
24" (61 cm) Max.
23 5/8" (60 cm) Min.
c/c 12 21/32"
(32,15 cm) | Figure 1 |
2