Built-In Instructions 8
Note: Make Sure To Use |
| Note A: Wire Cutout |
| |
|
| Left & Right Side |
| |
| 6” x 4” Opening Minimum | |||
GFI electrical outlet for |
|
|
|
|
rotisserie motor |
|
|
|
|
(6.5 Amp Min.) |
| Note A* |
| .75 |
3/4”
|
| Top | 2.00 |
|
|
| |
| Required igniter |
| 2” |
|
|
| |
A | Cutouts |
| 4” |
|
| ||
| 6” | Front | |
|
| ||
|
|
|
CLeft & Right Side cutout view
B
Required igniter
Cutouts
Open space
Minimum clearance to open hood 5”
1.50”
35.5”
Max
2 | 1/ | |
Mi7 | ||
n |
| 2” |
i |
| |
m |
| |
| u | |
|
| m |
0.75”
0.75
Max Max
1.440 Max
Top View
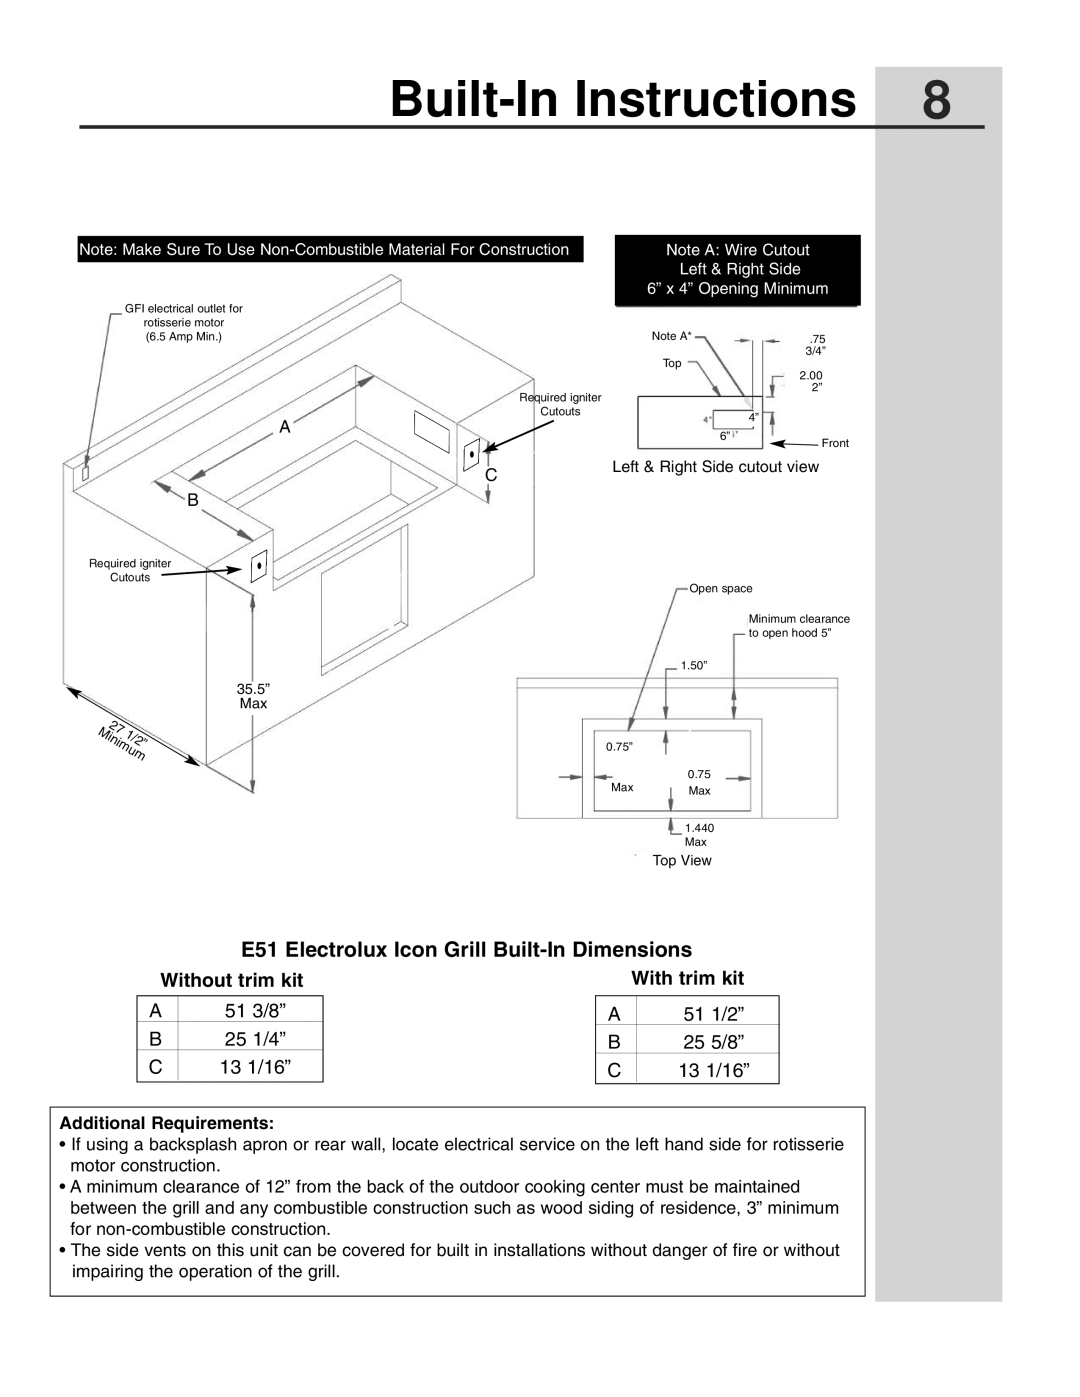
E51 Electrolux Icon Grill Built-In Dimensions
Without trim kit | With trim kit |
A
B
C
513/8”
251/4”
13 1/16”
A
B
C
511/2”
255/8”
13 1/16”
Additional Requirements:
•If using a backsplash apron or rear wall, locate electrical service on the left hand side for rotisserie motor construction.
•A minimum clearance of 12” from the back of the outdoor cooking center must be maintained between the grill and any combustible construction such as wood siding of residence, 3” minimum for
•The side vents on this unit can be covered for built in installations without danger of fire or without impairing the operation of the grill.
