Installation
Nut
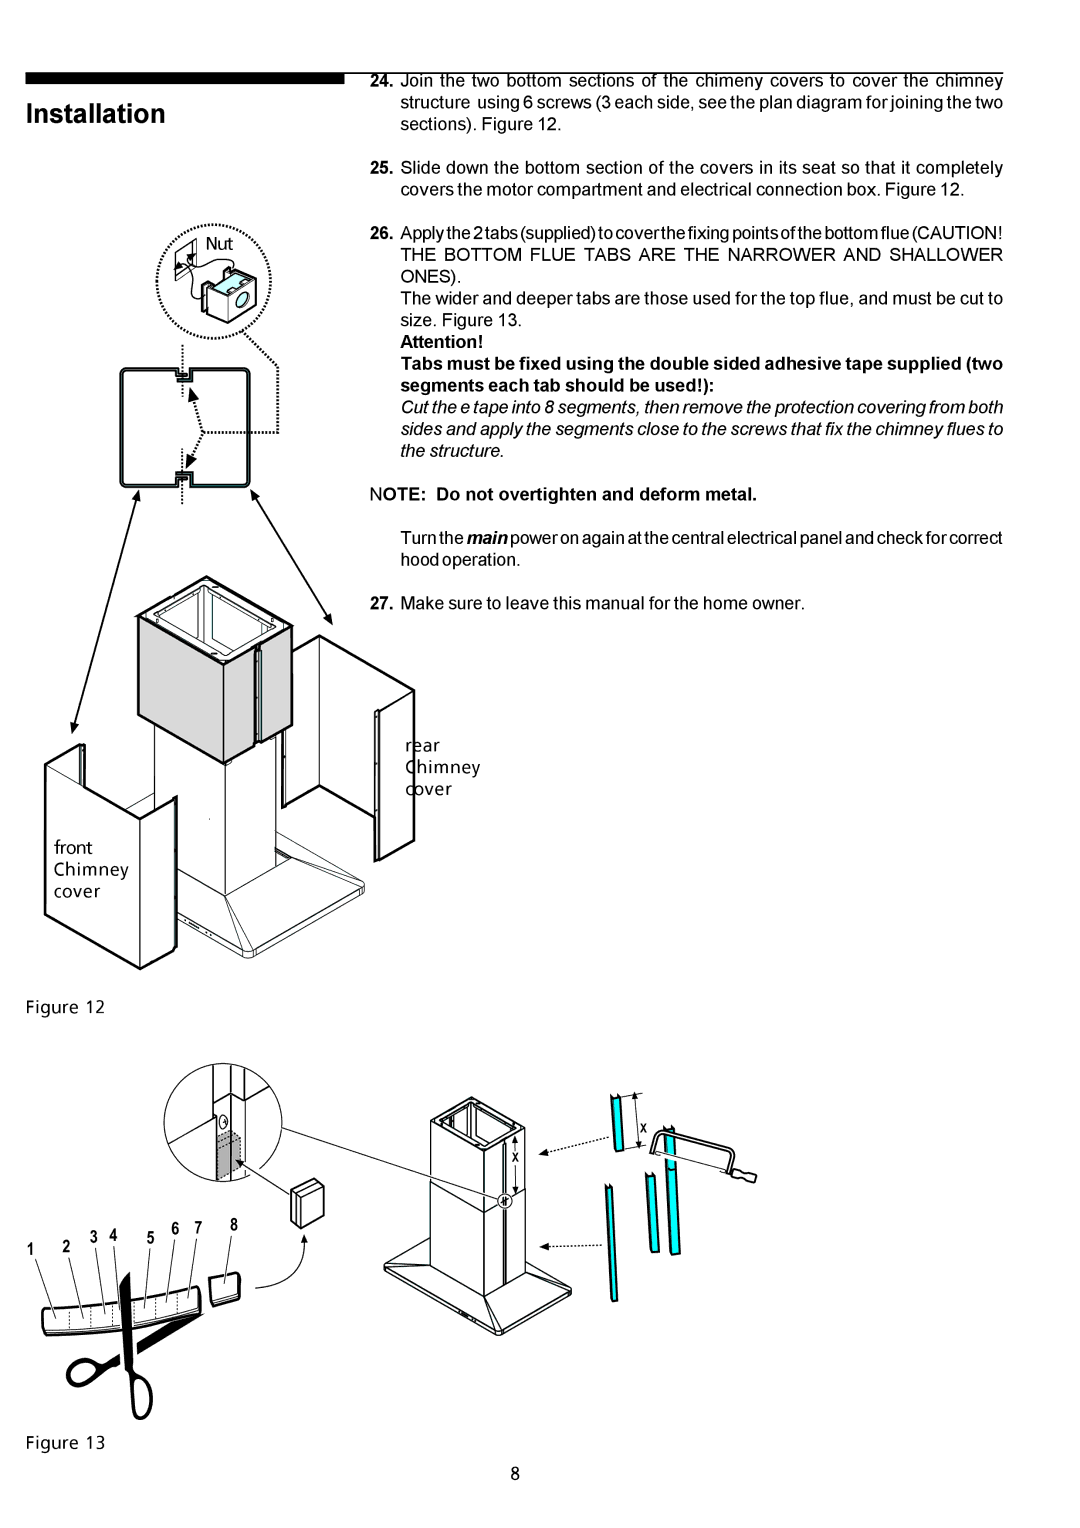
front Chimney cover
Figure 12
12 3 4 5 6 7 8
Figure 13
24.Join the two bottom sections of the chimeny covers to cover the chimney structure using 6 screws (3 each side, see the plan diagram for joining the two sections). Figure 12.
25.Slide down the bottom section of the covers in its seat so that it completely covers the motor compartment and electrical connection box. Figure 12.
26.Apply the 2 tabs (supplied) to cover the fixing points of the bottom flue (CAUTION!
THE BOTTOM FLUE TABS ARE THE NARROWER AND SHALLOWER ONES).
The wider and deeper tabs are those used for the top flue, and must be cut to size. Figure 13.
Attention!
Tabs must be fixed using the double sided adhesive tape supplied (two segments each tab should be used!):
Cut the e tape into 8 segments, then remove the protection covering from both sides and apply the segments close to the screws that fix the chimney flues to the structure.
NOTE: Do not overtighten and deform metal.
Turn the mainpower on again at the central electrical panel and check for correct hood operation.
27.Make sure to leave this manual for the home owner.
rear Chimney cover
X
X
8