III. INSTRUCTIONS FOR INSTALLATION
1.COMPLIANCE REFERENCE
•Local codes regarding installation vary greatle from one area to another.
•This equipment is to be installed to comply with the applicable federal, state or local codes.
These installation procedures must be followed by qualified personnel or warranty will be void.
The National Fire Protection Association, Inc states in its NFPA latestedition that local codes are the "authority having jurisdiction" when it comes to installation requirements for equipment. Therefore, installations should comply with all local codes.
2.PACKAGING
•Remove the appliance from the packaging and take away the protective film that covers the appliance's external panels careful- ly to avoid leaving any trace of glue. If necessary remove the glue using an appropriate diluent.
•Dispose off the packaging material following instructions given in section "Notes on ecology and environment".
Notice:
Immediately inspect for shipping damage.
•All containers should be examined for damage before and during unloading
•The freight carrier has assumed responsibility for its safe transit and delivery.
•If damaged equipment is receivd, either aparent or concealed, a claim must be made with the delivering carrier. Apparent damage or loss must be noted on the freight bill at the time of delivery.
•The freight bill must be then be signed by the carrier representative (driver). If the bill is not signed, the carrier may refuse the claim. The carrier can supply the necessary forms.
•A request for inspection must be made to the carrier within 15 days if there is concealed damage or loss that is not apparent until after the equipment is uncrated. The carrier should arrange an inspection.
•Be certain to hold all contents plus all packing material.
3. POSITIONING
•Refer to the technical data and installation diagrams at the beginning of this instructions manual for the space requirements and connection dimensions of the appliance.
•The appliances can be installed alone, side by side with other appliances of the same series, or otherwise laid on supporting structures .
•The appliance is not suitable for embedding.
•There must be adequate clearance between units and combustible construction. Clearance must also be provided for servicing and for operation.
MINIMUM BACK CLEARANCE 4"/100 mm
3.1.INSTALL CASTERS KIT (available on request and only for freestanding appliances wide not less than 26.7"/700mm) Refers to the specific accessory handbook.
3.2.LEVELING.
•The appliance has equipped with adjustable feet in height by means of their rotation (2"/50 millimeters of excursion).
•For a better operation of the apparatus it is recommend to adjust the feet so that the ledge is perfectly horizontal.
Possible wheels instead of the feet are not adjustable; therefore the floor must be horizontal.
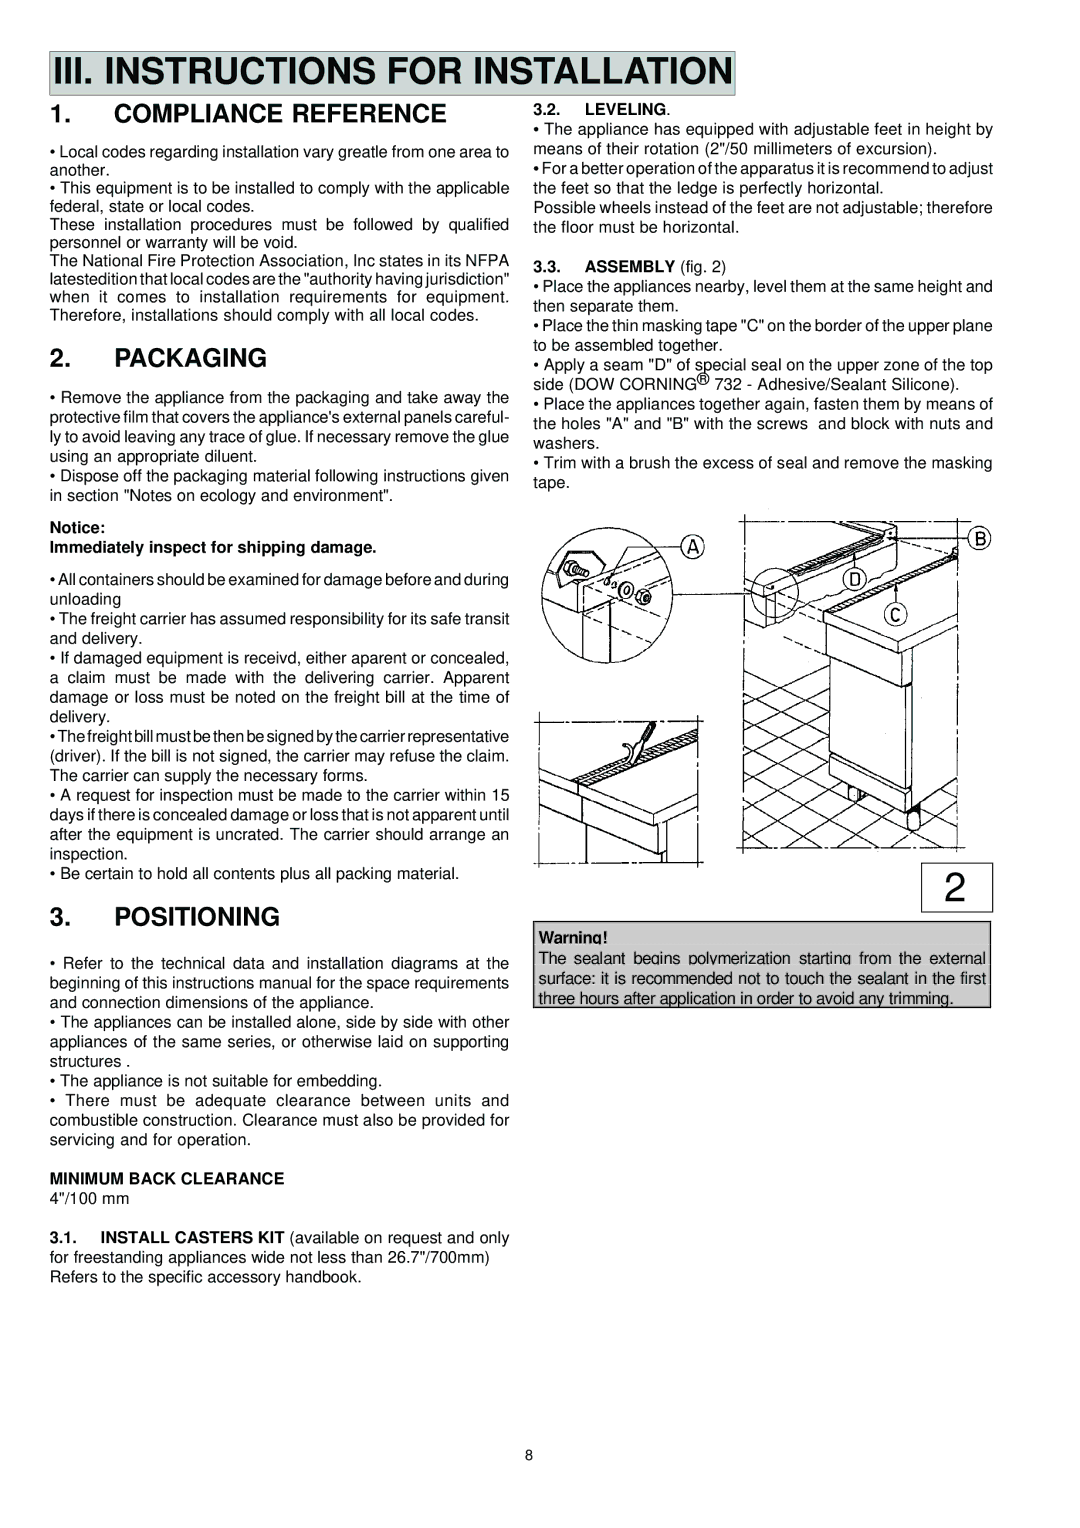
3.3. ASSEMBLY (fig. 2)
•Place the appliances nearby, level them at the same height and then separate them.
•Place the thin masking tape "C" on the border of the upper plane to be assembled together.
•Apply a seam "D" of special seal on the upper zone of the top side (DOW CORNING® 732 - Adhesive/Sealant Silicone).
•Place the appliances together again, fasten them by means of the holes "A" and "B" with the screws and block with nuts and washers.
•Trim with a brush the excess of seal and remove the masking tape.
2
Warning!
The sealant begins polymerization starting from the external surface: it is recommended not to touch the sealant in the first three hours after application in order to avoid any trimming.
8
