2.7.BASKET LIFTING (fig.4 - only for models supplied with automatic lifting system)
• Press push buttons “D” to lift supports “I”, positioning the baskets with the food to be cooked on the runners.
• Set the cooking time like suitable in the paragraph 2.6
• Press push buttons “D” and the supports will lower introducing into the basin the baskets starting the cooking cycle. At the end of the cycle, the supports will be lifted together with the baskets.
• To repeat the same cycle, just press push buttons “D”. The timer does not have to be reset.
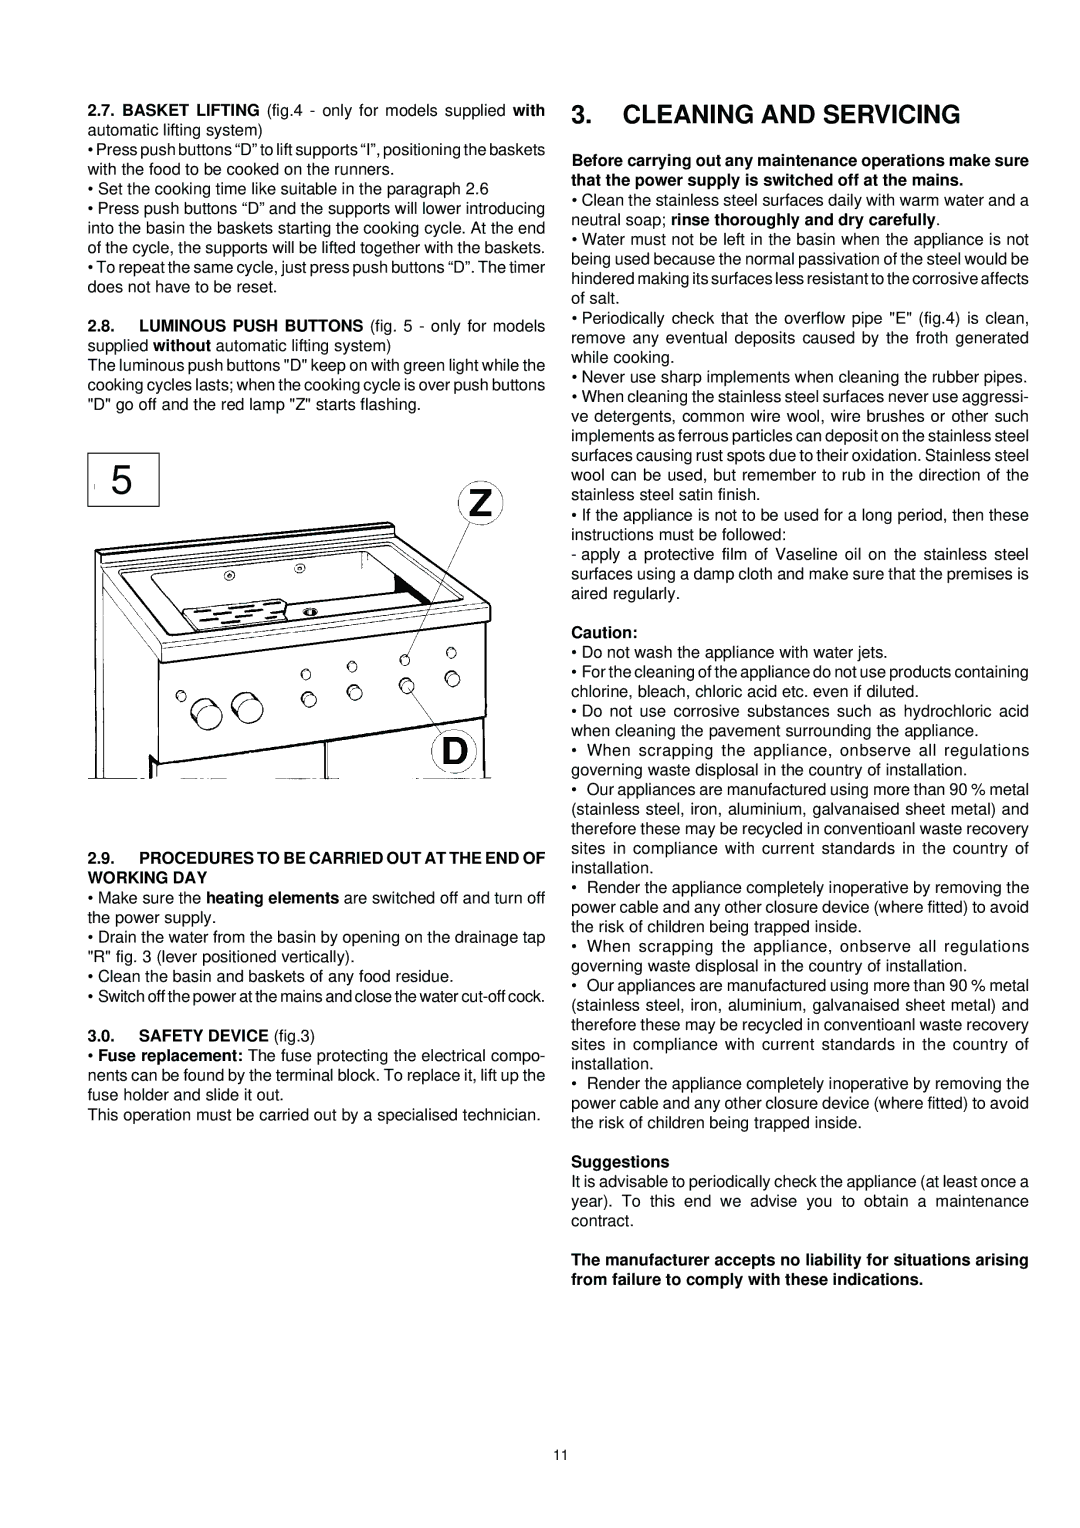
2.8.LUMINOUS PUSH BUTTONS (fig. 5 - only for models supplied without automatic lifting system)
The luminous push buttons "D" keep on with green light while the cooking cycles lasts; when the cooking cycle is over push buttons "D" go off and the red lamp "Z" starts flashing.
5
2.9.PROCEDURES TO BE CARRIED OUT AT THE END OF WORKING DAY
• Make sure the heating elements are switched off and turn off the power supply.
• Drain the water from the basin by opening on the drainage tap "R" fig. 3 (lever positioned vertically).
• Clean the basin and baskets of any food residue.
• Switch off the power at the mains and close the water
3.0.SAFETY DEVICE (fig.3)
•Fuse replacement: The fuse protecting the electrical compo- nents can be found by the terminal block. To replace it, lift up the fuse holder and slide it out.
This operation must be carried out by a specialised technician.
3.CLEANING AND SERVICING
Before carrying out any maintenance operations make sure that the power supply is switched off at the mains.
•Clean the stainless steel surfaces daily with warm water and a neutral soap; rinse thoroughly and dry carefully.
•Water must not be left in the basin when the appliance is not being used because the normal passivation of the steel would be hindered making its surfaces less resistant to the corrosive affects of salt.
•Periodically check that the overflow pipe "E" (fig.4) is clean, remove any eventual deposits caused by the froth generated while cooking.
•Never use sharp implements when cleaning the rubber pipes.
•When cleaning the stainless steel surfaces never use aggressi- ve detergents, common wire wool, wire brushes or other such implements as ferrous particles can deposit on the stainless steel surfaces causing rust spots due to their oxidation. Stainless steel wool can be used, but remember to rub in the direction of the stainless steel satin finish.
•If the appliance is not to be used for a long period, then these instructions must be followed:
-apply a protective film of Vaseline oil on the stainless steel surfaces using a damp cloth and make sure that the premises is aired regularly.
Caution:
•Do not wash the appliance with water jets.
•For the cleaning of the appliance do not use products containing chlorine, bleach, chloric acid etc. even if diluted.
•Do not use corrosive substances such as hydrochloric acid when cleaning the pavement surrounding the appliance.
•When scrapping the appliance, onbserve all regulations governing waste displosal in the country of installation.
•Our appliances are manufactured using more than 90 % metal (stainless steel, iron, aluminium, galvanaised sheet metal) and therefore these may be recycled in conventioanl waste recovery sites in compliance with current standards in the country of installation.
•Render the appliance completely inoperative by removing the power cable and any other closure device (where fitted) to avoid the risk of children being trapped inside.
Suggestions
It is advisable to periodically check the appliance (at least once a year). To this end we advise you to obtain a maintenance contract.
The manufacturer accepts no liability for situations arising from failure to comply with these indications.
11
