R H G 5 0 M

5.CONNECTING TO GAS

This appliance is designed to be installed with an appliance flexible connection only. Supply piping should not be less than R³/8 (³/8" B.S.P.). Connection is made to the Rc½ (½" B.S.P.) female threaded entry pipe located just below the hotplate level on the rear left hand side of the appliance.

Check for gas soundness after connecting the gas supply.

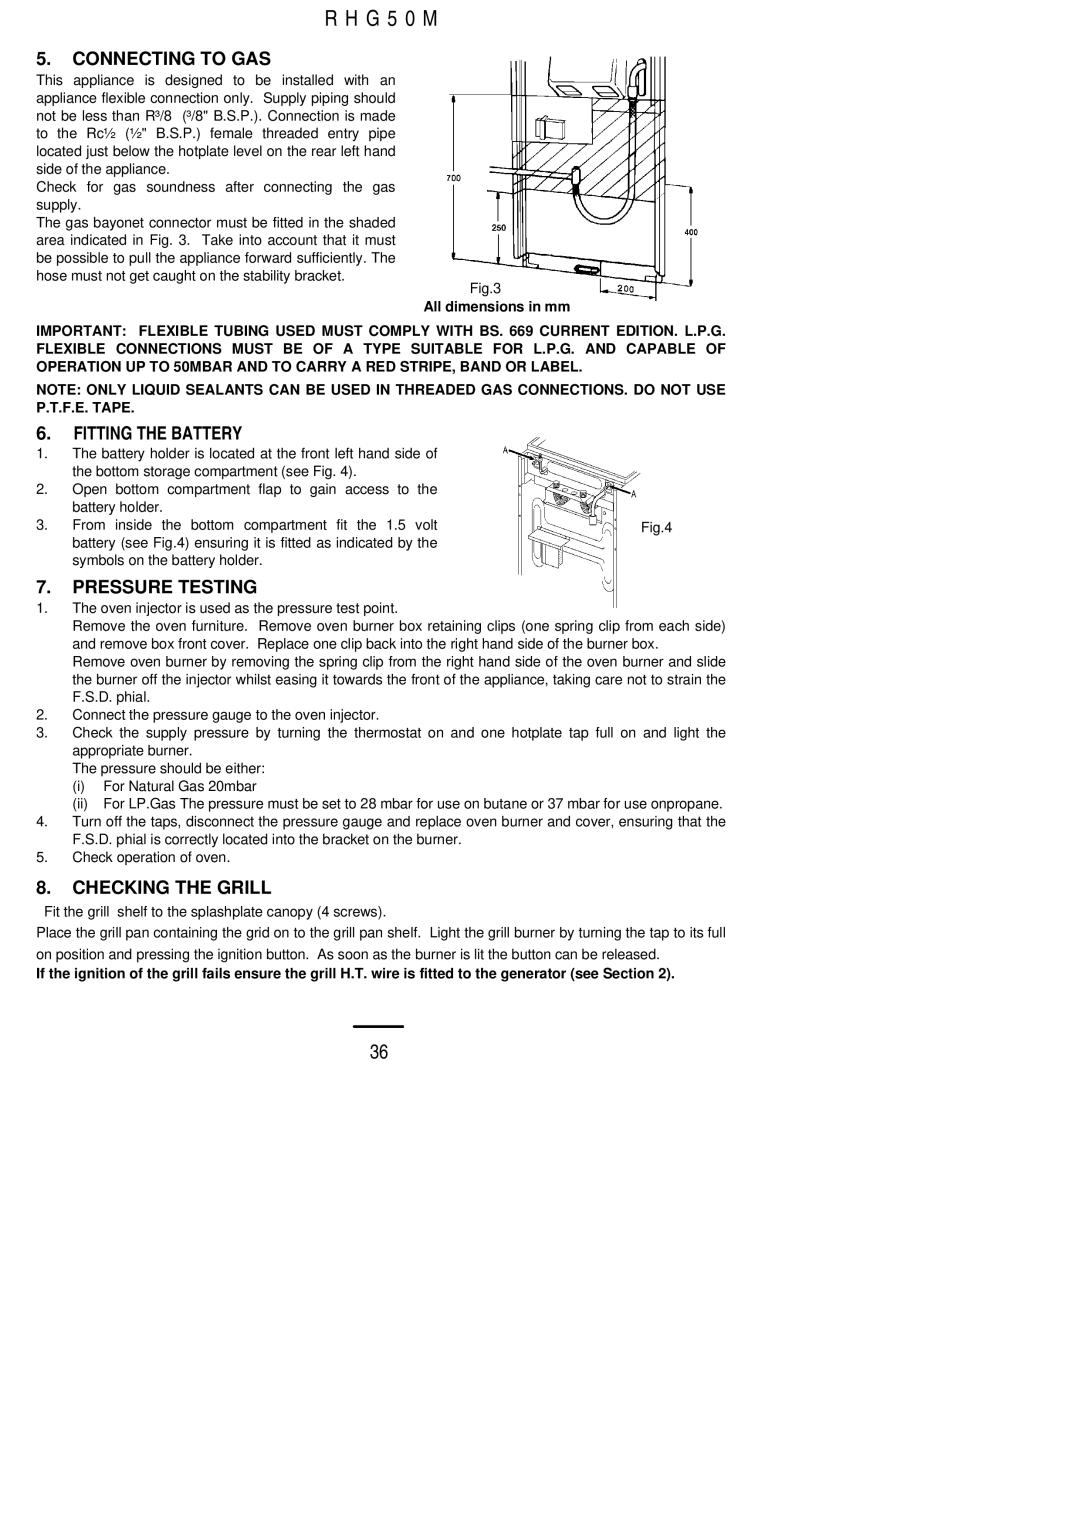
The gas bayonet connector must be fitted in the shaded area indicated in Fig. 3. Take into account that it must be possible to pull the appliance forward sufficiently. The

hose must not get caught on the stability bracket.

Fig.3

All dimensions in mm

IMPORTANT: FLEXIBLE TUBING USED MUST COMPLY WITH BS. 669 CURRENT EDITION. L.P.G. FLEXIBLE CONNECTIONS MUST BE OF A TYPE SUITABLE FOR L.P.G. AND CAPABLE OF OPERATION UP TO 50MBAR AND TO CARRY A RED STRIPE, BAND OR LABEL.

NOTE: ONLY LIQUID SEALANTS CAN BE USED IN THREADED GAS CONNECTIONS. DO NOT USE P.T.F.E. TAPE.

6.FITTING THE BATTERY

1.The battery holder is located at the front left hand side of the bottom storage compartment (see Fig. 4).

2.Open bottom compartment flap to gain access to the battery holder.

3. From inside the bottom compartment fit the 1.5 voltFig.4 battery (see Fig.4) ensuring it is fitted as indicated by the

symbols on the battery holder.

7.PRESSURE TESTING

1.The oven injector is used as the pressure test point.

Remove the oven furniture. Remove oven burner box retaining clips (one spring clip from each side) and remove box front cover. Replace one clip back into the right hand side of the burner box.

Remove oven burner by removing the spring clip from the right hand side of the oven burner and slide the burner off the injector whilst easing it towards the front of the appliance, taking care not to strain the F.S.D. phial.

2.Connect the pressure gauge to the oven injector.

3.Check the supply pressure by turning the thermostat on and one hotplate tap full on and light the appropriate burner.

The pressure should be either:

(i)For Natural Gas 20mbar

(ii)For LP.Gas The pressure must be set to 28 mbar for use on butane or 37 mbar for use onpropane.

4.Turn off the taps, disconnect the pressure gauge and replace oven burner and cover, ensuring that the F.S.D. phial is correctly located into the bracket on the burner.

5.Check operation of oven.

8.CHECKING THE GRILL

Fit the grill shelf to the splashplate canopy (4 screws).

Place the grill pan containing the grid on to the grill pan shelf. Light the grill burner by turning the tap to its full

on position and pressing the ignition button. As soon as the burner is lit the button can be released.

If the ignition of the grill fails ensure the grill H.T. wire is fitted to the generator (see Section 2).

36

Page 36
Image 36
Electrolux RHG50M installation instructions Connecting to GAS, Fitting the Battery, Pressure Testing, Checking the Grill

RHG50M specifications

The Electrolux RHG50M is a highly efficient and innovative appliance designed to meet the needs of modern households. This advanced product combines practicality with cutting-edge technology, making it a favorite among consumers seeking an effective and versatile solution for their cooking needs.

One of the standout features of the RHG50M is its powerful induction cooking capability. Induction technology uses electromagnetic fields to directly heat pots and pans, ensuring rapid and precise cooking. This not only reduces cooking times but also enhances energy efficiency, as only the cookware is heated while the surrounding surface remains cool. This feature significantly minimizes the risk of burns and is easier to clean, making it a safe choice for families.

The RHG50M also boasts a sleek and modern design that seamlessly integrates into any kitchen aesthetic. Its glass ceramic surface provides an elegant appearance while being durable and easy to maintain. The unit features multiple cooking zones, each equipped with adjustable power settings, allowing users to optimize their cooking experience depending on the recipe and ingredients.

Another notable characteristic is its user-friendly touch control interface. This intuitive panel simplifies the cooking process, providing precise control over the heat settings and timers. With a selection of pre-programmed cooking modes, users can achieve perfect results with minimal effort, whether frying, simmering, or boiling.

Safety is a top priority in the design of the RHG50M. The appliance includes features such as child lock, overheat protection, and an automatic shutdown function, ensuring peace of mind while cooking. Additionally, the appliance is equipped with a residual heat indicator that alerts users when the cooking zones are still hot, further enhancing safety.

The Electrolux RHG50M is designed to cater to a variety of cooking styles and preferences. It supports various cookware types, including stainless steel, cast iron, and magnetic cookware, making it a versatile addition to any kitchen. Its sleek, modern aesthetic, coupled with practicality and advanced cooking technologies, positions the RHG50M as a top choice for home cooks who value efficiency, safety, and style in their kitchen appliances. Overall, the Electrolux RHG50M represents a perfect balance of function and design, making it a valuable investment for those who appreciate culinary excellence.