Installation
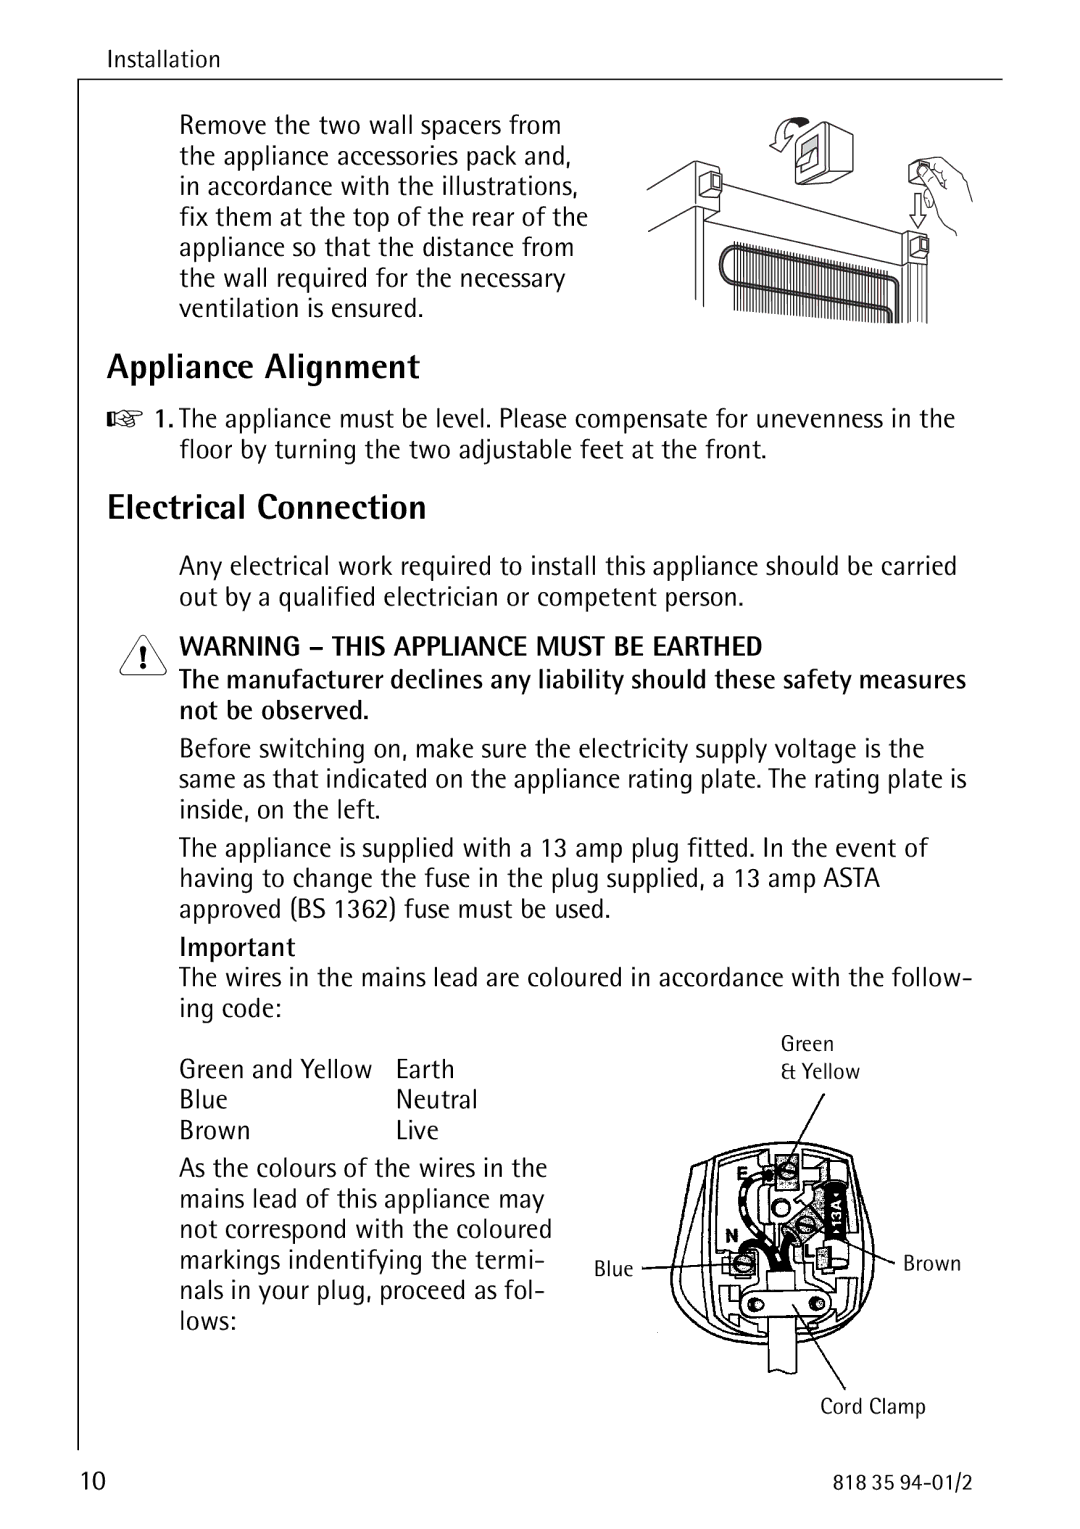
Remove the two wall spacers from the appliance accessories pack and, in accordance with the illustrations, fix them at the top of the rear of the appliance so that the distance from the wall required for the necessary ventilation is ensured.
Appliance Alignment
01. The appliance must be level. Please compensate for unevenness in the floor by turning the two adjustable feet at the front.
Electrical Connection
Any electrical work required to install this appliance should be carried out by a qualified electrician or competent person.
1 WARNING – THIS APPLIANCE MUST BE EARTHED
The manufacturer declines any liability should these safety measures not be observed.
Before switching on, make sure the electricity supply voltage is the same as that indicated on the appliance rating plate. The rating plate is inside, on the left.
The appliance is supplied with a 13 amp plug fitted. In the event of having to change the fuse in the plug supplied, a 13 amp ASTA approved (BS 1362) fuse must be used.
Important
The wires in the mains lead are coloured in accordance with the follow- ing code:
Green and Yellow | Earth |
| Green |
| & Yellow | ||
Blue | Neutral |
|
|
Brown | Live |
|
|
As the colours of the wires in the |
|
| |
mains lead of this appliance may |
|
| |
not correspond with the coloured |
|
| |
markings indentifying the termi- | Blue | Brown | |
nals in your plug, proceed as fol- lows:
Cord Clamp
10 | 818 35 |
