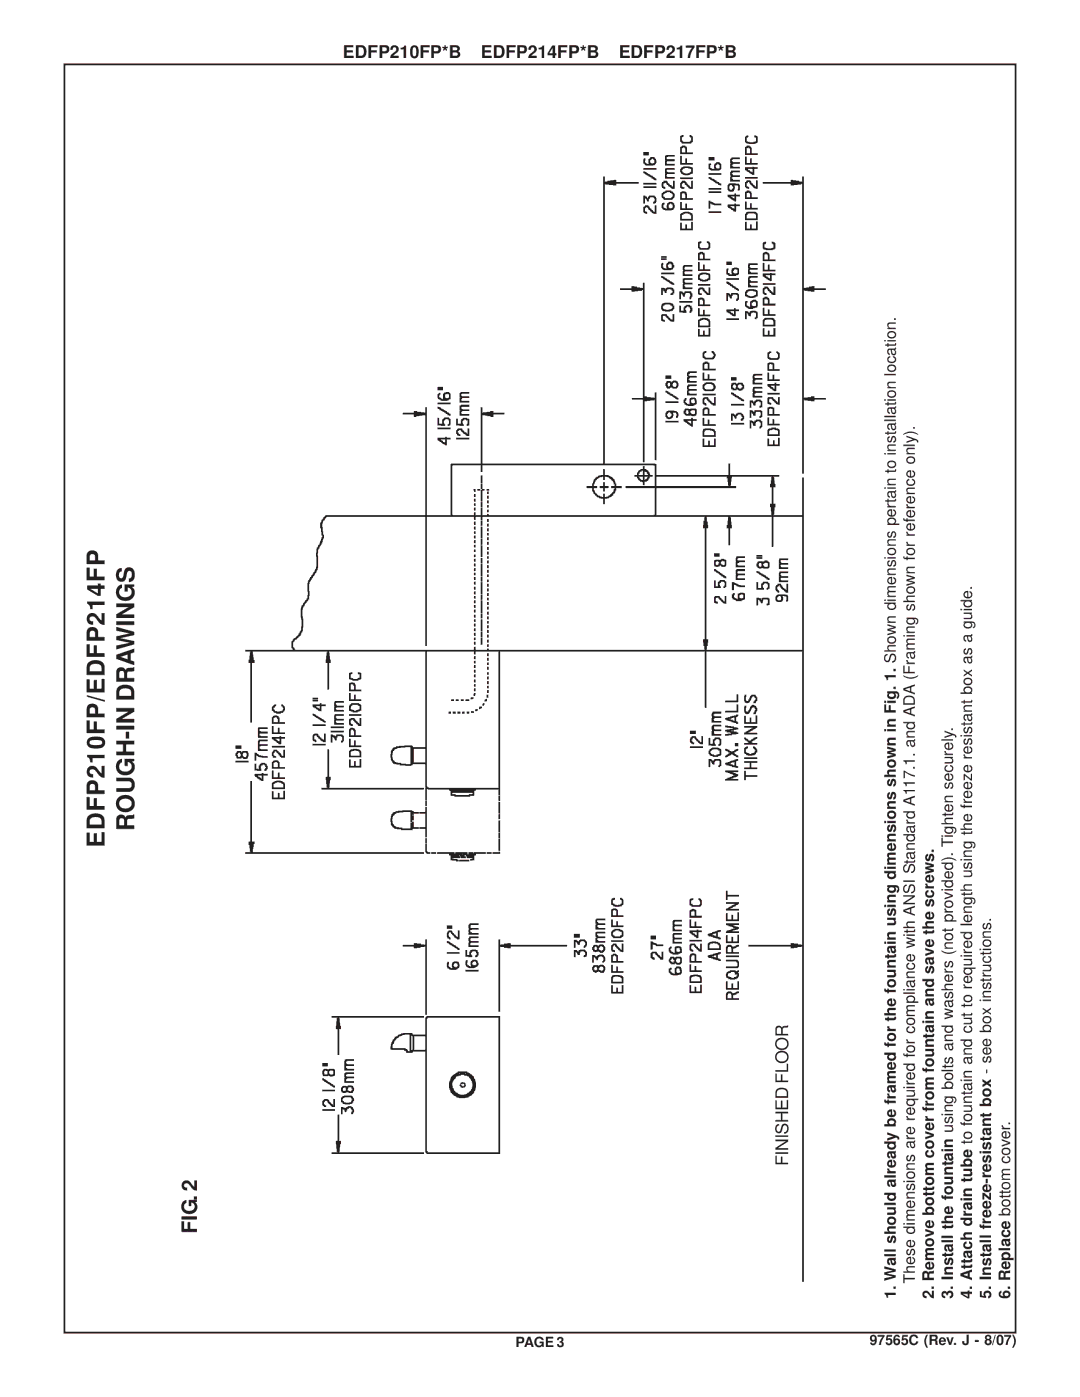
EDFP210FP/EDFP214FP
ROUGH-IN DRAWINGS
FIG. 2
PAGE 3
FINISHED FLOOR
97565C | 1. Wall should already be framed for the fountain using dimensions shown in Fig. 1. Shown dimensions pertain to installation location. |
| These dimensions are required for compliance with ANSI Standard A117.1. and ADA (Framing shown for reference only). |
| 2. Remove bottom cover from fountain and save the screws. |
(Rev.J | 3. Install the fountain using bolts and washers (not provided). Tighten securely. |
4. Attach drain tube to fountain and cut to required length using the freeze resistant box as a guide. | |
- | 5. Install |
8/07) | 6. Replace bottom cover. |
EDFP210FP*B EDFP214FP*B EDFP217FP*B