How to Put Your Ceiling Fan Together (continued)
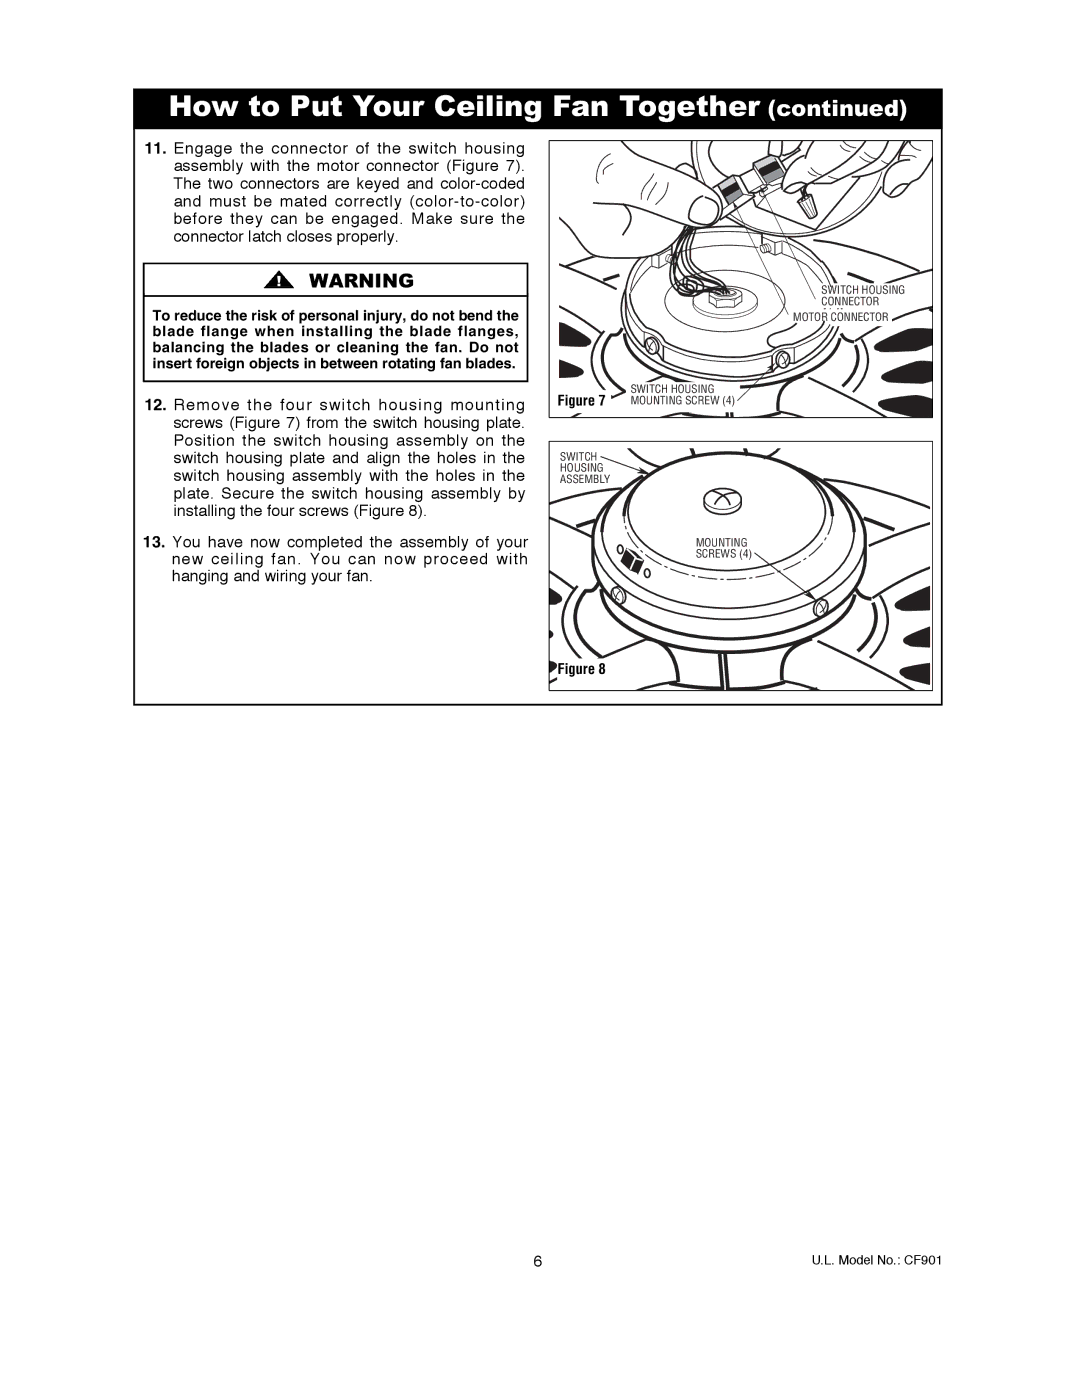
11.Engage the connector of the switch housing assembly with the motor connector (Figure 7). The two connectors are keyed and
!![]() WARNING
WARNING
To reduce the risk of personal injury, do not bend the blade flange when installing the blade flanges, balancing the blades or cleaning the fan. Do not insert foreign objects in between rotating fan blades.
12.Remove the four switch housing mounting screws (Figure 7) from the switch housing plate. Position the switch housing assembly on the switch housing plate and align the holes in the switch housing assembly with the holes in the plate. Secure the switch housing assembly by installing the four screws (Figure 8).
13.You have now completed the assembly of your new ceiling fan. You can now proceed with hanging and wiring your fan.
| SWITCH HOUSING |
| CONNECTOR |
| MOTOR CONNECTOR |
Figure 7 | SWITCH HOUSING |
MOUNTING SCREW (4) | |
SWITCH |
|
HOUSING |
|
ASSEMBLY |
|
| MOUNTING |
| SCREWS (4) |
![]() Figure 8
Figure 8
6 | U.L. Model No.: CF901 |
