
RPA-1 specifications
The Emotiva RPA-1 is a high-performance power amplifier designed for audio enthusiasts who demand exceptional sound quality and reliability. This amplifier is a part of Emotiva’s RPA series, known for their outstanding engineering and sonic performance. The RPA-1 delivers impressive power output, with the ability to drive demanding speakers effortlessly, making it ideal for both music and home theater applications.One of the main features of the RPA-1 is its robust power output. It provides 200 watts per channel into 8 ohms and an even more powerful 400 watts per channel into 4 ohms, ensuring that it can handle dynamic music passages and movie soundtracks with ease. This amplifier employs Class AB amplification technology, which combines the benefits of both Class A and Class B amplifiers, resulting in low distortion, high efficiency, and a very clean sound.
The RPA-1 is equipped with a high-quality, custom-designed power supply, which features a large toroidal transformer and multiple large filter capacitors. This design ensures that there is ample power for transient peaks in the audio signal, leading to improved dynamics and headroom. The amplifier also includes a sophisticated protection circuit to prevent damage from short circuits or overheating, ensuring longevity and reliability.
Another characteristic of the Emotiva RPA-1 is its exceptional build quality. The chassis is constructed from heavy-duty steel, providing a solid and stable foundation that minimizes resonances. The sleek, modern design features a brushed aluminum front panel with easy-to-read indicators, creating an aesthetically pleasing addition to any audio setup.
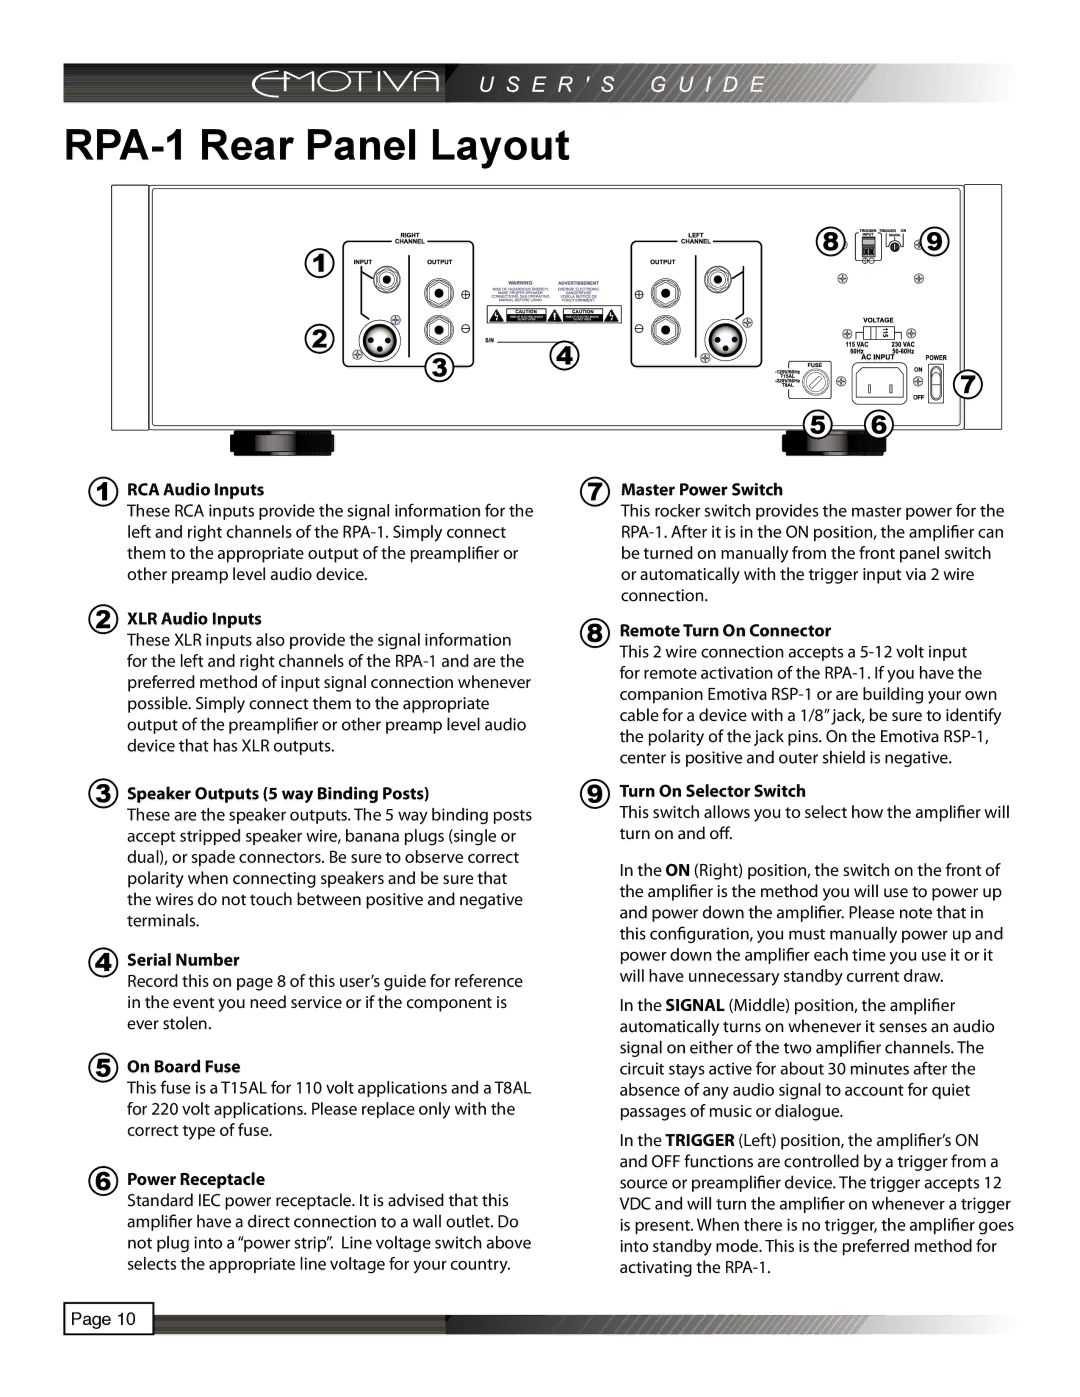
In terms of connectivity, the RPA-1 features multiple RCA inputs for connecting to various audio sources, as well as binding post outputs for speaker connections. This versatility allows users to integrate the amplifier into a wide range of systems, from stereo setups to multi-channel home theaters.
Overall, the Emotiva RPA-1 is a powerful, reliable, and versatile amplifier that delivers exceptional audio performance. Its combination of high power output, robust build quality, and advanced technologies makes it an excellent choice for audiophiles and home theater enthusiasts alike. Whether you are listening to music or watching movies, the RPA-1 is sure to provide an immersive and satisfying audio experience.