
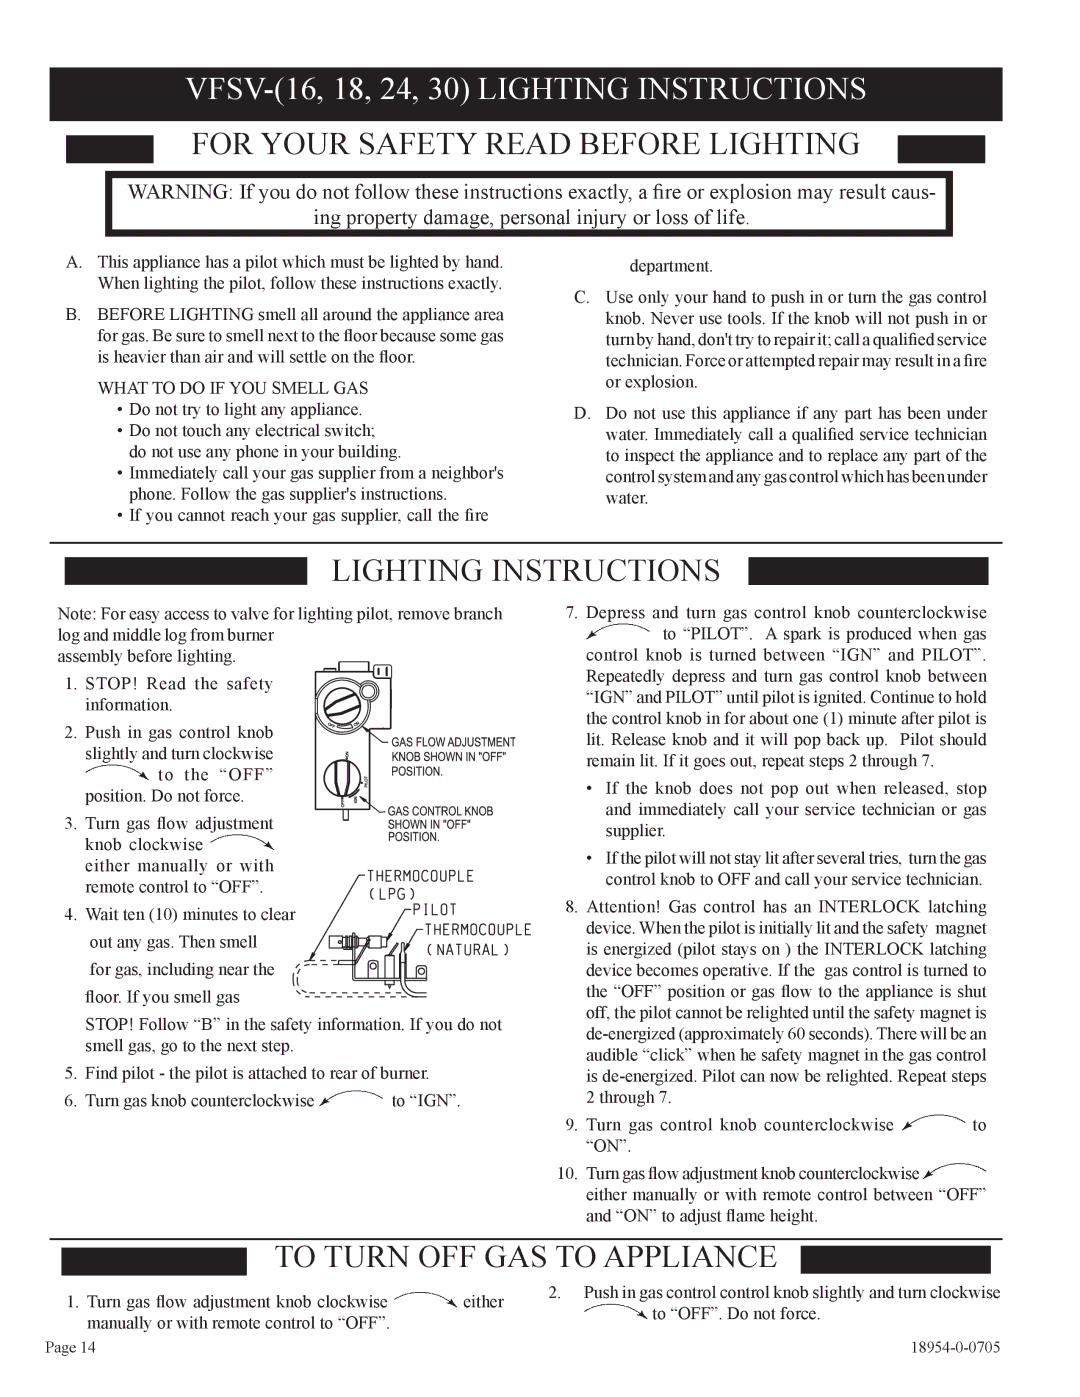
VFSV-30-3, VFSM -30-3, VFSR-30-3, VFSV-24-3, VFSR-24-3 specifications
Empire Comfort Systems offers a range of high-performance gas-fired vent-free space heaters, including the VFSM-24-3, VFSV-24-3, VFSM-30-3, VFSV-16-3, and VFSM-18-3 models. These heaters are designed to provide effective, efficient, and environmentally friendly heating solutions for homes and businesses.One of the key features of these models is their vent-free technology, which allows them to operate without the need for external venting. This design not only simplifies installation but also maximizes heat output in enclosed spaces, making them ideal for areas where traditional heating methods are impractical. The units are equipped with a safety pilot system that automatically shuts off the gas flow in case of a malfunction, ensuring safety for users.
The VFSM and VFSV series offer a variety of heating capacities, ranging from 16,000 to 30,000 BTUs, catering to different room sizes and heating requirements. The adjustable heat settings allow users to customize their heating experience based on their comfort needs. Additionally, the units feature a thermostat control option, which provides even greater ease of use and energy efficiency.
Energy efficiency is another hallmark of Empire’s vent-free heaters, as they utilize 99% of the gas consumed for heating. This high efficiency translates into lower energy bills for consumers. Furthermore, these heaters produce minimal emissions, making them an environmentally conscious choice for heating.
The VFSM and VFSV models are available in a range of stylish designs and finishes, allowing them to blend seamlessly with various home decors. Their compact sizes mean they can be installed in tight spaces or mounted on walls, optimizing room layouts without sacrificing heating performance.
Another notable characteristic is the option for remote control operation. This feature provides added convenience, allowing users to adjust settings from across the room. With their robust construction and user-friendly features, the VFSM-24-3, VFSV-24-3, VFSM-30-3, VFSV-16-3, and VFSM-18-3 models stand out as reliable solutions for efficient heating needs, ensuring comfort during the cold months while prioritizing safety and environmental considerations.