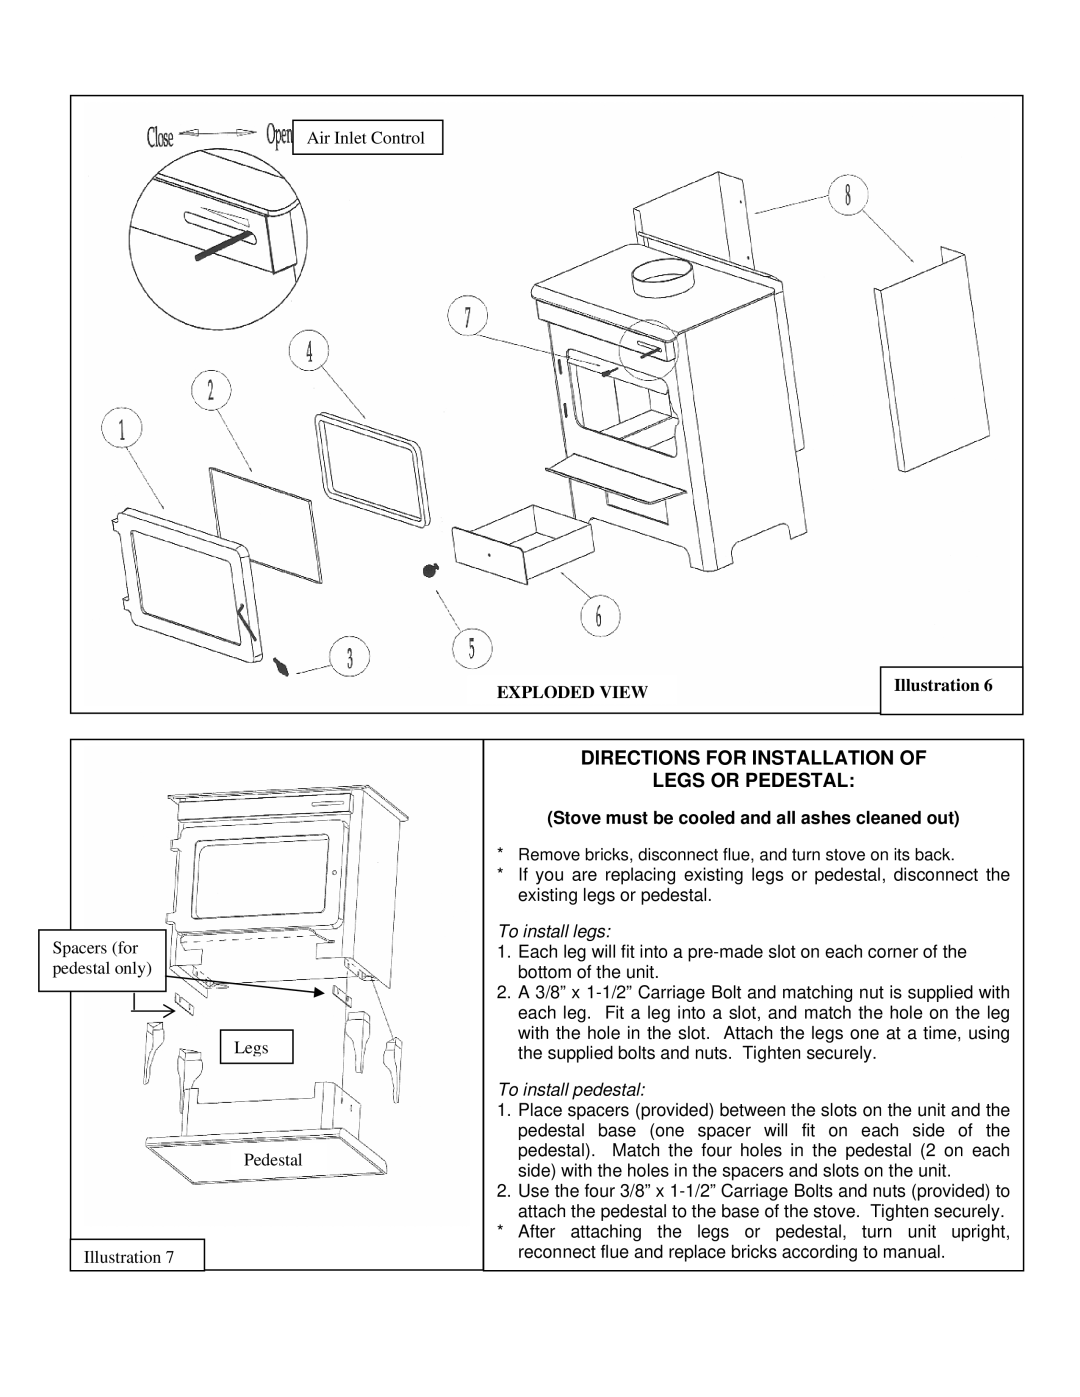
England's Stove Works 13-NCC 50-SNC13C 50-TNC13C Directions for Installation Legs or Pedestal

Models: 13-NCP 50-SNC13P 50-TNC13P 13-NCL 50-SNC13L 50-TNC13L 13-NCG 50-SNC13G 50-TNC13G 13-NCC 50-SNC13C 50-TNC13C

1 23
Download 23 pages 56 Kb
Page 21
Image 21

Air Inlet Control

EXPLODED VIEW

Illustration 6

Spacers (for pedestal only)

Legs

Pedestal

Illustration 7

DIRECTIONS FOR INSTALLATION OF

LEGS OR PEDESTAL:

(Stove must be cooled and all ashes cleaned out)

*Remove bricks, disconnect flue, and turn stove on its back.

*If you are replacing existing legs or pedestal, disconnect the existing legs or pedestal.

To install legs:

1.Each leg will fit into a pre-made slot on each corner of the bottom of the unit.

2.A 3/8” x 1-1/2” Carriage Bolt and matching nut is supplied with each leg. Fit a leg into a slot, and match the hole on the leg with the hole in the slot. Attach the legs one at a time, using the supplied bolts and nuts. Tighten securely.

To install pedestal:

1.Place spacers (provided) between the slots on the unit and the pedestal base (one spacer will fit on each side of the pedestal). Match the four holes in the pedestal (2 on each side) with the holes in the spacers and slots on the unit.

2.Use the four 3/8” x 1-1/2” Carriage Bolts and nuts (provided) to attach the pedestal to the base of the stove. Tighten securely.

*After attaching the legs or pedestal, turn unit upright, reconnect flue and replace bricks according to manual.

Page 21
Image 21
England's Stove Works 13-NCC 50-SNC13C 50-TNC13C, 13-NCG 50-SNC13G 50-TNC13G Directions for Installation Legs or Pedestal