ASSEMBLY
Assembly requires two persons. Set the treadmill in a cleared area and remove all packing materials. Do not dispose of the packing materials until assembly is completed. Note: The underside of the treadmill walking belt is coated with
Assembly requires the included allen wrench and your own phillips screwdriver ![]()
![]() .
.
For help identifying assembly hardware, see the drawings below. Note: If a part is not found in the part bags, check to see if the part has been preattached.
Upright Bolt | Latch Bolt |
|
| 3/8” Star |
|
|
| Washer |
|
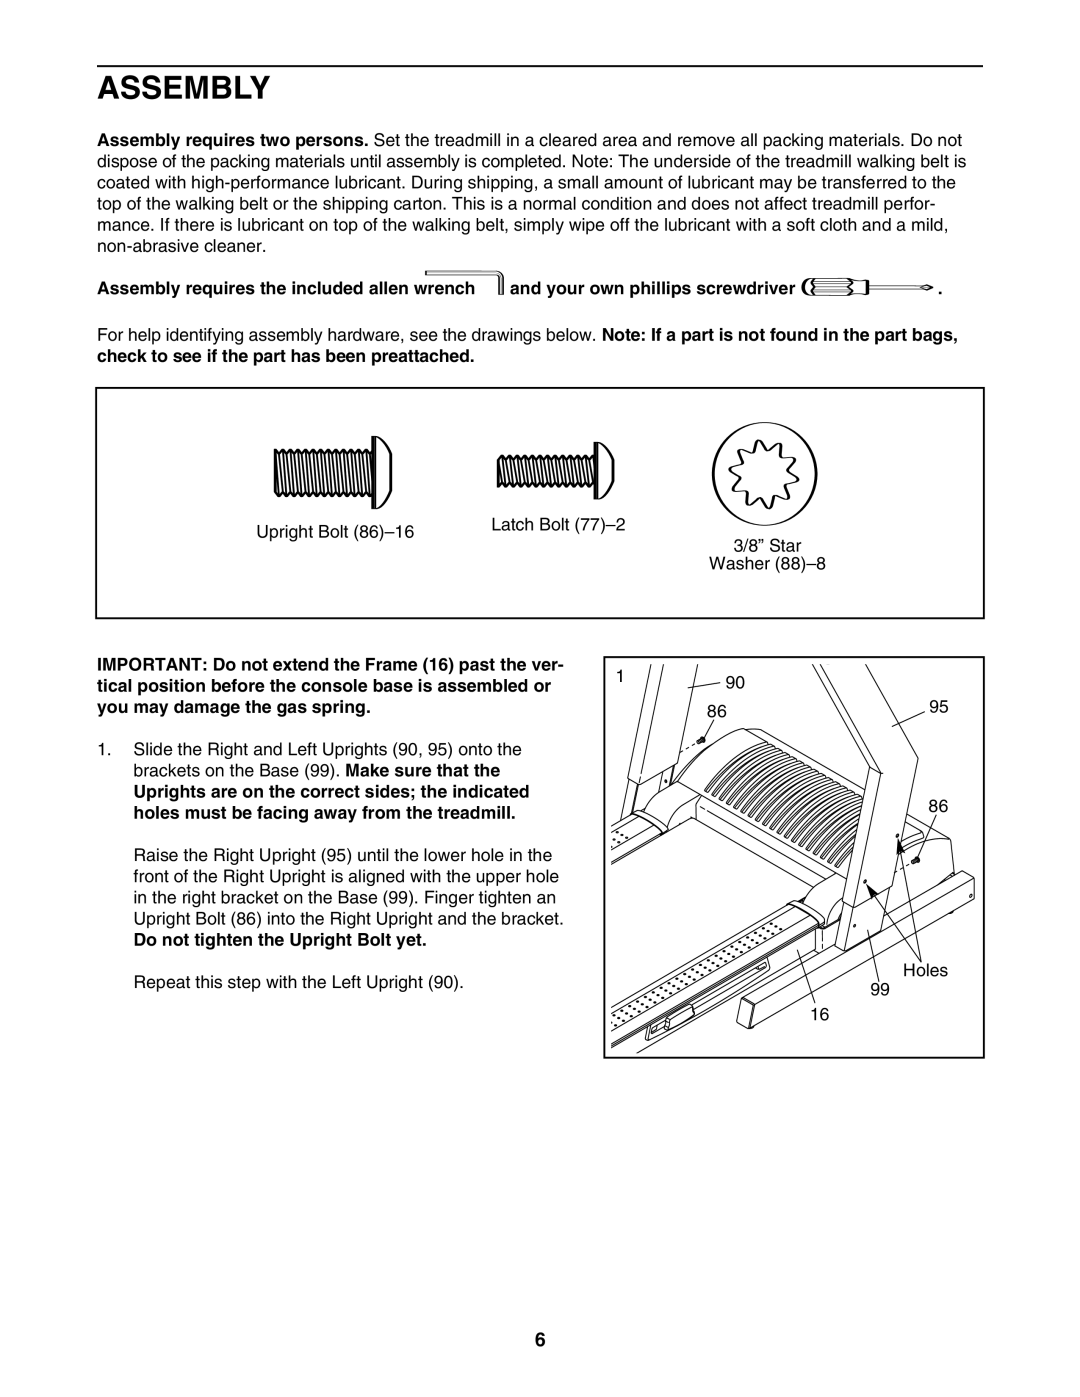
IMPORTANT: Do not extend the Frame (16) past the ver- | 1 | 90 |
|
tical position before the console base is assembled or |
| ||
|
| ||
you may damage the gas spring. |
| 86 | 95 |
1. Slide the Right and Left Uprights (90, 95) onto the |
|
|
|
brackets on the Base (99). Make sure that the |
|
|
|
Uprights are on the correct sides; the indicated |
|
| 86 |
holes must be facing away from the treadmill. |
|
| |
|
|
| |
Raise the Right Upright (95) until the lower hole in the |
|
|
|
front of the Right Upright is aligned with the upper hole |
|
|
|
in the right bracket on the Base (99). Finger tighten an |
|
|
|
Upright Bolt (86) into the Right Upright and the bracket. |
|
|
|
Do not tighten the Upright Bolt yet. |
|
|
|
Repeat this step with the Left Upright (90). |
|
| Holes |
|
| 99 | |
|
|
| |
|
| 16 |
|
6